
Lawn
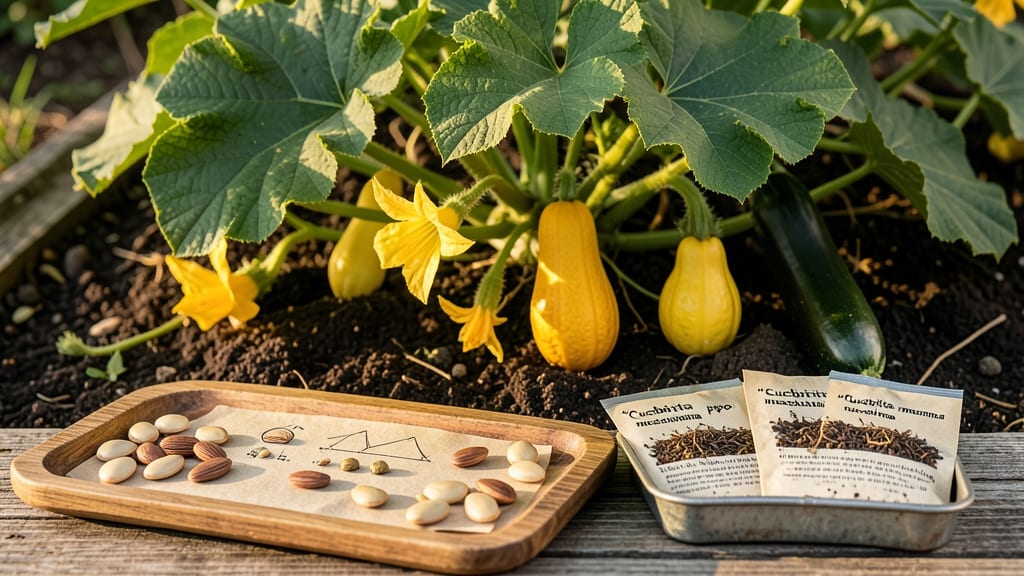
Squash seed identification correctly means the difference between a thriving garden and wasted effort. 🌱 That tiny seed packet holds the key to growing zucchini that ripens in 50 days or butternut squash that needs 100 days—and knowing which is which avoids disappointment. The shape, color, and even the texture of the seed tell you everything you need to plan your planting schedule, soil prep, and spacing.
Start by checking the seed packet labels for variety names and days-to-maturity. Summer squash seeds (like zucchini) are usually flat and oval, while winter squash (like pumpkins) are rounder and larger. Heirloom seeds often have more distinct markings or colors than hybrids.
If you're unsure, a quick germination test—soaking seeds in water for 24 hours—reveals which ones will sprout (the plump, firm ones) and which won’t.
Once you’ve sorted your seeds, you’ll plant them with confidence, knowing exactly when to expect harvests and how much space each plant needs. Zucchini might need 2 feet apart, while butternut squash thrives with 4 feet of room.
Proper spacing means fewer diseases and bigger yields—no more crowded vines or stunted growth. The right seeds lead to the right garden plan.
This method works for any squash variety, whether you’re growing from saved seeds or fresh packets. Keep a notebook to track what you’ve planted and when, so next season becomes even easier. With a little practice, you’ll spot viable seeds at a glance—and your garden will thank you for it.
📚 In This Guide
- What you need
- Instructions
- Tips and common mistakes
- Wrapping up and next steps
What you need
- ● Fresh or dried squash seeds – Collect seeds from healthy, mature squash (e.g., acorn, butternut, or pumpkin varieties). Aim for 10–20 seeds for testing.
- ● Small containers or paper towels – Use 2–4 shallow containers (like plastic takeout boxes) or paper towels for the germination test.
- ● Spray bottle with water – A 16–32 oz bottle works well for keeping seeds moist.
- ● Permanent marker or label tags – To label containers by squash type/date.
- ○ Magnifying glass (optional but helpful) – A 10x magnification makes it easier to spot seed details like color, texture, and damage.
- ● Ruler or measuring tape – To check seed size and uniformity (viable seeds are typically 0.5–1.5 inches long).
- ● Plastic wrap or ziplock bags – For short-term seed storage (if testing isn’t immediate).
- ● Seed catalog or reference book – For cross-referencing squash varieties and their ideal seed traits.
- ● Digital scale (0.1g precision) – To weigh seeds (viable seeds often have a consistent weight for their type).
- ● Notebook or app (e.g., Seed Savers Exchange) – To track seed viability over time.
- ● Grow lights or sunny windowsill – If conducting a germination test indoors.
- ● Gloves – For handling wet or mold-prone seeds safely.
How to identify viable squash seeds before planting
Here's how I sort through seeds to ensure only the best ones make it into the soil.
🌱 Step 1: Examine Seed Shape and Size
Start by holding a seed between your thumb and forefinger—viable squash seeds are plump, round, and feel solid when squeezed gently. Look for smooth, unblemished surfaces; any cracks, dents, or soft spots signal damage. I discard seeds that feel hollow or crumble slightly under pressure, as these won't germinate.
Size matters too. Healthy squash seeds are typically ½ to ¾ inch long and uniform in shape. If you spot seeds that are noticeably smaller or irregularly shaped, set them aside—they're likely nonviable. This quick visual check saves time and prevents wasted effort planting seeds that won't sprout.
🌿 Step 2: Test for Moisture Content
Place seeds in a bowl of room-temperature water for 10-15 minutes. Viable seeds sink immediately, while nonviable ones float. Remove any seeds that remain on the surface—these won't germinate. I also check for seeds that sink but have a cloudy or discolored appearance, as these may be damaged internally.
After the test, spread the viable seeds on a paper towel to dry completely before storing or planting. This step is critical because it separates good seeds from bad without requiring any special tools. I've found that even seeds that look perfect may fail if they've absorbed too much moisture over time.
💧 Step 3: Perform the Float Test for Doubtful Seeds
For seeds that pass the shape and sink test but still look questionable, I perform a more thorough float test. Fill a glass with warm water (not hot) and add the seeds. Let them soak for 24 hours. After this time, discard any seeds that haven't sunk or show signs of mold or discoloration.
This extended test helps identify seeds that might have internal damage not visible at first glance. I use this step as a final check before planting, especially if I'm saving seeds from a previous harvest. Warm water speeds up the process of revealing any hidden issues, so I always use it for seeds I'm unsure about.
☀️ Step 4: Check for Mold or Off Odors
Before planting, give each seed a quick sniff and visual inspection. Viable seeds should smell neutral or slightly earthy, while nonviable ones often emit a musty or sour odor. Look for any signs of mold, discoloration, or unusual textures—these are red flags that the seed is no longer good.
I also run my fingers lightly over the seed surface to feel for any rough or sticky spots, which can indicate fungal growth. If a seed feels slimy or has visible mold, toss it immediately. This final check ensures that only the healthiest seeds make it into the soil, giving your plants the best start possible.
⏰ Step 5: Store Viable Seeds Properly
Once you've identified your viable seeds, store them in a cool, dry place in a sealed container with a desiccant packet. I like to use small glass jars with tight-fitting lids to keep moisture out. Label each jar with the seed type and date—this helps track freshness, as squash seeds typically remain viable for 4-5 years if stored properly.
Keep seeds away from direct sunlight or heat sources, as these can degrade their quality faster. I store mine in the refrigerator's crisper drawer, where the temperature stays consistently cool. Proper storage extends their lifespan and ensures you'll have healthy seeds ready for next season's planting.
Tips & tricks for perfect squash seed identification
These simple strategies will help you confidently select the best seeds for planting every time.
Visual Inspection Tip: In Step 1, when examining seed shape, pay special attention to the seed's edges. Viable seeds should have smooth, slightly rounded edges, while nonviable ones often have jagged or irregular edges. I've found that holding seeds up to a bright light helps reveal any internal cracks that aren't visible to the naked eye. This extra step catches problems that might otherwise go unnoticed.
Water Temperature Matters: For the 10-15 minute moisture test in Step 2, use water that's truly room temperature—not cold from the fridge and not warm from hot water. I've ruined good seeds by using water that was too hot, which can damage their internal structure. If your kitchen is cold, let the water sit out for 10 minutes before using it to ensure accurate results.
Extended Float Test Wisdom: When performing the 24-hour float test in Step 3, use clear glass containers so you can easily spot any seeds showing signs of mold or discoloration. I recommend placing a small piece of cardboard under the glass to make it easier to see the bottom. This helps you identify any seeds that might have started to break down during the extended soak.
Storage Environment: For Step 5, consider using a small silica gel packet inside your storage container to absorb any moisture that might develop over time. I've noticed that seeds stored in humid environments lose viability faster, so this extra precaution helps maintain their quality. Just make sure to keep the packet away from direct contact with the seeds themselves.
Pro Tips for Squash Seed Identification
- These simple strategies will help you confidently select the best seeds for planting every time.
- Visual Inspection Tip: In Step 1, when examining seed shape, pay special attention to the seed's edges. Viable seeds ...
- Water Temperature Matters: For the 10-15 minute moisture test in Step 2, use water that's truly room temperature—not ...
Frequently asked questions
Got questions about squash seed identification? You’re not alone! Here are some of the most common queries—plus clear, actionable answers to help you sort viable from nonviable seeds like a pro.
How do I tell if a squash seed is still good for planting?
Look for plump, firm seeds with a smooth, unblemished surface. If they’re shriveled, cracked, or discolored (especially moldy or dark), they’ve likely lost viability. Float test them: Drop seeds in water—viable ones sink, while hollow or dead ones float. Store seeds in a cool, dry place for the best results!
Can I plant squash seeds saved from last year’s harvest?
Yes, but viability drops over time! Most squash seeds stay good for 4–5 years if stored properly (airtight container, 40–50°F, low humidity). Test a few first—plant 3–5 seeds in a pot and check for sprouts in 7–14 days. If germination is slow or spotty, fresh seeds may be your best bet.
What if my squash seeds won’t sprout—what’s the issue?
Several factors could be at play: old seeds, improper storage (moisture/mold), or planting too deep (seeds need light to germinate). Try soaking seeds in warm water for 12–24 hours before planting, or scratch the shell lightly with sandpaper to encourage moisture uptake. If soil is cold (<50°F), use a heat mat or wait for warmer temps.
Are there alternatives if my seeds are nonviable?
Buy fresh seeds from a reputable supplier (look for high germination rates on the packet). You can also try rooting cuttings from healthy squash vines (though this is trickier and less reliable). For heirloom varieties, check local seed swaps or gardening forums—many growers share seeds for free!
How big should squash seeds be to be viable?
Viable squash seeds are typically ½ inch (1.25 cm) long and ¼ inch (6 mm) wide, with a slightly oval or teardrop shape. Tiny, underdeveloped seeds (like those from underripe fruit) rarely sprout. Compare them to a reference chart or use a ruler for accuracy. Discard seeds that feel lightweight or hollow when tapped.
Wrapping up and next steps
Mastering squash seed identification ensures you’re ready to grow a thriving garden next season! By checking for firmness, color, and size, you’ll easily spot viable seeds—saving time and resources. Now that you’re equipped with these tips, grab those seeds and start planning your harvest. Happy gardening! 🌱🌿