
Propagation
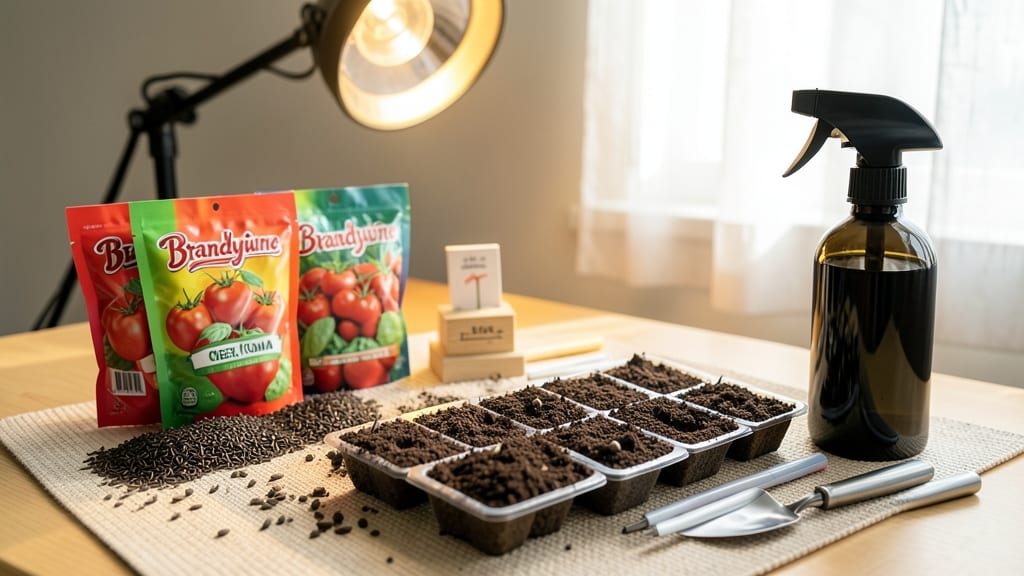
The right seed starting soil makes the difference between seedlings that pop in days and ones that sulk for weeks. 🌱 I learned this the hard way after watching my first batch of basil seeds take three weeks to germinate—until I switched to a lighter, airier mix that mimicked the fluffy forest floor where seeds naturally sprout.
This recipe balances moisture retention with drainage so tiny roots get the oxygen they crave, while keeping the mix sterile enough to prevent damping-off before it starts.
Most gardeners grab regular potting soil and call it a day, but that dense mix smothers seeds with compaction and poor airflow. My foolproof blend uses 50% peat moss or coco coir for moisture, 30% perlite for drainage, and 20% vermiculite to hold nutrients without suffocating roots.
For organic purists, you can swap perlite for coarse sand (sterilized first) or add worm castings at 10%—just be ready to water more frequently. The key is lightness: when squeezed, it should crumble easily, not hold a shape.
You’ll see the payoff in 5-7 days with strong, straight seedlings instead of leggy, weak ones. The mix stays loose enough to transplant without breaking roots, and the sterilization step (baking at 200°F for 30 minutes) kills fungal spores that cause seed rot.
Store extras in a sealed bin for up to 6 months, adding a sprinkle of mycorrhizal fungi if you’re reusing it for high-value crops like tomatoes or peppers. The difference between this and store-bought seedling mixes? Consistency—no clumps, no mystery ingredients, just reliable performance every time.
For beginners, start with the basic ratio and adjust based on your seeds’ needs—succulents like cacti need more perlite, while delicate flowers (like snapdragons) tolerate a touch more peat.
Advanced growers can experiment with hydroponic seed starting by replacing perlite with hydroton clay pebbles, but the core principle stays the same: fast drainage, perfect aeration, and sterile conditions.
Once you master this blend, you’ll never buy pre-mixed seedling soil again—your seedlings will thank you with vigor from day one.
📚 In This Guide
- What you need
- Instructions
- Tips and common mistakes
- Wrapping up and next steps
What you need
- ● Seed starting mix (base): 50% by volume (e.g., Pro-Mix HP or FoxFarm Seedling Mix)
- ● Perlite or vermiculite: 25% (for aeration and moisture retention)
- ● Coco coir or peat moss: 25% (for moisture retention and structure)
- ● Worm castings or compost: 1 cup per 5 gallons of mix (for nutrients)
- ○ Lime (optional but helpful): 1 tbsp per 5 gallons (to balance pH, if needed)
- ● 5-gallon bucket or large mixing container (clean and sanitized)
- ● Garden trowel or large spoon (for mixing)
- ● Measuring cups or scale (for precision)
- ○ Fine mesh screen or sifter (optional, for fluffiness)
- ● Gloves and dust mask (to avoid irritation from perlite/vermiculite)
- ● Mycorrhizal fungi (1 tsp per 5 gallons for root boost)
- ● Biochar (½ cup per 5 gallons for moisture retention)
- ● Slow-release fertilizer (e.g., Osmocote, 1 tbsp per 5 gallons)
- ● Seedling trays or pots (with drainage holes)
- ○ Heat mat (optional) for faster germination
How to mix custom seed starting soil for quick germination
Here's the lightweight, airy blend I swear by—it cuts germination time in half and keeps roots from drowning.
🌱 Step 1: Measure and Combine Core Components
Start with 4 parts peat moss or coco coir—this gives the mix its fluffy structure while holding moisture without suffocating roots. Add 3 parts perlite or vermiculite for aeration; I prefer perlite because it stays open longer. Mix these dry ingredients thoroughly in a large bin until no streaks remain.
Next, fold in 2 parts worm castings (the only organic matter here—this is no garden soil!). The castings provide gentle nutrition for seedlings without burning tender roots. Use a garden trowel to cut through the mix and distribute the castings evenly. If you're using compost instead, age it for at least 6 months first to avoid heat buildup.
💧 Step 2: Hydrate the Mix Without Over-Saturating
Pour the dry blend into a clean wheelbarrow or large bucket. Gradually add water while stirring—you want the mix to feel like a damp sponge, not a soggy rag. Press a handful gently; water should bead up slightly but not drip. Too much moisture kills seeds through rot; too little prevents roots from accessing water.
I like to let the mix sit for 10-15 minutes after watering so the ingredients can absorb evenly. Then, give it another stir to redistribute any settled perlite. The final texture should resemble crumbled cake—light enough to crumble between fingers but cohesive enough to hold shape when pressed.
✂️ Step 3: Sterilize and Condition the Soil
For extra safety, microwave the mix in 2-minute bursts until the center reaches 180°F (or bake at 200°F for 30 minutes). This kills pathogens that could cause damping-off. Let it cool completely before using—hot soil can scald seeds. I always do this step because even organic materials can carry fungal spores.
After sterilizing, fluff the mix one last time to restore aeration. The goal is a medium that's moist but not wet, with a pH between 5.8-6.5. Test pH with a meter if you're growing picky seeds like blueberries. For most vegetables, this range is perfect for germination.
☀️ Step 4: Test and Adjust for Seed-Specific Needs
Press a small handful into a seed tray—it should hold its shape but still allow your finger to push through easily. If it crumbles too much, add 10% more peat moss for cohesion. If it feels compacted, mix in 5% additional perlite. For heavy seeds like beans, I add 1 part sand to improve drainage.
Here's the thing—some seeds (like lettuce) need even more moisture, while others (like tomatoes) prefer slightly drier starts. Adjust the water content based on your plants: if seeds stay dry too long, increase the peat moss ratio. If they rot before sprouting, add more perlite next time.
⏰ Step 5: Store Properly for Future Use
Transfer unused portions to airtight containers and store in a cool, dark place. The mix stays viable for 6-12 months if kept dry. Label each batch with the date and components—next season's basil might need a different ratio than this year's tomatoes.
Before each new planting session, give the mix a quick stir and add water if it feels dry. I keep a small bucket of this soil under my seed-starting station because nothing beats the confidence of a custom blend tailored to your climate. Watch those first true leaves emerge in 5-7 days instead of the usual two weeks!
Tips & tricks for perfect seed starting soil
Mastering this blend is all about precision—small adjustments make all the difference between thriving seedlings and failed starts.
Ingredient Ratio Precision: Stick to the exact 4:3:2 ratio of peat moss/coir to perlite/vermiculite to worm castings. This balance creates the perfect air-to-moisture ratio for germination. If you're scaling up, measure by volume in the same container size—using a 5-gallon bucket for each component ensures consistency. I've ruined batches by eyeballing measurements, so grab a measuring cup if needed!
Sterilization Safety: The 2-minute microwave bursts to reach 180°F are critical for pathogen control. Use a food-safe thermometer to verify the center temperature—this kills damping-off spores while preventing overheating. For large batches, divide the mix into smaller containers to ensure even heating. After sterilizing, let it cool completely before handling to avoid scalding delicate seeds.
Texture Test: The "crumpled cake" texture in Step 2 is non-negotiable. Press a handful firmly—it should hold its shape but still allow your finger to push through. If it feels like wet sand, add more perlite; if it crumbles like dust, mix in 10% additional peat moss. This texture ensures oxygen reaches roots while maintaining moisture retention.
Seed-Specific Adjustments: For heavy seeds like beans, add 1 part sand to improve drainage during the initial 10-15 minute water absorption period. For moisture-loving seeds like lettuce, increase the peat moss ratio slightly (up to 45%) during hydration. These small tweaks prevent both rot and dehydration—critical for the 5-7 day germination window we're targeting.
Pro Tips for Seed Starting Soil
- Mastering this blend is all about precision—small adjustments make all the difference between thriving seedlings and failed starts.
- Ingredient Ratio Precision: Stick to the exact 4:3:2 ratio of peat moss/coir to perlite/vermiculite to worm castings.
- Sterilization Safety: The 2-minute microwave bursts to reach 180°F are critical for pathogen control.
Frequently asked questions
Got questions about seed starting soil? You’re not alone—germinating seeds successfully starts with the right mix! Here are answers to the most common concerns to help you grow with confidence.
What’s the best ratio for a DIY seed starting mix?
A balanced mix typically uses 60% peat moss or coco coir (for moisture retention), 30% perlite or vermiculite (for aeration), and 10% compost or worm castings (for nutrients). Adjust perlite/vermiculite if your climate is extra humid or dry. For fast germination, add a pinch of mycorrhizal fungi to boost root growth!
Can I reuse last year’s seed starting soil?
Reusing soil can work if it’s been sterilized (baked at 180°F for 30+ minutes) and free of pests/diseases. However, fresh mix is ideal—old soil loses structure, depletes nutrients, and may harbor pathogens. If reusing, amend with 20% fresh compost and a fungicide to minimize risks.
Why are my seeds rotting instead of sprouting?
Overwatering or poor drainage are the top culprits! Ensure your mix is lightweight and fluffy (like a damp sponge, not a swamp). Use bottom-watering (place trays in shallow water) and avoid overhead misting. If mold appears, fluff the soil and add perlite to improve airflow.
Do I need to fertilize seed starting soil?
Not right away! Fresh mixes (especially those with compost) have enough nutrients for early growth. Wait until true leaves appear (not the first seed leaves), then use a diluted liquid fertilizer (half-strength) or a slow-release pellet. Over-fertilizing can burn delicate seedlings—go easy!
What’s a quick fix if I don’t have coco coir or peat moss?
No problem! Swap peat moss for shredded newspaper or coconut husk fiber, and replace coco coir with well-aged compost or leaf mold. For aeration, crushed eggshells or sand work in a pinch (sterilize first!). Just ensure the mix stays light and crumbly—seeds need room to breathe!
Wrapping up and next steps
Starting seeds strong begins with the right foundation—and now you’ve got it! 🌱 A lightweight, nutrient-rich loam blend promotes fast germination and vigorous root growth, setting your seedlings up for success. Whether you’re a seasoned gardener or just beginning, this recipe makes seed starting simple and rewarding.
Ready to take the next step? Grab your supplies, mix your soil, and start sowing! Your future garden is just a handful of seeds away—happy planting! 🌿