
Propagation
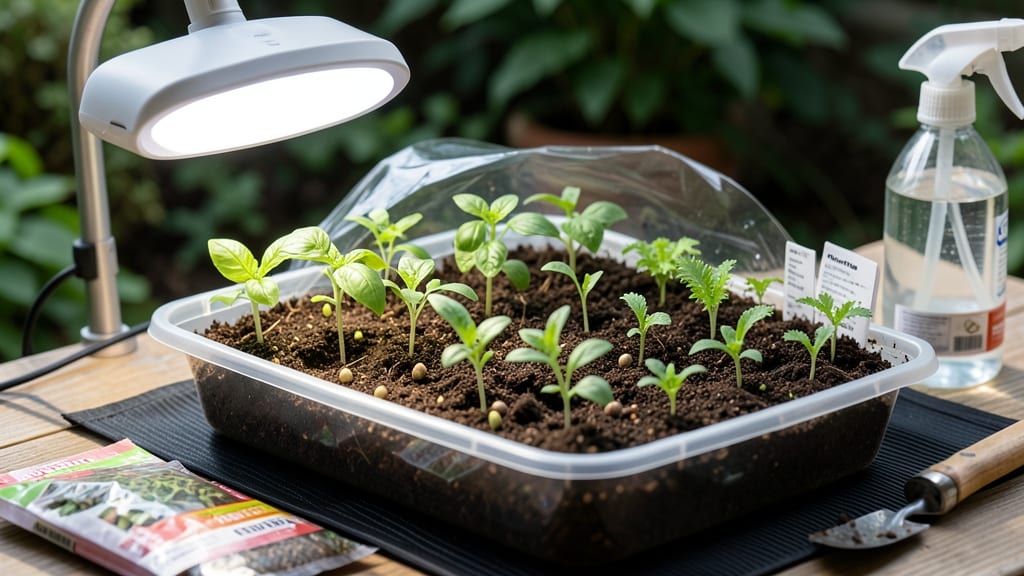
A seed starting kit with light turns your basement or kitchen into a greenhouse—no sunny windows required. 🌱 I’ve used mine for five years now, and it’s how I get a head start on tomatoes, peppers, and herbs that would never make it through my cold spring.
The right setup gives you control over light, heat, and moisture, which means stronger seedlings that transplant like pros. The kit itself is simple: a grow light (LED works best), seed trays with drainage, quality seed-starting mix, and maybe a humidity dome to keep things cozy.
My first setup cost under $50 and has paid for itself in better harvests. The key is matching the light to your seeds—14 to 16 hours a day for most veggies—and keeping the soil moist but not soggy.
You’ll see those first green shoots in as little as 5-10 days, depending on the seed. The plants stay stocky and green, not stretched out like they do under weak window light.
By the time you’re ready to transplant, they’re already 2-3 inches tall and ready to handle the great outdoors. Perfect for cool climates, short growing seasons, or anyone who’s tired of weak, leggy seedlings. Let’s get those lights set up right!
📚 In This Guide
- What you need
- Instructions
- Tips and common mistakes
- Wrapping up and next steps
What you need
- ● Seed Starting Trays: 10-20 cell trays (biodegradable or plastic) – 1-2 trays depending on seed volume.
- ● Seed Starting Mix: Lightweight, sterile potting soil (avoid garden soil) – 1-2 cubic feet.
- ● Grow Lights: LED grow lights (full-spectrum, 10,000-20,000K) – 1-2 lights (depends on tray size).
- ● Adjustable light stand or shelf – 1 (18-24" height from seeds).
- ● Seeds: Your chosen varieties – quantity based on planting density.
- ● Misting Bottle or Spray Nozzle: For gentle watering – 1.
- ○ Humidity Dome (Optional but Helpful): Clear plastic lid for trays – 1 per tray.
- ○ Heat Mat (Optional for Cold Climates): 70-75°F mat – 1 (for faster germination).
- ● Labels & Markers: For tracking seed types – 1 pack + pencil.
- ● Tweezers or Gloves: For delicate seed handling – 1 pair.
- ● Fan (Small Oscillating): For airflow (prevents mold) – 1.
- ● Timer: For light cycles (14-16 hrs/day) – 1 (smartphone app works too!).
- ● Scissors or Utility Knife: For cutting domes/film – 1.
Step-by-step instructions for growing seedlings under artificial light
Here's how to turn weak, leggy seedlings into sturdy, thriving plants using your kit's built-in light.
🌱 Step 1: Set Up Your Seed Starting Tray and Light
Start by arranging your seed starting trays inside the light kit—place them on the included shelf or rack, ensuring they sit 2-3 inches below the light source. Most kits have adjustable arms, so position the light so it covers all trays evenly without touching them. I like to rotate my trays a quarter turn daily so seedlings grow straight instead of leaning toward the light.
Plug in the light and set the timer to 14-16 hours per day (most kits have preset options). The light should feel warm but not hot to the touch—if it burns your fingers, move it up 1-2 inches. This setup mimics full sun exposure while preventing the heat stress that can scorch young plants.
💧 Step 2: Plant and Water Your Seeds
Fill your seed trays with the sterile seed-starting mix (never garden soil—it’s too dense and can harbor diseases). Press it down lightly so it’s firm but not packed, then use the included spray bottle to moisten it until it’s damp 1 inch deep. Plant seeds according to packet instructions—usually ¼ inch deep—and cover lightly with more mix.
Water gently from the bottom if your trays have drainage holes, or mist the surface until it’s evenly damp but not soggy. Overwatering now causes damping-off, a fungal disease that collapses seedlings overnight. After planting, place the trays under the light and wait 5-10 days for germination. You’ll see tiny sprouts push through the soil like little green hats.
☀️ Step 3: Monitor Light and Growth Daily
Check your seedlings every 2-3 days—they should have thick stems and deep green leaves if the light is working perfectly. If they stretch tall and pale (called "leggy"), the light is too far away or not strong enough. Move it 1-2 inches closer until the stems are sturdy and leaves are compact.
Thin seedlings to one per cell once they have 2-3 true leaves (the first leaves are just cotyledons—real leaves look like tiny versions of the mature plant). Use clean scissors to snip weak ones at soil level, leaving the strongest seedling. This prevents overcrowding and gives remaining plants room to grow.
✂️ Step 4: Harden Off Before Transplanting
Two weeks before your last frost date, start hardening off your seedlings. Move the entire tray outside to a shaded, sheltered spot for 1-2 hours the first day. Gradually increase time outside by 1 hour daily until they’re out all day. This toughens their stems and leaves so they survive the shock of moving to the garden.
Watch for wilting or yellowing—if you see it, bring them back inside for another day. Once they’re hardened off, transplant on an overcast afternoon to reduce stress. Water deeply at the base, and your seedlings will be ready to thrive in their permanent home.
Tips & tricks for perfect seed starting under artificial light
Transforming weak seedlings into sturdy, vibrant plants is all about nailing these game-changing details—trust me, I’ve seen the difference!
Light Positioning: That 2-3 inch distance below the light source is crucial—any closer and you’ll risk heat stress, any farther and your seedlings will stretch like they’re reaching for the sun. I’ve learned the hard way that even a 1-inch difference makes a world of difference in stem strength.
Daily Rotation Secret: The quarter-turn rotation you do each day isn’t just about aesthetics—it prevents seedlings from growing crooked as they all lean toward the light. I mark the rotation direction with a tiny piece of tape on the tray to keep track, and it’s made all the difference in my garden!
Germination Timing: Those 5-10 days for germination can feel like forever, but patience pays off. If you’re not seeing sprouts by day 10, gently press the soil with your finger—sometimes seeds need a little encouragement. Just don’t overwater during this waiting period, or you’ll risk damping-off disease.
Thinning Technique: When you’re thinning to one seedling per cell, use clean scissors to snip at soil level rather than pulling. This prevents disturbing the roots of your remaining plants. I’ve found that doing this when seedlings have 2-3 true leaves gives them the best chance to recover and grow strong.
Pro Tips for Seed Starting Kit With Light
- Transforming weak seedlings into sturdy, vibrant plants is all about nailing these game-changing details—trust me, I’ve seen the difference!
- Light Positioning: That 2-3 inch distance below the light source is crucial—any closer and you’ll risk heat stress, any farther and your seedlings will stretch like they’re reaching for the sun.
- Daily Rotation Secret: The quarter-turn rotation you do each day isn’t just about aesthetics—it prevents seedlings from growing crooked as they all lean toward the light.
Frequently asked questions
What’s the best time of year to start seeds with a light kit?
The ideal time depends on your climate and plant type! For most vegetables (like tomatoes and peppers), start seeds 6–8 weeks before the last frost date. Leafy greens and herbs can go in later—even as late as 4–6 weeks before frost. Use a frost date calculator to pinpoint your zone’s timeline. Pro tip: If you’re in a warm region, you might start earlier to avoid summer heat stress!
Can I use a regular LED bulb instead of a dedicated grow light?
Yes, but with caveats! A full-spectrum LED bulb (6500K+ color temp) can work, but grow lights are optimized for seedling needs—providing the right light spectrum (red/blue wavelengths) and intensity. Avoid warm-white bulbs (2700K), as they lack the blue light seedlings crave. For best results, use a grow light kit designed for seed starting.
Why are my seedlings stretching toward the light (leggy)?
Leggy seedlings are a classic sign of light hunger—they’re reaching for more light. Fix it by:
- Moving the light closer (2–4 inches from seedlings).
- Increasing light duration to 14–16 hours/day.
- Ensuring the light covers the entire tray (no shadows).
Are seed starting kits with lights worth the investment?
Absolutely—if you’re serious about seed starting! A kit (typically $30–$80) eliminates guesswork, provides consistent light, and speeds up germination. DIY setups (like a lamp + timer) can work, but kits offer better control, durability, and often built-in humidity domes. For occasional starters, a kit pays off in healthier, faster-growing seedlings.
How do I clean and maintain my seed starting light kit?
Keep your kit in top shape with these simple steps:
- Wipe down light bulbs/mesh monthly with a damp microfiber cloth (avoid harsh chemicals).
- Check for dust buildup on reflectors—clean with a soft brush.
- Replace LED bulbs every 1–2 years (or when light dims).
- Store unused kits in a dry, cool place to prevent mold.
Wrapping up and next steps
Starting seeds with a seed starting kit with light isn’t just smart—it’s your secret weapon for thriving plants! 🌱 With the right setup, you’ll unlock stronger, healthier seedlings ready to conquer your garden.
Whether you’re a newbie or a seasoned green thumb, this method makes growing from scratch easier (and way more rewarding) than ever.
Now that you’re armed with the knowledge, take the next step—grab your kit, pick your favorite seeds, and let the light do the work! Soon, you’ll be transplanting confident, robust seedlings into your garden or containers. Happy growing!