
Flowers
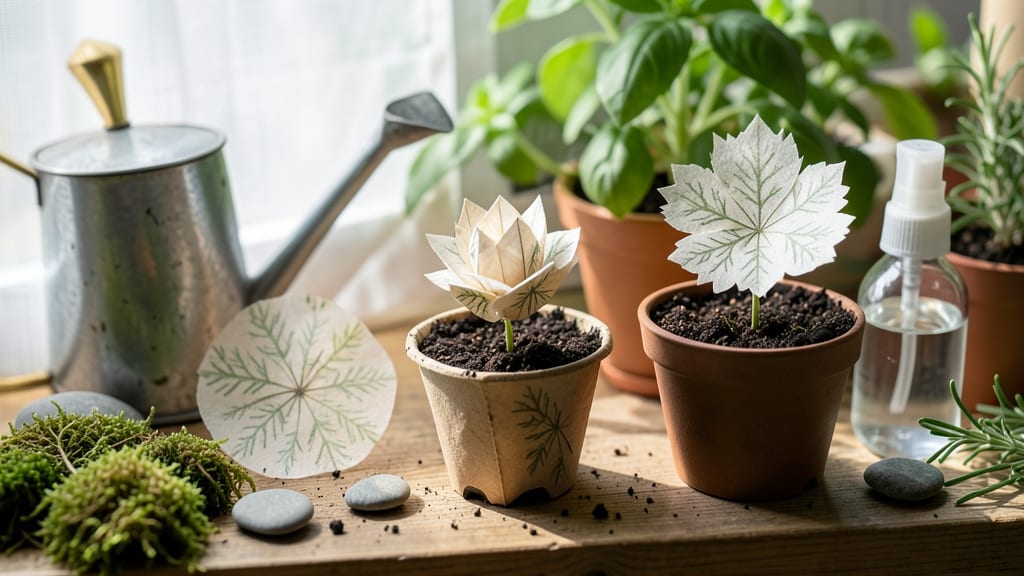
Creating seed paper flowers that bloom into living gifts is one of the most rewarding gardening projects I’ve ever tried. 🌸 The magic happens when you embed wildflower seeds into paper, then plant them to grow vibrant blooms—perfect for weddings, eco-friendly gifts, or just adding a touch of nature to your space.
You’ll need just a few simple supplies: wildflower seed paper (or DIY materials like paper pulp, seeds, and a screen), a shallow tray, water, and a sunny spot.
The process is surprisingly straightforward—no green thumb required. Once planted, these flowers can last for years, spreading joy and beauty with every bloom.
What makes this project special is the combination of creativity and sustainability. You’re not just growing flowers; you’re crafting something meaningful that gives back to the earth. Imagine handing out seed paper flowers at a wedding, where guests can plant them and watch life grow from their special day.
Whether you’re a beginner or a seasoned gardener, seed paper flowers offer a fun, low-maintenance way to bring nature indoors or outdoors. The key is patience—these blooms take time to sprout, but the reward is worth every moment of waiting. Let’s get started on your first batch!
📚 In This Guide
- What you need
- Instructions
- Tips and common mistakes
- Wrapping up and next steps
What you need
- ● Seed paper (pre-made or DIY): 1–3 sheets (8.5" x 11" or custom size), depending on flower size
- ● Wildflower or herb seeds embedded (e.g., cosmos, marigold, or basil)
- ● Floral wire: 22–24 gauge, 12–18" lengths (for stems)
- ● Green floral tape: 1–2 rolls (for securing stems)
- ● Scissors: Sharp craft scissors or floral shears
- ○ Bone folder or credit card: For crisp folds (optional but helpful)
- ● Glue (e.g., white glue or Mod Podge) for extra adhesion
- ● Lace or organza fabric (for layered petals)
- ● Waterproof sealant spray (to extend longevity)
- ● Dried flowers or leaves (for mixed-media designs)
Step-by-Step instructions for crafting seed paper flowers
Here's how to make these magical blooms that grow into living plants—no green thumb required.
🌱 Step 1: Prepare Your Seed Paper Base
Start by mixing 1 cup of wildflower seeds (choose a mix with varying bloom times for continuous color) with 2 cups of water in a bowl. Let it soak for 10 minutes to help the seeds cling together. In a separate container, blend 1 cup of recycled paper (torn into small pieces) with 2 cups of boiling water until it forms a thick, pulp-like consistency.
Once the paper pulp cools slightly, pour it into a blender with the soaked seeds. Add 1 tablespoon of psyllium husk powder and blend until smooth. The mixture should resemble thick paint. Spread it evenly onto a silicone mat or parchment paper, using a spatula or your hands to create a thin, even layer. Aim for about 1/8-inch thickness—too thick and it won't dry properly.
🎨 Step 2: Shape and Dry Your Flower Petals
While the base is still damp, use petal-shaped cookie cutters or a craft knife to cut out flower petal shapes. Press the edges gently to define the shape. For a more organic look, you can also freehand the petals by rolling the pulp between your palms into thin, curved strips. Arrange the petals on a flat surface, leaving 1/2-inch gaps between them to prevent sticking.
Let the petals dry completely for 24-48 hours in a warm, dry place away from direct sunlight. You'll know they're ready when they feel crisp to the touch and no longer stick together. If you notice any edges curling, gently press them down with a heavy book while they dry. Once fully dry, your petals will be lightweight and sturdy enough to handle.
☀️ Step 3: Assemble the Flower and Prepare for Planting
To create the flower, arrange 4-5 petals in a circular pattern, overlapping the edges slightly. Use a small dab of white glue or a tiny bit of diluted pulp mixture as an adhesive to hold them together. Add a green center using a small piece of dried moss or additional pulp rolled into a tiny ball. For extra durability, you can also use a thin wire stem wrapped in more pulp to create a handle.
Once your flower is assembled, let the glue dry completely. To plant, simply place the flower on top of moist soil in a pot or garden bed. Water lightly but thoroughly, ensuring the soil stays consistently moist for the first 7-10 days. You'll see tiny sprouts emerging within 2-3 weeks, and the flower will slowly transform into a living plant. Keep the soil moist but not soggy—overwatering can cause the seeds to rot before they sprout.
⏰ Step 4: Care for Your Growing Blooms
After the seeds sprout, your seed paper flower will start to decompose as the roots grow into the soil. This is completely normal! Once the plant is established, you can gently remove any remaining paper fragments. Place the pot in a location with 4-6 hours of sunlight daily, depending on the flower type. Most wildflower mixes thrive in full sun to partial shade, so a spot near a window or in a shaded garden bed works well.
Water the plant when the top 1 inch of soil feels dry. Avoid getting water directly on the leaves to prevent fungal issues. Fertilize lightly with a balanced, water-soluble fertilizer every 4-6 weeks during the growing season. With proper care, your seed paper flower will bloom within 6-8 weeks, and you'll have a beautiful, living reminder of your craft.
Tips & tricks for perfect seed paper flowers
These simple tricks will help you create blooms that are sturdy, beautiful, and ready to grow into living plants.
The Pulp Consistency Secret: For the smoothest texture in Step 1, aim for a pulp consistency like thick paint—it should hold its shape when you lift your spatula but still spread easily. If it's too runny, add a bit more recycled paper; if too thick, mix in a splash of water. Too-thick pulp cracks during drying, while too-thin pulp won't hold the seed shapes properly. Test a small patch first to check the consistency before committing to your silicone mat.
Drying Time Hack: During the 24-48 hour drying period in Step 2, place your petals under a fan on low speed. This speeds up drying without warping the edges, especially helpful if you're short on time. Just avoid direct airflow that could curl the petals—keep the fan at least 12 inches away. You'll know they're ready when they feel crisp and no longer stick together when touched.
Adhesive Alternatives: If you don't have white glue for Step 3, try mixing a tiny amount of the pulp with a drop of water to create a natural adhesive. For extra durability, use a thin wire stem wrapped in more pulp—this doubles as a handle for easy planting. The key is to use minimal adhesive; too much can prevent the seeds from making proper contact with the soil.
Sunlight Strategy: For Step 4, place your planted flowers in a spot with 4-6 hours of indirect sunlight initially. Direct sunlight can dry out the soil too quickly, while too little light slows germination. A north-facing window or shaded patio works perfectly. After sprouting, gradually increase sunlight exposure to help the plants acclimate.
Pro Tips for Seed Paper Flowers
- These simple tricks will help you create blooms that are sturdy, beautiful, and ready to grow into living plants.
- The Pulp Consistency Secret: For the smoothest texture in Step 1, aim for a pulp consistency like thick paint—it should hold its shape when you lift your spatula but still spread easily.
- Drying Time Hack: During the 24-48 hour drying period in Step 2, place your petals under a fan on low speed.
Frequently asked questions
Got questions?
Here are some of the most common ones about seed paper flowers—plus quick, easy answers to help you bloom with confidence!
How long does it take for seed paper flowers to grow?
Most seed paper flowers sprout within 7–14 days after planting, depending on sunlight, soil, and temperature. Once planted, keep the soil moist (but not soggy) and watch for tiny green shoots in about a week. Full blooms may take 4–8 weeks, depending on the seed type!
Can I plant seed paper flowers indoors?
Just use a sunny windowsill (6+ hours of light daily) or a small grow light. Choose a pot with drainage holes, and keep the soil consistently moist. Herbs like basil or flowers like marigolds thrive indoors—just avoid overwatering to prevent mold.
What if my seed paper flowers don’t grow?
Don’t worry—try these fixes:
- Check sunlight: Seed paper needs bright, indirect light (direct sun can scorch delicate sprouts).
- Test soil moisture: Too dry? Water gently. Too wet? Let it dry slightly between waterings.
- Verify seeds: Some seed paper uses wildflower mixes—germination varies by type. Check the packet for specifics!
Are seed paper flowers eco-friendly?
Yes! They’re a zero-waste alternative to plastic or silk flowers. The paper decomposes naturally, and the seeds grow into pollinator-friendly plants. Plus, they’re biodegradable—no landfill waste! For extra sustainability, use recycled seed paper or compost the flowers after their lifespan.
Can I make seed paper flowers without special tools?
You bet! While embossing tools add detail, you can craft beautiful seed paper flowers with just:
- A rolling pin (for pressing)
- Floral wire or pipe cleaners (for stems)
- Scissors or a craft knife (for cutting shapes)
- Water and a spray bottle (for moisture)
Pro Tip:
For longer-lasting blooms, plant your seed paper flowers in well-draining soil and add a slow-release fertilizer. Water in the morning to reduce evaporation, and avoid placing them in windy spots until roots establish (about 2 weeks). Happy growing!
Wrapping up and next steps
Seed paper flowers aren’t just a creative craft—they’re a sustainable way to bring beauty to your space while giving back to the earth. 🌱 Whether you’re a seasoned crafter or a beginner, these handmade blooms offer endless possibilities for gifting, decorating, or even brightening up your garden. Why not try making a few today?
Start small with a single flower or go all out with a bouquet—your green thumbs (and future plants!) will thank you. Happy crafting, and may your seed paper blooms grow wild with joy!