
Planting
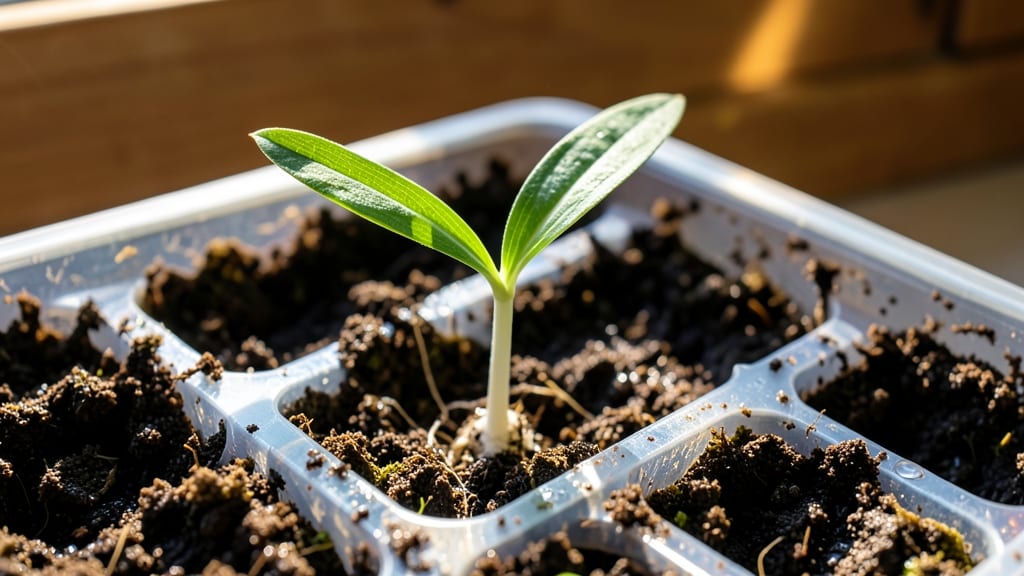
Watching a seed grow into a plant is like unlocking nature's most rewarding magic—and it starts with the right conditions. 🌱 I remember my first time: tiny radish seeds sprouted in just three days, while stubborn okra took weeks, but both proved how patience pays off when you get the basics right.
You only need three things to begin: moisture to wake the seed, warmth (around 70°F) to speed up the process, and light once the sprout breaks through soil. Most beginners overwater or bury seeds too deep—radishes need just ½ inch of cover, while beans can handle 1-2 inches.
The goal is to create a cozy, damp environment without drowning the seed.
Within 5-14 days, you’ll see the first green shoot push through the soil—a sign the seed has cracked open and is reaching for sunlight. Keep the soil evenly moist (not soggy) and move containers to a sunny spot.
Fast growers like lettuce pop up in 3-7 days, while slow starters like tomatoes may take 10-20 days to break through.
Common mistakes? Overwatering (which causes rot) or planting too deep (seeds need darkness to germinate but light to grow). Start with fast seeds like radishes or beans to build confidence, then move to slower varieties.
Once you’ve mastered this, you’ll be ready to tackle soil prep and transplanting like a pro.
📚 In This Guide
- What you need
- Instructions
- Tips and common mistakes
- Wrapping up and next steps
What you need
- ● Seeds: Choose fast-growing varieties like radish, lentils, or alfalfa (1–2 tbsp per container). Opt for organic, non-GMO seeds for best results.
- ● Sprouting Container: A wide-mouth glass jar (16–32 oz) or a dedicated sprouting lid with mesh.
- ● Cheesecloth or Fine Mesh: A 4–6 inch square (cut to fit your jar’s opening).
- ● Rubber Band or Jar Ring: To secure the cloth over the jar.
- ● Water: Room-temperature, filtered water (1–2 cups per soak).
- ● Colander: For rinsing sprouts (if not using a jar).
- ● Small Fan or Towel: To dry sprouts after rinsing (reduces mold risk).
- ● Sprouting Tray: With drainage holes for larger batches.
- ● pH Strips: To test water acidity (ideal: 6.5–7.0).
- ● Notebook: To track sprouting progress (fun for kids!).
- ● A clean workspace (wipe surfaces with vinegar or hydrogen peroxide).
- ● Daily time commitment (5–10 minutes for soaking/rinsing).
- ● Patience! Sprouts take 3–7 days to grow—depending on the seed.
How to watch a seed transform into a thriving plant
This is where the magic happens—let's break down how to nurture a seed into its first true leaves.
🌱 Step 1: Select and Prepare Your Seed
Choose a seed that's fresh and firm, not dried out or cracked. I always check the packet date—seeds older than a year lose vigor. For best results, soak seeds overnight in lukewarm water to soften the outer coating, especially for hard shells like peas or beans. This step isn't required for tiny seeds like lettuce, but it dramatically speeds up germination for tougher varieties.
Here's the thing—don't skip the soak if your seed packet says "scarify" or "stratify." These terms mean the seed needs a special treatment to break dormancy. For example, poppy seeds need light to trigger germination, so I sprinkle them on top of the soil instead of burying them. Watch for any special instructions on the packet, as these can make the difference between success and failure.
🌿 Step 2: Create the Ideal Germination Environment
Fill a small container with a lightweight, sterile seed-starting mix—never garden soil, as it's too dense and may carry diseases. Moisten it until damp but not soggy, then press it down gently so the surface is firm. The goal is to create a cozy, moist environment where the seed can easily push through the soil.
Place your container in a warm spot, ideally between 70-85°F. A seedling heat mat works wonders here, especially if your home runs cooler. Cover the container with plastic wrap or a humidity dome to trap moisture and warmth, which are critical for germination. Check daily for condensation—if you see water droplets, you've got the humidity just right.
💧 Step 3: Monitor and Support Early Growth
Germination can take anywhere from 3 days to 3 weeks, depending on the seed type. You'll see the first sign when a tiny shoot breaks through the soil—this is called the radicle, the embryonic root. Once you spot this, remove the plastic cover immediately to prevent damping-off, a fungal disease that attacks young seedlings.
Keep the soil consistently moist but never waterlogged. I use a spray bottle to mist the soil lightly, ensuring the surface stays damp but not wet. You'll notice the seedling's first true leaves emerging after the initial cotyledons (the seed leaves). These true leaves look different—they're smaller and more complex in shape. This is when the plant starts photosynthesizing on its own, marking a major milestone in its growth.
☀️ Step 4: Transition to Light and Air
As soon as those first true leaves appear, move the seedling to a bright location with 12-16 hours of indirect light daily. A south-facing window is ideal, but if natural light is insufficient, supplement with a grow light. You'll see the plant respond immediately—stems will thicken, and leaves will darken in color. Avoid direct sunlight at this stage, as it can scorch tender new growth.
This is also the time to introduce fresh air. Open a window nearby or use a small fan on low to encourage strong stem development. Weak seedlings grow tall and leggy without airflow, so a gentle breeze helps them stay sturdy. Watch for any signs of stress, like yellowing leaves or wilting, which can indicate overwatering or insufficient light.
⏰ Step 5: Encourage Healthy Development
Once the seedling has 3-4 true leaves, it's ready for its first true test: a gentle pinch. Pinching the top set of leaves encourages the plant to branch out, creating a bushier growth habit. This is especially important for plants like basil or tomatoes, which benefit from a fuller shape. You'll see new growth emerging from the sides within a week—that's your signal everything is working.
Continue to monitor soil moisture, but resist the urge to overwater. The key is to let the top inch of soil dry out slightly between waterings. You'll know you're doing it right when the leaves stay vibrant and the stems remain firm. If you notice any yellowing or browning, adjust your care routine immediately—this is often a sign of overwatering or poor drainage.
Tips & tricks for perfect seed germination
Real talk: The difference between a thriving seedling and a failed experiment often comes down to these small but critical details.
Seed Selection Matters: Always check the packet date—seeds older than a year lose up to 50% of their germination rate. For seeds requiring scarification or stratification (like poppy seeds), follow the packet instructions precisely. I learned this the hard way after planting poppy seeds buried too deep—they need light to trigger germination, so sprinkle them on top of the soil instead.
Temperature Control: The ideal 70-85°F range is non-negotiable for most seeds. If your home runs cooler, a seedling heat mat (around $20) is worth every penny—it creates that perfect cozy environment. Pro tip: Place your container on top of your fridge during the day if you don't have a heat mat; the warmth from the compressor will help maintain temperature.
Light Transition Timing: Those critical 12-16 hours of indirect light start as soon as you see the first true leaves—not the initial cotyledons. I use a timer on my grow light to ensure consistency, especially in winter months when natural light is scarce. Watch for leaves that look pale or stretched—the classic signs of insufficient light. A south-facing window works, but supplement with artificial light if you notice these symptoms.
Pinching Technique: When your seedling reaches 3-4 true leaves, that pinch is your secret weapon. Use your thumb and forefinger to gently remove the top set of leaves—don't cut with scissors. You'll see new growth sprouting from the sides within 7-10 days. This simple step transforms leggy seedlings into bushy plants, especially for herbs like basil or vegetables like tomatoes.
Pro Tips for Seed Grows Into A Plant
- Real talk: The difference between a thriving seedling and a failed experiment often comes down to these small but cri...
- Seed Selection Matters: Always check the packet date—seeds older than a year lose up to 50% of their germination rate...
- Temperature Control: The ideal 70-85°F range is non-negotiable for most seeds. If your home runs cooler, a seedling h...
Frequently asked questions
Got questions about turning seeds into thriving plants? You’re not alone! Here are some of the most common queries—plus straightforward answers to help you grow with confidence.
How long does it take for a seed to grow into a plant?
The timeline varies wildly by seed type. Fast growers like radishes or lettuce sprout in 5–14 days, while slowpokes (think beans or tomatoes) may take 10–21 days to break soil. Check your seed packet for specifics—patience is key!
What if my seeds aren’t sprouting? Troubleshooting tips?
Don’t panic! First, check moisture—keep soil damp (not soggy). Next, verify temperature (most seeds need 60–75°F). If seeds are old (<1 year), try fresh ones. Pro tip: Place a clear plastic wrap over the tray to trap humidity until sprouts appear!
Can I grow plants from seeds without sunlight?
Yes, but with a twist! Use a grow light (LED or fluorescent) for 12–16 hours/day until seedlings develop true leaves. South-facing windows work too, but avoid drafts. Warning: Stretchy, leggy seedlings = not enough light!
What’s the easiest seed to grow for beginners?
Start with fast, forgiving seeds like:
- Lettuce (sprouts in 7–10 days, loves shade)
- Green beans (hardy, grows in poor soil)
- Zucchini (produces tons of plants from one seed!)
Can I reuse soil from old seed trays?
Not ideal! Old soil may harbor fungus or pests. Sterilize it by baking at 200°F for 30 minutes or mix in 10% fresh potting soil. Better yet, compost the used soil and start fresh—your new seeds will thank you!
Wrapping up and next steps
From a tiny seed to a thriving plant, the journey is nothing short of magical! 🌱 The key to success lies in patience, the right conditions, and a little love.
Whether you're a seasoned gardener or a curious beginner, every seed you plant has the potential to grow into something beautiful—and you’re the gardener who makes it happen.
Ready to take the next step? Start small—plant a single seed today and watch the transformation unfold. Your green thumb is closer than you think! 🌿