
Size
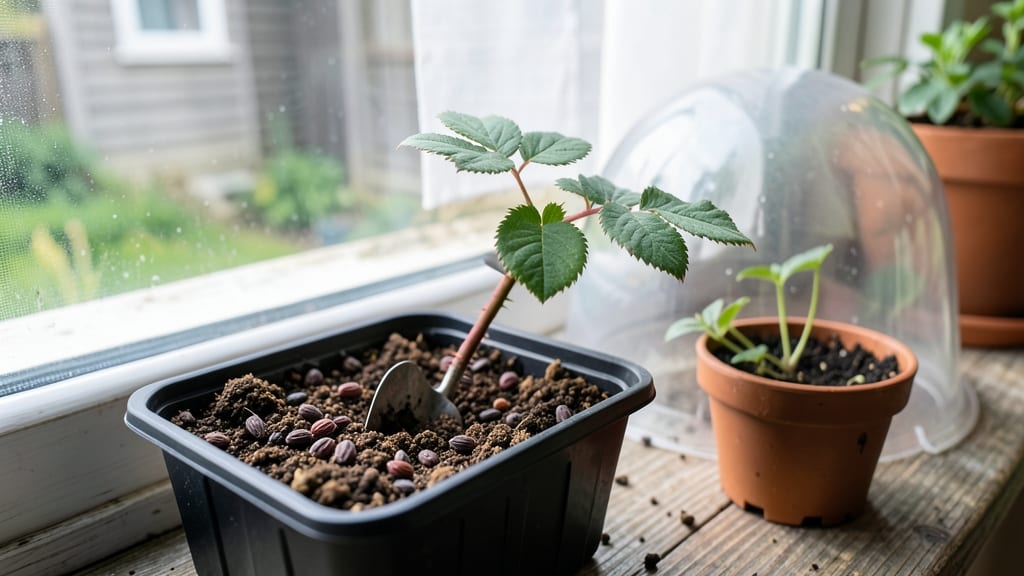
Growing roses from seed lets you create entirely new varieties from your garden's blooms—no nursery needed. 🌱 I've turned last year's spent roses into this year's thriving bushes by collecting seeds from hybrid teas, saving money and creating unique plants that match my yard's style perfectly.
The process starts with patience—germination takes 4-6 weeks, and seedlings grow slowly at first. You'll need a sunny spot, well-draining soil mix, and a heat mat to speed up sprouting. My first batch struggled until I added a simple bottom heat source—now I get consistent germination every time.
By summer's end, you'll have sturdy young plants ready for transplanting. With proper care, some varieties even bloom in their first year, though most need 1-2 seasons to reach full flowering potential. The payoff? Roses that look exactly like your favorites, with colors and shapes no store-bought plant can match.
This method works for any rose type—hybrid teas, floribundas, or even climbers. Just remember: seed-grown roses take longer to mature than grafted plants, but the satisfaction of growing something truly unique makes every extra month worthwhile. Let's get those seeds planted!
📚 In This Guide
- What you need
- Instructions
- Tips and common mistakes
- Wrapping up and next steps
What you need
- ● Rose seeds: Fresh, viable seeds (10–20 seeds per packet is ideal for experimentation). Pro tip: 💡 Collect seeds from healthy, organic roses for the best results!
- ● Seed-starting mix: A lightweight, sterile potting mix (1–2 bags, ~1–2 cubic feet total). Avoid garden soil—it’s too dense for seedlings.
- ● Small pots or seed trays: 2–4 inch pots (10–15 pots) or a seed tray with individual cells for easy transplanting.
- ● Clear plastic domes or plastic wrap: To create a mini greenhouse effect and retain moisture.
- ● Spray bottle: For gentle watering (avoid over-saturating the soil).
- ● Grow lights or sunny windowsill: Seedlings need 12–16 hours of light daily. A basic LED grow light (~$20–$50) works well.
- ○ Heat mat (optional but helpful): A seedling heat mat (~$15–$30) keeps soil warm (70–75°F) for faster germination.
- ● Patience: Rose seeds can take weeks to months to germinate—think of it as a slow-blooming adventure! 🌱
- ○ Stratification tools (optional): A refrigerator (for cold stratification) or a mix of sand/peat moss if you’re pre-treating seeds.
- ● Fertilizer (diluted): A balanced, water-soluble fertilizer (like 10-10-10) for seedlings once they sprout true leaves.
- ● Labeled markers: To track seed varieties and planting dates (toothpicks + masking tape work great!).
- ● Garden journal: To log progress, germination dates, and care notes—future you will thank present you!
Step-by-step instructions for harvesting and growing roses from seed
Turn this year's spent blooms into next season's garden stars with these simple, zero-waste techniques.
🌱 Step 1: Select and Prepare Mature Rose Seeds
Choose seeds from fully mature rose hips—look for deep red, orange, or purple hips that have swollen naturally on the plant. Squeeze gently to confirm they're firm, not mushy. Split open a few hips to reveal the seeds inside; they should be plump and dark brown, about 1/4 inch long. Remove any seeds that appear shriveled or discolored.
Here's the thing—rose seeds need a cold stratification period to break dormancy. Place the clean seeds in a sealed container with slightly damp sphagnum moss or paper towels. Store this container in your refrigerator's crisper drawer for 8-12 weeks. Check periodically to ensure the moss stays barely moist; soggy conditions will rot the seeds before they germinate.
☀️ Step 2: Sow Stratified Seeds in a Controlled Environment
After stratification, fill small seedling pots with a sterile seed-starting mix and plant the seeds 1/4 inch deep, spacing them 1 inch apart. I like to use individual 2-inch pots for each seed—this prevents overcrowding later. Gently press the soil around each seed to ensure good contact but don't compact it too tightly.
Place the pots under a grow light set to provide 12-14 hours of light daily. Roses need consistent warmth to germinate; maintain soil temperatures between 65-75°F. You'll see the first tiny sprouts in 4-8 weeks, though some varieties may take longer. Be patient—this is where most gardeners give up, but persistence pays off.
🌿 Step 3: Transplant and Harden Off Seedlings
Once seedlings develop their first true leaves (the second set after the initial cotyledons), they're ready to move to slightly larger 3-inch pots. Use the same seed-starting mix and avoid disturbing the roots as you transplant. Water gently after repotting to settle the soil around the delicate stems.
Two weeks before your last frost date, begin hardening off the seedlings. Start by placing them outside in a sheltered spot for 1-2 hours daily, gradually increasing their time outdoors over 10-14 days. Watch for signs of stress—wilting or yellowing leaves mean they're not ready for full sun yet. By the time they're acclimated, you'll have sturdy young plants ready to plant in the garden.
🪴 Step 4: Plant Seedlings in Permanent Garden Beds
Choose a location with full sun exposure (at least 6-8 hours daily) and well-draining soil. Roses hate soggy roots, so amend the soil with compost to improve drainage. Dig holes twice as wide as the root ball but only as deep as the container's height—planting too deep can suffocate the stems.
Space seedlings 18-24 inches apart, depending on the mature size of your rose variety. Water deeply after planting to help settle the soil and eliminate air pockets. Mulch around the base with 2-3 inches of organic mulch to retain moisture and suppress weeds. The first year, focus on establishing strong root systems rather than expecting blooms—your patience will reward you with vigorous plants next season.
Tips & tricks for perfect rose seed germination
Transforming rose seeds into thriving plants requires patience and precision—here's how to maximize your success without the common pitfalls.
Seed Selection Matters: When harvesting rose hips, prioritize those that are fully mature and firm to the touch. The seeds inside should be plump and dark brown—anything shriveled or discolored won't germinate. Pro tip: If you're unsure about maturity, squeeze the hip gently; it should feel firm like a small apple, not mushy or hollow. This careful selection directly impacts your 8-12 week stratification success rate.
Stratification Precision: The 8-12 week cold period in your refrigerator's crisper drawer is non-negotiable for breaking dormancy. I've learned this the hard way—skipping stratification means seeds either won't germinate or produce weak seedlings. Use a small plastic container with ventilation holes (like a takeout container with poke marks) to prevent mold while maintaining that barely-moist sphagnum moss environment. Check weekly to ensure the moss stays damp but not soggy—this is where most failures happen.
Lighting Strategy: Those critical 12-14 hours of grow light daily can't be substituted with natural light alone. Position your grow lights just 2-3 inches above the seedlings to provide consistent warmth (65-75°F soil temp) without overheating. I use a simple LED grow bulb on a timer—it's more cost-effective than full-spectrum systems and still delivers reliable results. Watch for the first sprouts between 4-8 weeks, though some varieties may take longer; don't be tempted to move them until you see true leaves forming.
Harden Off Gradually: The 10-14 day hardening process before transplanting is where most seedlings fail. Start with just 1-2 hours of sheltered outdoor exposure, then increase daily. I've seen seedlings wilt dramatically when moved too quickly—look for leaves that stay firm and green, not yellowing or curling. This gradual acclimation builds resilience that makes all the difference when you finally plant them in the garden.
Pro Tips for Rose Seed Grow A Garden
- Transforming rose seeds into thriving plants requires patience and precision—here's how to maximize your success without the common pitfalls.
- Seed Selection Matters: When harvesting rose hips, prioritize those that are fully mature and firm to the touch.
- Stratification Precision: The 8-12 week cold period in your refrigerator's crisper drawer is non-negotiable for breaking dormancy.
Frequently asked questions
Got questions about growing roses from seed? Here are some of the most common ones—and their answers—to help you get started on your zero-waste gardening journey!
How long does it take for rose seeds to germinate?
Rose seeds can take anywhere from a few weeks to several months to germinate, depending on the variety and conditions. Some seeds sprout in 4–6 weeks, while others may need up to 6 months of cold stratification (a natural process mimicking winter). Patience is key—keep them moist and warm (or refrigerated for stratification) and check regularly!
Do I need to stratify rose seeds before planting?
Yes! Most rose seeds benefit from cold stratification to break dormancy. Place seeds in a damp paper towel or peat moss, seal them in a plastic bag, and refrigerate for 4–8 weeks. This mimics winter conditions and significantly improves germination rates. Skip this step, and you might wait much longer for sprouts—or none at all!
Can I grow roses from store-bought seeds, or do they need to come from my own plants?
While you can grow roses from store-bought seeds, they may not produce the exact variety advertised—rose hybrids are often sterile or don’t breed true. For predictable results, save seeds from organic, heirloom, or wild roses in your garden. If you’re experimenting, try hybrid seeds, but expect surprises!
What’s the best soil mix for germinating rose seeds?
Use a light, well-draining mix like a 50/50 blend of peat moss or coconut coir and perlite or sand. Avoid heavy garden soil, which can compact and suffocate tiny seedlings. A shallow tray with drainage holes works perfectly—keep the mix moist but not soggy to prevent rot.
My rose seeds aren’t sprouting—what went wrong?
Don’t panic! Common issues include:
- Dry soil: Seeds need consistent moisture (but not waterlogging).
- No stratification: Many rose seeds won’t germinate without cold treatment.
- Old seeds: Viability drops after 1–2 years—fresh seeds sprout better.
- Poor light: Place trays in bright, indirect light (or under grow lights) once sprouted.
Wrapping up and next steps
Growing roses from seed is a rewarding way to cultivate zero-waste blooms while embracing sustainability. With patience, the right techniques, and a little care, you’ll soon be harvesting seeds to nurture next year’s garden.
Whether you’re a seasoned gardener or just starting out, every seed you save is a step toward a more vibrant, self-sufficient garden.
Ready to take the next step? Start small—plant a few seeds this season and watch your garden flourish. Share your progress with fellow gardeners or explore advanced propagation tips to expand your skills. Your future roses are waiting! 🌱✨