
Lawn
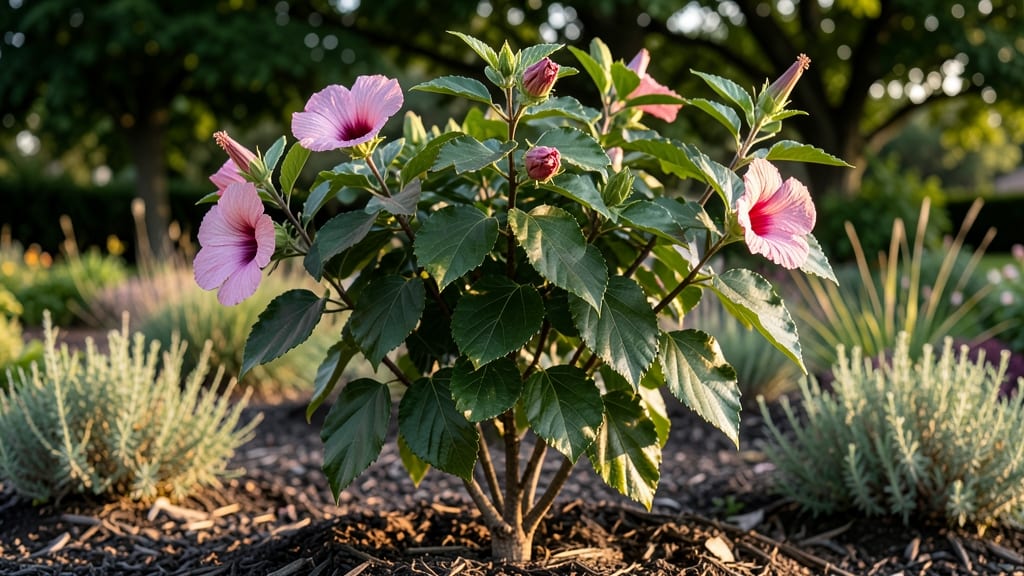
Harvesting Rose of Sharon seed pods means free plants next year—no nursery trips required. 🌿 The secret lies in timing: wait until pods turn brown and papery, then collect them before they split open.
I’ve propagated dozens this way, and the key is patience—these seeds need a cold period to germinate properly.
You’ll need just three things: sharp scissors, a paper bag for collecting pods, and a warm, sunny spot for drying. Once you’ve gathered them, crack open the pods to reveal the seeds inside—each one holds the potential for a stunning, fragrant shrub.
The process is simple, but getting the timing right makes all the difference.
With the right preparation, you’ll see sprouts within 4-6 weeks of planting, and by next summer, you could have a thriving Rose of Sharon bush. The best part? These plants grow 6-10 feet tall and bloom for weeks, turning your garden into a magnet for hummingbirds and butterflies.
Works in zones 4-9, and the seeds store well for up to a year if kept dry. Perfect for gardeners who love propagating from seed—here’s how to do it right the first time.
📚 In This Guide
- What you need
- Instructions
- Tips and common mistakes
- Wrapping up and next steps
What you need
- ● Rose of Sharon seed pods: Harvest fully dried, brown pods (avoid green or soft ones—those aren’t ready!). Aim for 50–100 pods for a good seed yield.
- ● Pruning shears or sharp scissors: Sterilized tools to snip pods cleanly (avoid tearing the stems).
- ● Paper bags or breathable fabric sacks: 2–3 medium-sized bags (12"x15") for drying and storage. No plastic—humidity is the enemy!
- ● Rubbing alcohol (70% isopropyl) & cotton swabs: For sanitizing tools before and after use.
- ● Labeling markers or tags: To mark bags with harvest date and storage location.
- ● Seed tray or shallow container: For spreading pods to dry evenly (if not using bags).
- ● Desiccant packets: Place 1–2 in storage bags to absorb excess moisture.
- ● Glove: A lightweight gardening glove to protect hands from prickly stems.
- ○ Digital scale (optional): To track seed weight for germination tests later.
How to harvest and store Rose of Sharon seed pods
Here’s my go-to method for collecting and storing these seeds—simple, reliable, and perfect for overwintering.
🌿 Step 1: Identify and Harvest Ripe Seed Pods
Wait until the seed pods turn a deep brown and begin to split open naturally—this usually happens in late fall after the blooms fade. Gently twist the pods from the stem; they should release easily when fully mature. If they’re still green or hard, leave them on the plant a few more days.
Harvest on a dry day to avoid moisture trapping inside the pods. Place them in a paper bag and let them dry in a warm, shaded spot for 3-5 days. This prevents mold and ensures the seeds inside are fully dry before storage. I like to spread them out on a tray lined with newspaper to catch any stray seeds that might pop out.
🪴 Step 2: Clean and Separate the Seeds
Once the pods are completely dry and brittle, crush them gently with your fingers or a mortar and pestle to release the seeds. Avoid pressing too hard—you want to break open the pods, not crush the seeds themselves. Sift the mixture through a fine mesh screen to separate seeds from chaff and debris.
Pick out any remaining pod fragments or foreign material by hand. Store the clean seeds in a small envelope or airtight container. Label it with the harvest date—this helps track seed viability, especially since Rose of Sharon seeds can lose potency after 1-2 years if stored improperly.
⏰ Step 3: Store Seeds for Long-Term Viability
Place the sealed container in a cool, dark place with consistent humidity—a refrigerator works perfectly. The ideal storage temperature is between 35-40°F, which slows seed aging. Avoid freezing, as extreme cold can damage the seeds over time.
Check the container every 6 months to ensure no moisture has condensed inside. If you notice any dampness, transfer the seeds to a fresh, dry container immediately. Properly stored, Rose of Sharon seeds should remain viable for 2-3 years, though germination rates may drop after the first year.
💧 Step 4: Test Seed Viability Before Planting
Before sowing, test a few seeds by placing them in a damp paper towel and sealing them in a plastic bag. Keep the bag in a warm spot (70-75°F) and check daily for sprouts. If 50% or more germinate within 7-10 days, your stored seeds are still good to use.
If germination is slow or weak, try soaking the seeds in lukewarm water for 12 hours before planting—this can help break dormancy. Plant the seeds ¼ inch deep in well-draining soil and keep them moist until sprouts appear. Patience is key; Rose of Sharon seeds can take 2-4 weeks to germinate.
Tips & tricks for perfect Rose of Sharon seed pod harvesting
Here's what I learned after years of trial and error—these little details make all the difference when working with delicate seed pods.
Timing is Everything: Harvest pods only when they're fully mature and beginning to split naturally. I can't stress this enough—green or firm pods won't yield viable seeds. The deep brown color and slight opening are your clear signals that it's time. If you harvest too early, you'll end up with seeds that won't germinate properly, and nobody wants to waste their time on that.
Drying Strategy: The 3-5 day drying period in Step 1 is crucial for preventing mold. I've learned the hard way that rushing this step leads to damp seeds that spoil quickly. Spread them out on newspaper-lined trays to catch any stray seeds that might escape during crushing. This also helps you see exactly what you're working with—no surprises when it's time to clean them up.
Storage Wisdom: That refrigerator storage at 35-40°F isn't just about keeping seeds cool—it's about maintaining consistent conditions. I've had seeds last 3 years in my fridge, but I've also seen them fail after just 1 year when stored in inconsistent kitchen environments. The key is that steady temperature and humidity. Check every 6 months because even small moisture changes can ruin your entire batch overnight.
Viability Test: The germination test in Step 4 is your quality control moment. I always test a small batch before planting my entire seed stash. If you're getting less than 50% germination after 10 days, it's time to collect fresh seeds. That lukewarm water soak for 12 hours is particularly helpful for older seeds—it mimics natural rainfall and helps break dormancy without damaging the seeds.
Pro Tips for Rose Of Sharon Seed Pods
- Here's what I learned after years of trial and error—these little details make all the difference when working with d...
- Timing is Everything: Harvest pods only when they're fully mature and beginning to split naturally. I can't stress th...
- Drying Strategy: The 3-5 day drying period in Step 1 is crucial for preventing mold. I've learned the hard way that r...
Frequently asked questions
Got questions about harvesting and storing Rose of Sharon seed pods? You’re not alone!
Here are the answers to the most common queries—from timing tips to troubleshooting tricks.
When is the best time to harvest Rose of Sharon seed pods?
The ideal time is late fall or early winter, once the pods turn brown and papery but before they split open naturally. Aim for mid-October to November in most climates. If you miss this window, pods may release seeds prematurely—so keep an eye out!
How do I know if the seeds inside are still viable?
Viable seeds should be plump, firm, and dark brown inside the pod. Test a few by crushing them—if they’re hard and dry, they’re likely good to go! Avoid seeds that feel shriveled or hollow, as they’ve lost viability. Store them in a cool, dry place for up to 2 years.
Can I use the seed pods for anything other than propagation?
While the seeds are the star, the dried pods themselves make stunning winter décor or dried arrangements. Just remove the seeds first—then hang them upside down to preserve their shape. Bonus: They add texture and rustic charm to floral designs!
What should I do if my pods are moldy or attracting pests?
If pods develop fuzz or dark spots, they’re likely moldy—discard them immediately. To deter pests like rodents or insects, harvest pods early and store them in airtight containers with a silica gel packet or rice grains (natural moisture absorbers). Never store them in damp areas!
Are there alternatives if my Rose of Sharon isn’t producing seed pods?
If your plant skips flowering or pod formation, try pruning lightly in early spring to encourage new growth. For guaranteed seeds, consider buying from a nursery or propagating via hardwood cuttings in late winter. Some varieties (like ‘Amajus’ or ‘U.S. Standard’) are more reliable seed producers!
Wrapping up and next steps
Harvesting and storing Rose of Sharon seed pods is a rewarding way to extend your garden’s beauty year-round—without the stress! Whether you’re saving seeds for propagation or crafting seasonal decor, these pods offer versatility and ease.
With the right timing, tools, and storage tricks, you’ll enjoy vibrant blooms and sustainable growth for seasons to come.
Ready to dive in? Start small—pick a sunny spot, gather your supplies, and follow the steps at your own pace. You’ve got this! 🌱✨