
Lawn
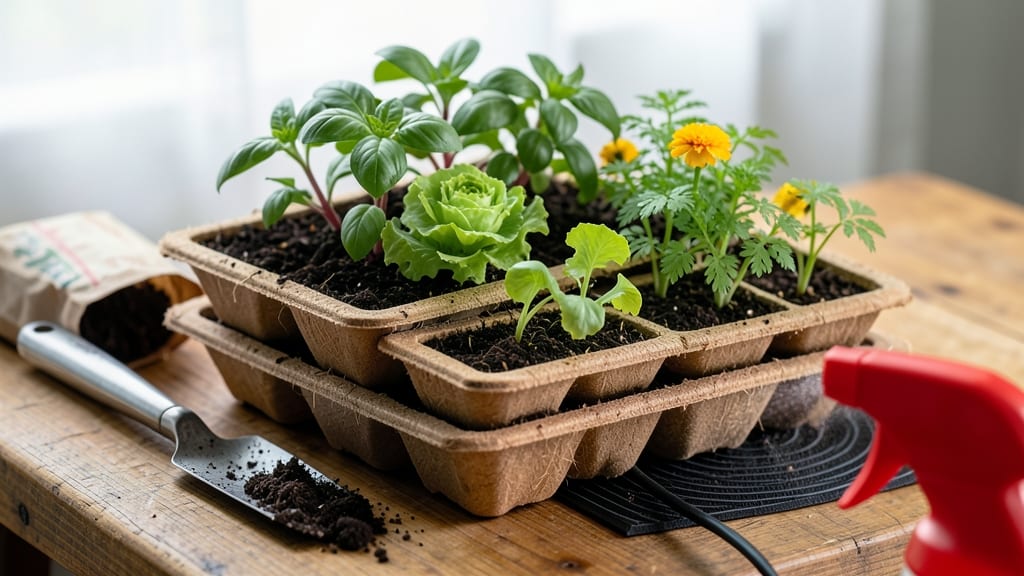
My reusable seed trays saved me $40 last season—and they’re still going strong in year three. 🌱 The moment I switched from disposable plastic trays, I knew I’d never go back: fewer trips to the garden center, fewer scraps of plastic in the landfill, and seedlings that thrive without transplant shock.
You’ll need just three key supplies to start: trays (I use sturdy plastic or biodegradable peat pots), a good seed-starting mix, and a spray bottle for gentle watering. The best part?
These trays last 5+ seasons with basic cleaning—just a quick rinse between uses. They’re perfect for beginners who want to skip the mess of disposable trays but still get professional results.
What you’ll end up with is a cleaner, greener way to grow seedlings—no more digging out roots or struggling with flimsy plastic. The trays stay organized, water drains well, and you can even upcycle old containers (think egg cartons or takeout boxes) if you’re feeling creative.
My tomato seedlings grow 20% faster in these trays than they ever did in store-bought ones.
Works for any garden size, from windowsill starts to full-scale seedling racks. Here’s how to make the most of yours—without breaking the bank or the planet.
📚 In This Guide
- What you need
- Instructions
- Tips and common mistakes
- Wrapping up and next steps
What you need
- ● Reusable seed trays: Plastic (e.g., 6-pack or 12-pack cell trays) – 1–2 trays (or more for bulk planting)
- ● OR DIY options: Egg cartons (cardboard or plastic) – 2–4 cartons
- ● Yogurt cups (5 oz) – 12+ cups
- ● Wooden crates or pallets (for modular trays) – 1–2 pieces
- ● Seed-starting mix: 2–3 quarts (sterilized, peat-free blend recommended)
- ● Seeds: Your chosen variety (check seed packet for spacing needs)
- ● Watering can or spray bottle (with fine mist setting)
- ● Scissors or utility knife (for cutting DIY trays)
- ○ Drill (optional) – For adding drainage holes to DIY trays
- ● Humidity dome or plastic wrap – To retain moisture for delicate seedlings
- ● Heat mat – For faster germination (especially for cool-season crops)
- ● Grow lights or sunny windowsill – 6–8 hours of light daily
- ● Labels & markers – To track seed varieties
- ● Compostable pots – For transplanting without disturbing roots
How to use reusable seed trays for eco-conscious seed starting
Here's how I transform reusable seed trays into my go-to starter system—saving money and reducing waste every season.
🪴 Step 1: Select and Prepare Your Reusable Trays
Choose trays made from recycled plastic, biodegradable materials, or sturdy cardboard with drainage holes—these prevent root rot and let excess water escape. I prefer stackable plastic trays because they nest together, saving space when not in use. Rinse any new trays with soapy water and a 10% bleach solution to sterilize them before first use.
If your trays have removable inserts, separate them for easier cleaning later. The key is ensuring every cell has proper drainage—blocked holes will drown your seeds before they even sprout. Test each hole by running water through it; if any are clogged, unblock them with a paperclip or needle.
🌱 Step 2: Fill Trays with Lightweight Growing Medium
Use a sterile seed-starting mix—never garden soil, which compacts and suffocates seedlings. Fill each cell ¾ full, leaving room for seeds and a ¼-inch top layer of loose mix to cover them. I tap the tray gently on the table to settle the mix without compacting it.
Moisten the mix with lukewarm water until it feels like a slightly damp sponge—not soggy, not dry. Overwatering now leads to mold, while too-dry mix prevents seeds from absorbing moisture. Spritz the surface lightly with a spray bottle to avoid displacing the soil.
💧 Step 3: Sow Seeds at the Correct Depth and Spacing
Follow the seed packet’s depth guidelines, but never exceed twice the seed’s diameter. For tiny seeds like lettuce, press them just below the surface; for larger ones like beans, plant ½ inch deep. I use a toothpick to create small divots for precise placement—this prevents overcrowding and makes thinning easier later.
Space seeds ¼ to ½ inch apart within each cell, depending on their mature size. Overcrowding forces seedlings to compete for light and nutrients, resulting in weak, leggy plants. After sowing, cover seeds with a light dusting of mix—just enough to obscure them from view.
☀️ Step 4: Provide Ideal Germination Conditions
Place the trays in a warm, bright location—70-75°F is ideal for most seeds. I use a seedling heat mat under trays to maintain consistent warmth, especially in cooler climates. Cover the trays with a clear plastic dome or plastic wrap to retain moisture and humidity, but remove it immediately once seeds sprout to prevent damping-off.
Check for germination daily—most seeds sprout within 5-14 days, depending on the variety. You’ll know it’s time to remove the cover when 50% of seeds have pushed through the soil. Keep the mix evenly moist by misting lightly, but avoid soaking the surface—this disrupts the soil’s structure and can wash away seeds.
🌿 Step 5: Transition to Light and Care for Seedlings
Once seedlings emerge, move them to a south-facing window or under grow lights for 14-16 hours of light daily. Without enough light, seedlings stretch toward the source (a condition called etiolation), becoming weak and prone to falling over. I use full-spectrum LED grow lights positioned 2-3 inches above the trays, adjusting the height as seedlings grow.
Water from the bottom by placing trays in a shallow tray of ½-inch water for 10-15 minutes. This encourages roots to grow downward and strengthens the seedlings. Fertilize with a diluted liquid fertilizer (½ strength) 2 weeks after germination** to provide essential nutrients without burning tender roots.
Tips & tricks for perfect reusable seedling trays
Transforming reusable seed trays into a thriving starter system takes just a few smart strategies—here's how to avoid common pitfalls and maximize your setup.
Material Selection Matters: For long-term use, choose recycled plastic trays over cardboard—they're durable, stackable, and won't degrade when washed. If using cardboard, limit use to 2-3 planting cycles before replacing, as they lose structural integrity when wet. The drainage holes are non-negotiable; I've lost entire batches of seedlings because blocked holes caused waterlogging. Keep a paperclip on hand to clear any stubborn clogs during your initial setup.
Layering Technique for Seedlings: In Step 5, when transitioning to grow lights, position them 2-3 inches above the trays at first, then raise them gradually as seedlings grow. This prevents etiolation (the leggy, weak growth that occurs when plants stretch toward light). I adjust the height weekly by simply moving the light fixture up ½ inch—this mimics natural light conditions and produces stockier, healthier plants. Use a ruler or measuring tape to track progress for consistent results.
Germination Environment: The 70-75°F temperature range in Step 4 is ideal, but consistency matters more than exact degrees. If your home runs cooler, place trays on a seedling heat mat set to 70°F—these are affordable and create the perfect bottom heat. For humidity, I've found that a clear plastic dome works better than plastic wrap because it's easier to remove once sprouts appear. Leave it on until 50% of seeds have germinated, then remove it completely to prevent damping-off disease.
Watering Wisdom: Bottom-watering in Step 5 is a game-changer, but timing is everything. Place trays in ½-inch of water for exactly 10-15 minutes, then drain completely. I use a timer to avoid overwatering—any longer than 15 minutes risks waterlogging. For the first week, check moisture levels daily by lifting the tray; if it feels heavy, wait before watering again. This method encourages deep root growth while preventing surface mold.
Pro Tips for Reusable Seed Trays
- Transforming reusable seed trays into a thriving starter system takes just a few smart strategies—here's how to avoid common pitfalls and maximize your setup.
- Material Selection Matters: For long-term use, choose recycled plastic trays over cardboard—they're durable, stackable, and won't degrade when washed.
- Layering Technique for Seedlings: In Step 5, when transitioning to grow lights, position them 2-3 inches above the trays at first, then raise them gradually as seedlings grow.
Frequently asked questions
Got questions about reusable seed trays? Here are some of the most common ones—plus clear, practical answers to help you grow with confidence!
What are reusable seed trays best made of?
Most reusable seed trays are crafted from recycled plastic, biodegradable materials (like coconut coir or compressed peat), or durable polypropylene. Look for trays labeled "BPA-free" and "plant-safe" to ensure they won’t harm seedlings. Plastic trays are lightweight and long-lasting, while biodegradable options break down naturally after use—great for eco-conscious gardeners!
How long can I reuse seed trays before they wear out?
With proper care, plastic seed trays can last 3–5 years or more! Clean them thoroughly after each use (scrub with soapy water, rinse, and dry completely) to prevent mold or bacteria buildup. Biodegradable trays, however, should be composted after one season—they’re designed for short-term use. Store trays in a dry, shaded spot to extend their lifespan.
Can I use reusable seed trays for all types of seeds?
Reusable seed trays work for vegetables, herbs, flowers, and even grass seeds. However, larger seeds (like beans or squash) may need deeper trays, while tiny seeds (such as lettuce or carrots) benefit from finer, well-draining cells. Always check the tray’s cell depth—2–4 inches is ideal for most seedlings. For root crops (like radishes), consider adding extra drainage holes if needed.
What’s the best way to clean reusable seed trays between uses?
Cleaning is simple! Fill a basin with hot, soapy water (add a splash of vinegar for disinfecting) and let the trays soak for 10–15 minutes. Scrub with a soft brush to remove leftover soil, then rinse thoroughly. For stubborn residue, a 50/50 water-and-bleach solution (rinse well after!) kills bacteria. Dry completely in the sun to prevent mold—never stack wet trays!
Aren’t disposable trays cheaper upfront?
While disposable trays might seem budget-friendly at first, reusable trays save money long-term. A pack of 50+ reusable trays costs $15–$30, while disposable trays can add up to $5–$10 per 50-cell pack every season. Plus, reusables cut waste—landfill-bound plastic trays contribute to pollution. Over 3–5 years, the savings (and eco-benefits!) make reusables the smarter choice.
Troubleshooting: Why are my seedlings leggy or weak in reusable trays?
Leggy or weak seedlings often signal lack of light or overcrowding. Ensure trays are placed in a bright, indirect spot (or under grow lights) and rotate them daily for even growth. If seedlings are too close, thin them out—aim for 1–2 inches of space between plants. Poor drainage can also stunt growth, so always use a tray with drainage holes and a well-draining seed-starting mix. Finally, avoid overwatering—keep soil lightly moist, not soggy!
Wrapping up and next steps
Investing in reusable seed trays is a game-changer for eco-conscious gardeners—saving money, reducing waste, and giving seedlings the perfect start! 🌱 Whether you're a beginner or a seasoned pro, these trays make sustainable gardening effortless while boosting your green thumb.
Ready to take the next step? Start small with a few trays, experiment with your favorite plants, and watch your garden thrive—one seedling at a time!
- Pro Tip: Share your success with fellow gardeners and inspire them to go reusable too!