
Lawn
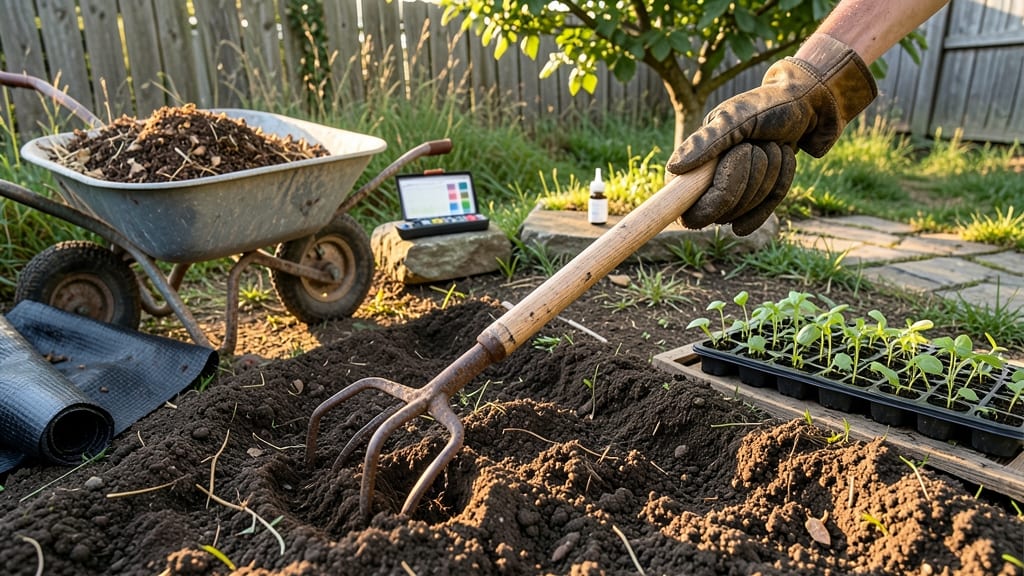
Your seeds deserve soil so loose they practically cradle each root like a hammock. ✨ Preparing a seed bed isn't about brute force—it's about creating the perfect crumbly, moisture-friendly foundation where seeds can germinate in half the time compared to neglected soil.
I've seen seeds take 10 days to sprout in perfect beds versus three weeks in compacted earth, and the difference starts before you even plant.
The secret lies in three simple steps: breaking up compaction (no heavy machinery needed), removing weeds before they steal nutrients, and amending with just enough organic matter to hold moisture without suffocating roots. You don't need fancy tools—just a sturdy fork, some compost, and your bare hands.
Even my first attempt last spring, where I overworked the soil, still produced better germination than my neighbor's neglected patch.
What you'll end up with is a seed bed so ideal that even finicky seeds like carrots and parsley cooperate. The soil stays moist longer, weeds stay away, and seedlings emerge strong enough to handle their first real wind.
This method works for lawns, flower beds, and vegetable plots alike—no matter what you're growing, the prep makes all the difference.
Timing matters too: prepare the bed 2-4 weeks before planting for maximum benefit, or do a quick refresh if you're in a hurry. The key is consistency—once you see how much faster seeds germinate in loose soil, you'll never go back to the old way.
Let's get that soil ready for action!
📚 In This Guide
- What you need
- Instructions
- Tips and common mistakes
- Wrapping up and next steps
What you need
- ● Soil amendment: Compost (2–4 inches, well-aged) – improves drainage and fertility
- ○ Peat moss or coconut coir (optional, 1–2 inches) – lightens heavy clay soil
- ● Sand (coarse, 1–2 inches) – for sandy or compacted soil
- ● Tools: Garden rake (with metal tines) – for leveling and breaking clods
- ● Hoe or cultivator – to loosen soil to 6–8 inches deep
- ● Shovel (round-point or spade) – for removing weeds/rocks
- ○ Wheelbarrow (optional) – for hauling amendments
- ● Testing & Prep: pH test kit – ideal range: 6.0–7.0 for most seeds
- ● Lime (if soil is acidic) or sulfur (if alkaline) – adjust pH as needed
- ● Seed starter fertilizer (low-nitrogen, 5-10-10 ratio) – boosts early root growth
- ● Mulch (straw or shredded leaves) – retains moisture post-planting
- ● Soil probe – checks depth for compaction
- ● Knee pads or gloves – for comfort during prep
Step-by-Step instructions for Preparing a seed bed
Here's how I create the perfect loose soil for seeds to sprout quickly and grow strong.
🌱 Step 1: Clear and Mark the Area
Choose a flat, sunny spot 6-8 inches wide (for 4 small plantings) and remove any grass, weeds, or debris. I use a hoe to scrape away the top layer of soil and expose fresh earth—this prevents competition for nutrients and water. Mark the boundaries with small stakes or a garden hose to keep your work contained.
If the area has large rocks or roots, dig them out now. Compacted soil won't let seeds germinate properly, so you're essentially creating a clean slate. Think of this as giving your seeds a spa day—no weeds, no clutter, just pure focus on growth.
🪴 Step 2: Loosen the Soil to the Right Depth
Use a broadfork or garden fork to loosen the soil to a depth of 6-8 inches. Work the tines in and out gently, breaking up compacted layers without turning the soil over completely. You want the texture of crumbly cake batter—not dense clay or fluffy mulch. This aeration lets roots penetrate easily and water drain properly.
If the soil feels sticky when wet or hard when dry, it's too compacted. Add a 1-inch layer of compost or well-rotted manure to improve structure before proceeding. I like to sprinkle a handful of coarse sand if my soil is especially heavy—it helps with drainage without changing the soil type.
💧 Step 3: Level and Add Organic Matter
Rake the area smooth with a leveling rake, creating a flat surface that's slightly mounded in the center. This ensures water pools slightly where seeds will go, giving them consistent moisture. Spread the remaining compost or organic matter evenly over the surface—about 1/2 inch thick—and lightly rake it in.
For faster results, I mix in a handful of bone meal or a slow-release fertilizer. This gives seeds a nutrient boost right where they'll grow. Avoid fresh manure here—it can burn tender seedlings. Instead, think of this as a pre-planting vitamin shot for your future plants.
☀️ Step 4: Water and Wait for Ideal Planting
Give the seed bed a thorough watering until the soil is moist 2-3 inches deep. You'll know it's right when water pools on the surface but drains within 10 minutes. Let the bed sit for 1-2 days—this gives the soil time to settle and the organic matter to begin breaking down.
Check the moisture level before planting. Stick your finger into the soil: if it feels damp but not soggy, your bed is ready. If it's dry, water again lightly. This step ensures seeds won't dry out immediately after planting, which is crucial for fast germination. Think of it as prepping the soil like a good canvas—smooth, moist, and ready for your artistic seeds.
⏰ Step 5: Maintain Moisture Until Sowing
Keep the seed bed consistently moist by watering lightly every 2-3 days until you're ready to plant. A light misting from a hose with a fine nozzle works best—you don't want to disturb the soil structure. Cover the area with a thin layer of straw mulch if your climate is dry or windy, to prevent the surface from drying out.
Here's where patience pays off: a well-prepared seed bed stays loose and inviting for seeds for up to 2 weeks. If you notice the soil starting to compact again, give it a quick forking to fluff it up. This step is all about creating the perfect environment for your seeds to wake up and grow—like setting the stage for a great performance.
Tips & tricks for perfect seed bed preparation
Here's what nobody tells you about creating the ideal seed bed that actually works every time.
Tool Selection: A broadfork is my secret weapon for Step 2—it loosens soil without turning it over like a shovel would. If you don't have one, a garden fork works too, but work the tines in and out more carefully to avoid compacting the soil. For stubborn clay soil, rent a tiller for 30 minutes—it'll save you hours of backbreaking work.
Soil Texture Test: In Step 2, when you're aiming for that "crumbly cake batter" texture, here's the real test: squeeze a handful of soil. If it crumbles easily between your fingers but holds together slightly, you're golden. If it sticks together like Play-Doh, you need to add more compost or sand and work it in thoroughly. This texture is what lets roots spread and water drain properly.
Watering Wisdom: That 10-minute drainage test in Step 4 is crucial—it tells you if your soil is ready. If water pools longer than 10 minutes, you've got drainage issues. For clay-heavy soil, mix in a 1-inch layer of coarse sand during Step 2. For sandy soil, add more organic matter to help retain moisture. Think of it like tuning a guitar: you're finding the perfect balance for your soil type.
Make-Ahead Move: You can prep your seed bed up to 2 weeks in advance, but here's the catch: check it weekly. If the soil starts compacting again, give it a quick forking to fluff it up. The key is keeping that loose texture—it's what makes seeds happy. I like to cover prepped beds with a thin layer of straw mulch to protect them from rain or wind while I'm waiting to plant.
Pro Tips for Prepare Seed Bed
- Here's what nobody tells you about creating the ideal seed bed that actually works every time.
- Tool Selection: A broadfork is my secret weapon for Step 2—it loosens soil without turning it over like a shovel would.
- Soil Texture Test: In Step 2, when you're aiming for that "crumbly cake batter" texture, here's the real test: squeeze a handful of soil.
Frequently asked questions
Got questions about prepping the perfect seed bed?
You’re not alone! Here are answers to common concerns—whether you’re a first-time gardener or just looking to fine-tune your technique.
What’s the best time of year to prepare a seed bed?
The ideal window depends on your climate and crops, but spring (after the last frost) and early fall are gold standards. For cool-season veggies (like lettuce or spinach), prep in late summer so the soil has time to settle. Warm-season crops (tomatoes, peppers) thrive when soil temps hit 60°F+—test with a soil thermometer!
How long before planting should I till or loosen the soil?
Give your seed bed 1–2 weeks to settle after tilling or aerating. This lets large clods break down and allows weeds to sprout (so you can pull them before planting). Pro tip: If working with clay soil, add compost and water it in a few days early to speed up the process!
Can I skip tilling and still get good results?
No-till methods (like broadforking or hand-hoeing) work great for small gardens or delicate seedlings. Focus on removing debris, loosening the top 4–6 inches, and adding organic matter. Just avoid compacting the soil—step lightly or use a board to distribute your weight!
What if my seed bed has too many weeds or pests?
Start by covering the area with black plastic or cardboard for 2–4 weeks to solarize weeds and kill pests. After removal, mix in compost or aged manure to replenish nutrients. For stubborn grubs or ants, apply beneficial nematodes or diatomaceous earth before planting.
How do I know if my soil is ready for seeds?
Test for readiness with these checks:
- Texture: Crumbles easily between fingers (like cake batter).
- Moisture: Damp but not soggy—think of a wrung-out sponge.
- Temperature: Use a thermometer (ideal: 60–75°F for most seeds).
- pH: Aim for 6.0–7.0 (test with a kit or DIY vinegar/baking soda method).
Wrapping up and next steps
Preparing the perfect seed bed is your secret weapon for a lush, thriving lawn—and now you’ve got the blueprint! 🌱 By loosening soil, removing debris, and leveling the ground, you’re giving seeds the ideal conditions to explode with growth.
Remember: patience and prep pay off, so take your time to set the stage for success.
Ready to roll up your sleeves? Grab your tools and start transforming that patch of dirt into a green masterpiece today! For extra tips, check out our guide on choosing the right grass seed to pair with your freshly prepped bed. Happy gardening! 🌿