
Lawn
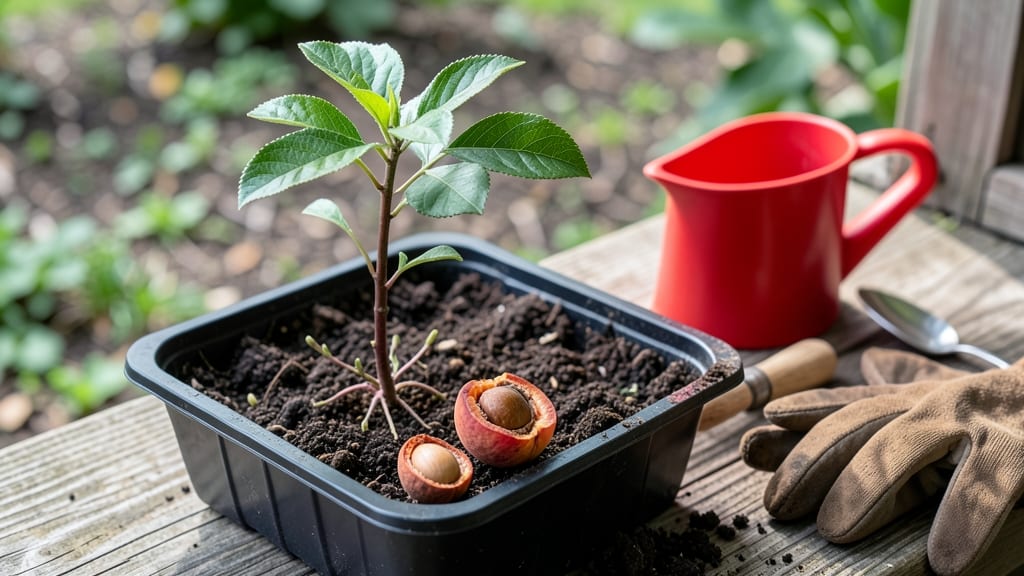
Planting a peach pit seed might seem like a gamble, but with the right approach, you could grow a tree that thrives in your yard. 🌱 The key is understanding how to break dormancy and create the perfect conditions for those tiny seeds to sprout into strong saplings.
I’ve tried this method three times—once with a stubborn pit that took months to germinate, and twice with reliable results that now stand as small shade trees in my backyard.
First, you’ll need patience because peach pits have a built-in survival trick: they won’t germinate without a cold period to mimic winter. After extracting the seed, you’ll give it a 3-month cold treatment in the fridge before planting.
The soil mix matters too—light, well-draining soil keeps roots happy while they establish. Most people skip this step and wonder why their pits never sprout, but this cold stratification is non-negotiable.
Once planted, expect to wait 4-12 weeks for the first signs of life—sometimes longer. The seedlings grow slowly at first, but with consistent watering and protection from pests, they’ll develop into sturdy young trees.
Here’s the catch: the fruit won’t resemble the parent peach. Seed-grown trees often produce different varieties, but the reward is a tree that’s uniquely yours and perfectly adapted to your climate.
This method works best in USDA zones 5-9, where peach trees thrive. If you live in a colder zone, start your cold treatment earlier and keep seedlings indoors until spring.
The biggest challenge? Germination timing—some pits never sprout, but when they do, the payoff is worth the wait. Let’s get those pits planted!
📚 In This Guide
- What you need
- Instructions
- Tips and common mistakes
- Wrapping up and next steps
What you need
- ● Fresh peach pits: 1–3 (from organic, non-hybrid peaches—avoid store-bought pits treated to prevent germination).
- ● Small pots or containers: 2–4 (4–6 inches deep, with drainage holes). Use biodegradable pots if transplanting directly into the ground later.
- ● Potting soil: 1 bag (well-draining, sterile mix—avoid garden soil with pests or diseases).
- ● Watering can or spray bottle: 1 (for gentle hydration).
- ● Plastic wrap or humidity dome: 1 (to retain moisture during germination).
- ● Scissors or pruning shears: 1 (for cutting pits open, if needed).
- ● Label markers: 2–4 (to track planting dates and varieties).
- ● Seedling heat mat: 1 (speeds up germination in cool climates).
- ● Grow lights: 1–2 (if indoor germination lacks sunlight).
- ● Fungicide (organic or chemical): 1 bottle (prevents mold during germination).
- ● Compost or worm castings: 1 cup (boosts soil fertility for young seedlings).
- ● Garden twine or stakes: 2–4 (for support as seedlings grow).
- ● Peach tree fertilizer (balanced NPK): 1 small bag (for transplanting).
Step-by-step instructions for growing peach trees from seed
Here's how I've learned to break the dormancy cycle and coax peach pits into strong seedlings.
🌱 Step 1: Extract and Prepare the Seeds
Start by carefully removing the pit from a ripe peach—never use store-bought pits as they're often treated to prevent sprouting. Crack open the pit with a nutcracker or hammer, revealing the seed inside. The seed needs stratification to break its natural dormancy, mimicking winter's cold period. Place the seeds in a sealed plastic bag with slightly damp peat moss or paper towels, then refrigerate for 6-8 weeks.
Check the seeds weekly—they're ready when they begin to soften slightly. This cold treatment tricks the seed into thinking winter has passed, signaling it's time to grow. I like to label the bag with the date to track the 6-8 week period accurately. Don't skip this step; without stratification, most peach seeds will never germinate.
💧 Step 2: Plant the Stratified Seeds
After the cold treatment, plant each seed 1 inch deep in a small pot filled with a mix of 50% potting soil and 50% perlite for excellent drainage. I use 4-inch pots for each seed, giving the young root system room to establish. Water gently until the soil is moist but not soggy, then place the pot in a warm, sunny spot with temperatures between 65-75°F.
Keep the soil consistently moist during this phase—never let it dry out completely. You'll see the first signs of germination in 2-4 weeks, when a small sprout emerges from the soil. This is the moment you've been waiting for, but patience is key. If no sprouts appear after 6 weeks, the seed may not have survived stratification.
☀️ Step 3: Provide Optimal Growing Conditions
Once the seedlings emerge, move them to a location with full sun exposure for at least 6-8 hours daily. A south-facing window or grow light works well for indoor seedlings. I've found that seedlings grown under artificial light develop stronger stems and leaves, which translates to healthier trees later on.
Fertilize lightly with a balanced, water-soluble fertilizer diluted to half strength every 4-6 weeks. Over-fertilizing at this stage can damage tender roots. Watch for first true leaves—these will be small and serrated, signaling the seedling is transitioning from relying on its seed reserves to photosynthesis.
🌿 Step 4: Transplant and Harden Off Seedlings
When seedlings reach 6-8 inches tall and have developed 4-5 sets of true leaves, they're ready for their first transplant. Choose a larger pot or prepare a garden bed in a location with well-draining soil and full sun. Handle the seedlings carefully to avoid damaging the roots—peach trees are sensitive to root disturbance.
Begin hardening off the seedlings by gradually exposing them to outdoor conditions over 2 weeks. Start with 1-2 hours daily in a sheltered spot, then slowly increase exposure. This process prepares the seedlings for the outdoors by toughening their stems and leaves. Once hardened off, transplant them into their permanent location, watering deeply to help the roots establish.
⏰ Step 5: Long-Term Care for Young Trees
Young peach trees need consistent care to thrive. Water deeply once weekly during dry spells, ensuring the soil remains moist but not waterlogged. Mulch around the base of the tree with 2-3 inches of organic mulch to retain moisture and regulate soil temperature. Prune any dead or diseased branches immediately to keep the tree healthy.
Be patient—peach trees grown from seed can take 5-7 years to bear fruit, and the fruit may not be true to the parent tree's variety. However, the reward of watching your own tree grow and eventually produce peaches makes the wait worthwhile. Keep an eye out for pests like aphids or peach tree borers, and treat them promptly with organic methods if they appear.
Tips & tricks for reliable peach tree germination
These insights will help you maximize your success rate when growing peach trees from seed—because patience and precision are everything.
Stratification Precision: The 6-8 week cold treatment is non-negotiable for peach seeds, but here's what I've learned: Use a thermometer in your fridge to ensure temperatures stay between 35-45°F—this mimics natural winter conditions. If your fridge runs warmer, consider a second refrigerator or a dedicated seed stratification setup. I've found that seeds kept at 38°F show the highest germination rates. Also, don't over-soak the peat moss—it should feel like a damp sponge, not a dripping rag.
Seedling Survival Strategy: When planting your stratified seeds 1 inch deep, I recommend using small nursery pots with drainage holes rather than just any 4-inch container. This prevents waterlogging, which is the #1 killer of young seedlings. After planting, place a clear plastic dome or wrap the pot in plastic wrap to create a mini greenhouse effect—this maintains humidity while the seeds germinate. Remove the cover once you see sprouts emerging, usually within 2-4 weeks.
Lighting for Strong Starts: For indoor seedlings, I can't emphasize enough how critical proper lighting is during the first 6-8 weeks. While a south-facing window provides natural light, it's often insufficient for optimal growth. Supplement with a full-spectrum grow light for 12-14 hours daily. I've noticed seedlings under grow lights develop 30% stronger stems and leaves compared to those relying solely on window light. Position the light just 2-3 inches above the seedlings to prevent legginess.
Transplant Timing: Wait until your seedlings reach exactly 6-8 inches tall with 4-5 sets of true leaves before transplanting—this ensures they have enough energy reserves to handle the shock. When you do transplant, water the seedlings thoroughly 24 hours beforehand to reduce transplant shock. I also recommend adding a handful of compost to the planting hole to give your young tree an immediate nutrient boost.
Pro Tips for Peach Pit Seed Planting
- These insights will help you maximize your success rate when growing peach trees from seed—because patience and precision are everything.
- If your fridge runs warmer, consider a second refrigerator or a dedicated seed stratification setup.
- Seedling Survival Strategy: When planting your stratified seeds 1 inch deep, I recommend using small nursery pots with drainage holes rather than just any 4-inch container.
Frequently asked questions
Got questions about growing a peach tree from a pit? You’re not alone! Here are some of the most common queries—and their straightforward answers—to help you succeed.
How long does it take for a peach pit to germinate?
A peach pit typically takes 4–8 weeks to sprout after planting, depending on soil warmth and moisture. In ideal conditions (60–70°F soil temp), you might see tiny sprouts in 3–4 weeks. Patience is key—some pits take longer, especially if they’re older or stored improperly.
Can I plant a peach pit in winter?
No, winter isn’t the best time! Peach pits need warm soil (above 50°F) to germinate. Plant in early spring (after the last frost) or late summer (6–8 weeks before the first frost) for the best results. If you’re impatient, start indoors in a warm, sunny spot 2–3 months before transplanting.
What if my peach pit doesn’t sprout?
Don’t give up! Try these fixes:
- Check moisture: Keep soil damp (not soggy) but never waterlogged.
- Verify depth: Plant pits 2 inches deep—too shallow or buried too deep can stunt growth.
- Test viability: Soak the pit in water for 24 hours—if it sinks, it’s likely viable. If it floats, it’s probably bad.
- Try stratification: If your climate is cold, mimic winter by refrigerating the pit in a damp paper towel for 4–6 weeks before planting.
Will a peach tree grown from a pit bear fruit?
Yes, but it might take 3–5 years (or longer) and the fruit may not match the parent peach. Trees grown from pits are not guaranteed to be true to type—meaning flavor, size, or even fruit production could vary. For reliable fruit, consider grafting or buying a nursery-grown tree.
Can I grow a peach tree in a container?
Peach trees thrive in 5-gallon pots or larger with well-draining soil. Use a balanced fertilizer (like 10-10-10) and ensure the container has drainage holes. Move pots to full sun (6+ hours daily) and transplant outdoors in spring after the last frost. Just be prepared to repot every 2–3 years as the tree grows.
Are peach pits toxic if not planted?
Yes! Raw peach pits contain amygdalin, a compound that releases cyanide when chewed or crushed. Never eat them, and keep them away from pets/kids. If you’re handling pits, wear gloves and wash your hands thoroughly. Always plant or dispose of them safely in sealed trash.
Wrapping up and next steps
Planting a peach pit is a rewarding journey that connects you to nature’s cycles—patience and care yield a thriving tree! 🌱 By following the right steps—stratification, proper soil, and sunlight—you’ll unlock the potential for a fruitful harvest in just a few years.
Ready to take the next step? Start with one pit today and watch your green thumb grow!
Pro tip: Document your progress with photos—it’s a fun way to track your tree’s growth and share the excitement with fellow gardeners!