
Lawn
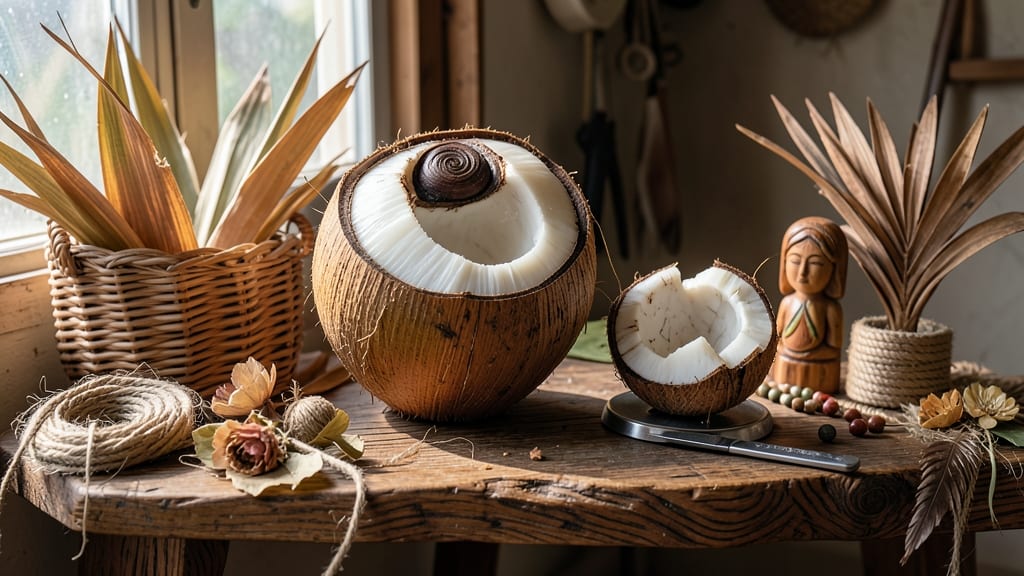
Transforming palm seed pods into whimsical garden art turns ordinary yard clutter into stunning focal points. 🌿 I’ve turned dozens of these fibrous pods into everything from wind chimes to planters, and the best part? They’re free if you know where to look.
The secret starts with sourcing—check local parks or palm tree-lined streets after storms when pods wash up. Once you’ve gathered them, a simple soak in vinegar and water removes dirt and pests, leaving you with clean, ready-to-use materials. No fancy tools needed, just patience and creativity.
Imagine a rustic chandelier made of dried pods swaying in your breeze, or a planter that doubles as a conversation piece. The possibilities are endless, and each piece tells a story of where it came from. Your garden will never look the same.
This project works year-round, whether you’re refreshing summer decor or adding winter charm. Start small with a single piece, then let your collection grow—just like the palms that inspired it.
📚 In This Guide
- What you need
- Instructions
- Tips and common mistakes
- Wrapping up and next steps
What you need
- ● Palm seed pods: 10–50 pods (depending on project size; larger pods like Cocos nucifera or Borassus flabellifer work best)
- ● Fresh or dried (dried pods are lighter and easier to carve)
- ● Adhesives: Epoxy resin (for durable bonds) – 1 small bottle (4 oz)
- ● OR strong wood glue (for lighter projects) – 1 tube (8 oz)
- ● Base structure: Wooden dowels or branches (for stability) – 2–4 pieces (½"–1" diameter)
- ● OR a pre-made wire frame (for flexibility)
- ● Sandpaper: Medium (120–150 grit) and fine (220+ grit) – 1 sheet each
- ● Paint or sealant: Acrylic paint (for color) – 1–2 small tubes
- ● OR outdoor varnish (for natural finish) – 1 quart
- ● Carving tools: Dremel tool OR X-Acto knife (for precision cuts)
- ● Rasp or file (for smoothing edges)
- ● Measuring tape or ruler (for accuracy)
- ● Clamps (to hold pieces in place while drying)
- ● Paintbrushes (varied sizes for detailing)
- ● Safety gear: Gloves, goggles, and a dust mask (for sanding)
- ● Twine or fishing line (for hanging mobile pieces)
- ● Moss or dried flowers (for natural embellishments)
- ● LED string lights (to illuminate your sculpture at night!)
- ● Stencils or templates (for intricate designs)
How to create whimsical palm seed pod garden sculptures
Turn nature’s discarded treasures into playful garden art with these simple, creative steps.
🌿 Step 1: Forage and Select Your Palm Seed Pods
Collect pods from palm trees after they’ve fallen naturally—never cut them down. Look for ones that are dry, cracked, or split open, as these make the best textures for art. I like to gather a mix of sizes: a few large, dramatic ones as focal points and smaller pods for intricate details. Rinse them gently with water to remove dirt, but let them dry completely in the sun before crafting.
Here’s the thing—some pods will be too fibrous or brittle. Test a few by bending them slightly: if they snap easily, skip them. The best pods hold their shape but still feel lightweight enough to arrange freely. A handful of 4-6 pods gives you enough variety to start a small sculpture.
✂️ Step 2: Clean and Prep the Pods for Assembly
Use a sharp knife or pruning shears to trim away any remaining fibrous strands or dried fruit clusters still attached to the pods. Work carefully—these fibers can be stubborn, so I like to cut them close to the pod’s base rather than pulling. For extra texture, leave some natural ridges and cracks intact; they’ll add character to your piece.
If you’re using pods with seeds still inside, you can either leave them as-is for a rustic look or remove them by gently prying them out with a screwdriver. Just don’t force it—some seeds are stubborn, and you don’t want to damage the pod’s structure. Once prepped, let the pods sit in a dry, shaded spot for 24 hours to ensure all moisture has evaporated.
🪴 Step 3: Design and Assemble Your Sculpture
Start by sketching a rough design on paper—even a simple outline helps visualize how the pods will fit together. I often begin with the largest pod as the base or centerpiece, then arrange smaller pods around it to create balance. For example, a tall, upright pod can become the "trunk" of a whimsical tree, while smaller pods cluster around it like leaves or branches.
Use hot glue or strong craft glue to attach the pods. Hot glue works best for quick adjustments, but if you’re making something permanent, a two-part epoxy holds up better in outdoor conditions. Apply glue sparingly to the back of each pod and press it into place, holding for 10-15 seconds to ensure a strong bond. Let the glue dry completely before moving the sculpture.
☀️ Step 4: Seal and Weatherproof Your Art
Once your sculpture is fully assembled, seal it with an outdoor-rated polyurethane or acrylic sealant to protect it from rain and sun. Apply a thin, even coat with a brush, letting each layer dry for 2-4 hours before adding another. Two coats should suffice for most pieces. If your sculpture has intricate details, use a spray sealant for better coverage.
Let the sealant cure for 24 hours before placing your art in the garden. Here’s where it gets fun—position it where it catches the light, like near a pathway or under a tree where it’ll cast interesting shadows. Over time, the pods will fade slightly but retain their charm, blending beautifully with the surrounding greenery.
🌱 Step 5: Maintain and Enjoy Your Creation
Check your palm pod sculpture occasionally to ensure the sealant is holding up. If you notice any cracks or peeling, touch up with another coat of sealant as needed. Avoid placing it in areas where it might get bumped by foot traffic—these pieces are lightweight but delicate over time.
Real talk: your sculpture will become a conversation starter. Neighbors and visitors will ask how you made it, so be ready to share the story of turning "trash" into treasure. And if a pod shifts or loosens over the years, don’t stress—just pop it back into place with a dab of glue. These pieces are meant to evolve with your garden.
Tips & tricks for whimsical palm seed pod art
Here’s what nobody tells you about making these nature-inspired sculptures—lessons I learned after a few wobbly attempts.
Selection is Everything: In Step 1, don’t just grab any pods! Look for ones with interesting natural cracks or splits—they create perfect textures for details like tree bark or animal scales. I once used a pod with a deep spiral pattern as the "trunk" of a whimsical tree sculpture, and it became the focal point. The 4-6 pods you gather should include at least one with unique features to anchor your design.
Drying Time Matters: That 24-hour drying period in Step 2 isn’t just about moisture—it’s about stability. Wet pods can warp when you glue them, ruining your carefully planned structure. Place them on a wire rack in a breezy spot rather than crammed together. I learned this the hard way when my first sculpture started sagging after a week in the rain—proper drying makes all the difference.
Glue Placement Technique: When assembling in Step 3, apply glue to the back of the pod rather than the front where it’ll be visible. A tiny dot in the center holds better than smearing glue everywhere. For larger pieces, I use a toothpick to spread glue precisely—it gives you more control than squeezing from the bottle. And always hold that 10-15 second press! Rushing leads to wobbly connections that won’t last.
Sealant Layering Secret: For Step 4, let that first sealant coat dry completely before adding the second—even if it looks dry to the touch. I once rushed and got sticky residue all over my garden path. Use a soft brush for intricate areas and a foam roller for flat surfaces. The 2-4 hour drying time between coats is your friend; it prevents drips and ensures even protection.
Pro Tips for Palm Seed Pod Art
- Here’s what nobody tells you about making these nature-inspired sculptures—lessons I learned after a few wobbly attem...
- Selection is Everything: In Step 1, don’t just grab any pods! Look for ones with interesting natural cracks or splits...
- Drying Time Matters: That 24-hour drying period in Step 2 isn’t just about moisture—it’s about stability. Wet pods ca...
Frequently asked questions
Got questions about turning palm seed pods into stunning garden art? You’re not alone! Here are some of the most common queries—and their answers—to help you dive in with confidence.
How do I know when palm seed pods are ready for crafting?
Palm seed pods are best when fully mature but still slightly flexible—think "dry but not brittle." Look for pods that have fallen naturally (no green flesh inside) and have a light brown or tan hue. If they’re too hard, they may crack unpredictably. Pro tip: Collect them after a rain when they’re softer and easier to shape!
Can I use any type of palm seed pod for art?
Most palm seed pods work, but some are easier than others! Coconut husks and Sabal palm pods are popular for their size and durability. Avoid overly fibrous or thorny pods (like those from Washingtonia palms) unless you’re up for extra prep work. Always sanitize pods with rubbing alcohol to prevent mold or pests.
How long does it take for palm pod art to dry or cure?
Drying time varies by pod size and climate. Small pods (like Sabal) may dry in 3–7 days in a well-ventilated, shaded area, while larger ones (like coconut husks) can take 2–4 weeks. Speed it up with a fan or dehumidifier, but avoid direct sun—it can warp the pods. Test for readiness by tapping: a hollow sound means it’s dry!
What’s the best way to clean and prep palm seed pods for art?
Start by rinsing pods with soapy water to remove dirt, then scrub gently with a brush to loosen fibers. Soak in a 1:10 bleach-water solution for 10 minutes to kill bacteria, rinse thoroughly, and let air-dry. For stubborn stains, use hydrogen peroxide (3%)—it’s safe and effective. Warning: Wear gloves; some pods have natural oils that can irritate skin.
Are there eco-friendly alternatives if palm seed pods aren’t available?
Try gourds (like bottle gourds), pinecones, dried citrus shells, or even bamboo for similar textures. For a sculptural look, driftwood or sea glass paired with natural dyes can mimic palm pod aesthetics. Just ensure your materials are sustainably sourced—check local parks or farmers’ markets for "free-for-the-taking" options!
How do I prevent pests or mold in my palm pod art?
Prevention starts with proper drying and storage. Keep pods in a cool, dry place (like a mesh bag) and avoid humidity. If mold appears, wipe with vinegar or tea tree oil (diluted). For pests (like beetles), freeze pods for 48 hours or treat with diatomaceous earth. Pro tip: Store finished art in a dehumidifier-safe box with silica gel packets.
Wrapping up and next steps
Transforming palm seed pods into art isn’t just a creative outlet—it’s a celebration of nature’s whimsical beauty and sustainability. Whether you’re crafting playful sculptures, functional decor, or intricate mobiles, these organic canvases inspire endless imagination with zero waste. 🌿✨
Ready to bring your vision to life? Start small—gather a few pods, sketch your design, and let your hands guide the process. Your garden (and the planet) will thank you! Share your masterpiece online or invite friends to join in the fun.
The best art begins with a single seed of curiosity—what will you create next?