
Lawn
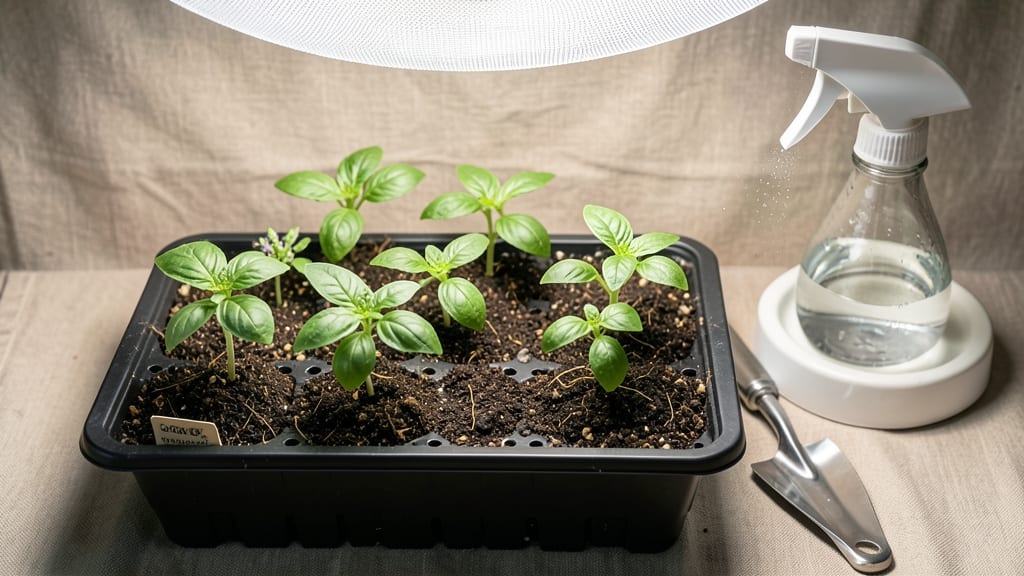
My first batch of seedlings thrived because of this organic seed starter soil—light, fluffy, and packed with nutrients to fuel those fragile first sprouts. 🌱 The secret isn’t just sterilization (though that’s critical), but balancing moisture retention with airflow so roots breathe while they grow.
Too many beginner mixes either drown roots or leave seeds starving for nutrients, but this blend does both jobs perfectly.
You’ll need just three core ingredients: compost for nutrients, perlite or vermiculite for aeration, and coconut coir or peat moss to hold moisture without compacting.
The magic happens when you mix them in a 3:1:1 ratio—enough food to feed hungry seedlings, but still loose enough that water drains instead of pooling. Sterilization is easy with a 10-minute microwave or oven bake to kill pathogens that could wipe out your entire tray.
What you’ll end up with is seedlings that stand tall and sturdy instead of leggy and weak—roots branching out like tiny fingers, leaves unfurling with vibrant color. The organic matter feeds them gradually, so you won’t get the sudden nutrient burn that stunts growth.
Plus, you’ll avoid the heartbreak of damping-off, that mysterious fungus that turns healthy seedlings to mush overnight.
This works for any seed—from delicate lettuce to tough tomatoes—and adapts to trays, peat pots, or even repurposed egg cartons. The same mix fuels my spring peppers and fall kale with equal success.
Once you master this, store-bought seedling soil will feel like overpriced disappointment. Let’s get those seeds sprouting right!
📚 In This Guide
- What you need
- Instructions
- Tips and common mistakes
- Wrapping up and next steps
What you need
- ● Coco coir or peat moss – 50% of the mix (2 parts). Coco coir is eco-friendly and retains moisture better than peat.
- ● Perlite or vermiculite – 20% of the mix (1 part). Adds aeration and prevents compaction.
- ● Compost or worm castings – 20% of the mix (1 part). Provides essential nutrients for seedlings.
- ● Composted bark or sand – 10% of the mix (½ part). Improves drainage and structure.
- ○ Optional: Mycorrhizal fungi – A sprinkle. Boosts root growth and disease resistance.
- ● Large mixing container (5-gallon bucket or wheelbarrow). Clean and sanitized to avoid contaminants.
- ● Garden gloves – To protect your hands from sharp materials.
- ● Small hand trowel or shovel – For blending ingredients thoroughly.
- ● Spray bottle with water – To moisten the mix before use.
- ● Sterilized seed trays or pots – With drainage holes.
- ○ pH testing kit (optional) – Ensures your mix is between 6.0–7.0 for optimal seedling growth.
How to create organic seed starter soil at home
Here’s my foolproof method for crafting the perfect organic seed starter mix—sterile, lightweight, and packed with nutrients to give seedlings their strongest start.
🌱 Step 1: Gather the Base Components
Start with 50% peat moss or coconut coir—this holds moisture while allowing airflow. I use coconut coir because it’s renewable and holds water better than peat. Next, add 25% perlite or vermiculite—this ensures drainage and prevents compaction. Perlite is my go-to because it stays sterile and never breaks down.
For the remaining 25%, mix in compost or worm castings—this provides gentle nutrients without overfeeding seedlings. Sift everything through a fine mesh screen to remove clumps. This ensures a uniform texture that seeds can push through easily. Store your base mix in a sealed container until ready to use.
🌿 Step 2: Sterilize for Seedling Safety
Seedlings are vulnerable to damping-off and mold, so sterilization is critical. Spread your base mix in a shallow tray and microwave it in 1-minute intervals until the entire batch reaches 160°F—this kills pathogens without killing beneficial microbes. Let it cool completely before handling.
Alternatively, bake the mix in the oven at 200°F for 30 minutes, stirring halfway. The goal is to eliminate harmful bacteria while preserving organic matter. Once cooled, fluff the mix with your hands to restore aeration. You’ll notice it feels lighter and airier than garden soil—this is exactly what seedlings need.
💧 Step 3: Hydrate Without Waterlogging
Fill a clean spray bottle with room-temperature water and mist the mix until it’s damp but not soggy. Press a handful gently—water should bead on the surface but not drip through. Overwatering now leads to anaerobic pockets where roots suffocate. I like to work in batches of 1-2 cups at a time to maintain consistency.
Let the mix sit for 10 minutes, then re-fluff it. This lets moisture distribute evenly. The texture should resemble a damp sponge—firm enough to hold shape but light enough for tender roots to penetrate. If it feels too dry, add a fine mist; if too wet, spread it thinly to dry slightly before proceeding.
☀️ Step 4: Add Nutrient Boosters (Optional but Recommended)
For extra strength, stir in 1 tablespoon of fish emulsion or seaweed extract per quart of mix. These provide quick-access nutrients without burning seedlings. I also sprinkle 1/4 teaspoon of kelp meal—it’s rich in micronutrients and acts as a natural growth regulator. Mix gently to avoid clumping.
If you’re growing heavy feeders like tomatoes or peppers, add 1/2 teaspoon of bone meal per quart. This boosts phosphorus for root development. For leafy greens, a pinch of greensand adds potassium. The key is moderation—too much fertilizer now can stunt seedlings by overwhelming their tiny systems.
✂️ Step 5: Test and Use Immediately
Fill a seed tray or small pots with your mix, leaving 1/4 inch of space at the top for watering. Press lightly to settle, then sow seeds according to packet instructions. The mix should crumble easily when squeezed—if it sticks together, it needs more perlite. If it falls apart, add a little more compost.
Cover seeds with a thin layer of the same mix (about 1/4 inch deep for most seeds). Mist the surface with water until evenly moist, then place trays in a warm, bright spot. You’ll see sprouts in 5-14 days, depending on the plant. The secret? Sterility, aeration, and just enough moisture to keep things moving without drowning the seeds.
Tips & tricks for perfect organic seed starter soil
Creating the ideal seed starter mix is all about precision—these small details make the difference between weak seedlings and thriving starts.
Mixing Ratio Precision: The 50-25-25 ratio of coconut coir/peat moss, perlite/vermiculite, and compost/worm castings is non-negotiable for balance. I weigh my components on a kitchen scale for accuracy—volume measurements can vary wildly by brand. For example, a cup of coconut coir from one bag might weigh 4 ounces, while another brand's could be 5 ounces. This affects moisture retention and aeration, which directly impacts seedling health.
Sterilization Safety: When microwaving in 1-minute intervals to reach 160°F, use a food thermometer to verify temperature. The center of your mix tray should consistently hit this mark—understerilization leaves pathogens, while oversterilization can kill beneficial microbes. I place my thermometer probe in the thickest part of the mix during each interval. For oven sterilization at 200°F, spread the mix in an even layer no deeper than 1 inch to ensure even heat penetration throughout the 30-minute cycle.
Hydration Technique: The 10-minute resting period after misting is crucial for even moisture distribution. This prevents surface drying while allowing excess water to wick away from the core. I test consistency by squeezing a handful—it should hold shape when pressed but not feel damp to the touch. Room-temperature water is essential; cold water can shock delicate seedlings and cause uneven germination. For large batches, I divide the mix into 1-2 cup portions and hydrate sequentially to maintain consistency.
Nutrient Balance: When adding optional boosters like fish emulsion or kelp meal, dilute them first in water to prevent salt buildup that can inhibit seedling growth. I mix 1 tablespoon of fish emulsion with 1 cup of water before adding to each quart of starter mix. For bone meal, I pre-mix it with a small amount of dry perlite to distribute it evenly—this prevents clumping that can create nutrient hotspots where seedlings might overgrow at the expense of others.
Pro Tips for Organic Seed Starter Soil
- Creating the ideal seed starter mix is all about precision—these small details make the difference between weak seedl...
- Mixing Ratio Precision: The 50-25-25 ratio of coconut coir/peat moss, perlite/vermiculite, and compost/worm castings ...
- Sterilization Safety: When microwaving in 1-minute intervals to reach 160°F, use a food thermometer to verify tempera...
Frequently asked questions
Got questions about organic seed starter soil?
You’re not alone! Here are answers to the most common queries to help you grow confidently from seed.
What’s the best time to use organic seed starter soil?
Use it before planting—mix it into seedling trays, pots, or directly into your garden beds when sowing. For cold climates, start indoors 6–8 weeks before the last frost. For warm climates, sow directly in starter soil 2–4 weeks before transplanting. Pro tip: Keep it moist but not soggy to avoid damping-off disease.
Can I reuse organic seed starter soil?
Reusing it isn’t recommended because it can harbor pathogens or deplete nutrients over time. However, you can sterilize it by baking at 200°F (93°C) for 30 minutes or microwaving in 1-minute bursts. For convenience, compost the old soil and mix it with fresh organic matter for future batches.
Is organic seed starter soil more expensive than regular potting mix?
Yes, it’s often pricier because of its sterile, nutrient-rich ingredients like coconut coir, worm castings, and perlite. But the trade-off? Higher germination rates and healthier seedlings. Budget hack: Blend starter soil with a cheaper potting mix (50/50 ratio) to stretch your supply.
Why are my seeds rotting in the organic starter soil?
Overwatering or poor drainage are the top culprits. Ensure pots have drainage holes, and water only when the top inch feels dry. If the soil stays clumpy, sift it or add vermiculite for aeration. Quick fix: Sprinkle cinnamon (natural antifungal) on the soil surface before planting.
What’s a good alternative if I can’t find organic seed starter soil?
Mix your own! Combine:
- 50% sterile coco coir or peat moss
- 30% compost or worm castings
- 20% perlite or sand for drainage
Wrapping up and next steps
Creating your own organic seed starter soil is a rewarding way to ensure your seedlings thrive from day one! By blending nutrient-rich components like compost, coconut coir, and perlite, you’ve crafted a sterile, well-draining foundation that supports healthy growth.
This DIY approach saves money, reduces waste, and gives you control over what goes into your plants’ earliest stages.
Now that you’re equipped with the knowledge, roll up your sleeves and get growing! Start small—test your mix with a few easy seeds like basil or marigolds—then expand as you gain confidence. Happy planting! 🌱✨