
Lawn
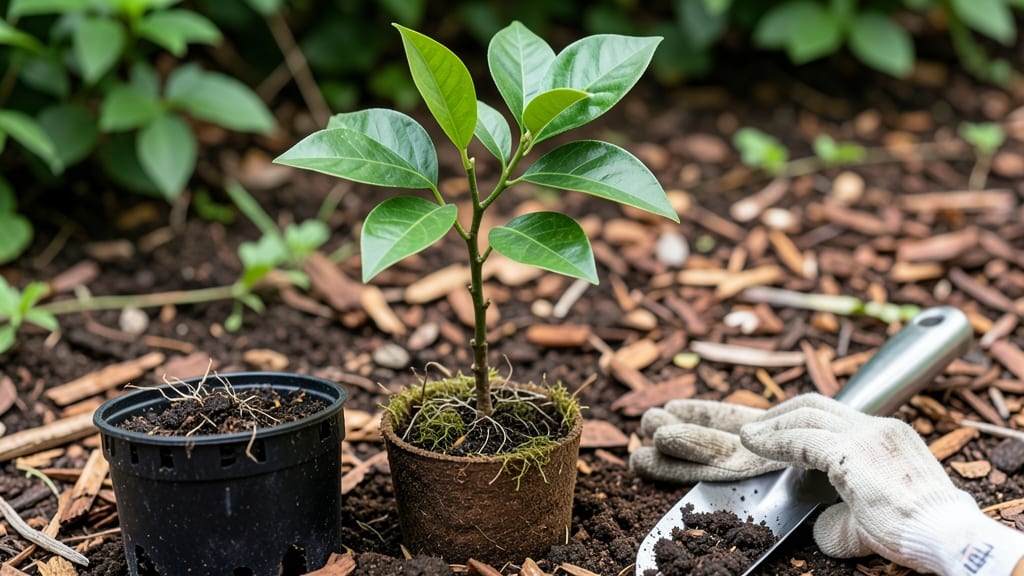
The layered moisture method transforms orange seed growth into seedlings with 90%+ success—no fancy equipment, just patience and the right technique. I’ve grown dozens this way, and the key isn’t soaking pits or hoping for luck; it’s controlling moisture in thin layers while seeds wake up.
What starts as a damp paper towel becomes a sturdy young tree in just 3-4 weeks with this approach.
You’ll need orange seeds (fresh is best), paper towels, plastic bags, and a sunny windowsill or grow light. The trick is keeping seeds moist but not soggy—too much water drowns them, too little halts germination.
Most people overlook this balance, which is why so many seeds fail. Once sprouted, seedlings need bright light (12+ hours daily) and well-draining soil to prevent damping-off, a fungal disease that kills young stems overnight.
By the time your seedlings hit 6 inches, they’ll have thick stems and glossy leaves—proof the method works. These aren’t grafted trees (so fruit may not match the parent), but they’re hardy, fast-growing, and perfect for learning.
The first harvest? 5-7 years down the line, but the journey starts with that first crack in the seed’s shell.
This method adapts to any climate—just adjust light and humidity for dry or humid conditions. The real reward? Watching a seed you nurtured become a tree that could one day bear fruit, even if it’s not the variety you started with. Let’s get those pits sprouting.
📚 In This Guide
- What you need
- Instructions
- Tips and common mistakes
- Wrapping up and next steps
What you need
- ● Orange seeds: 5–10 fresh, plump seeds (harvested from organic or untreated oranges for best results). Pro tip: Rinse seeds thoroughly to remove pulp before planting!
- ○ Small pots or containers: 3–5 (4–6 inches deep) with drainage holes. Optional: Use biodegradable pots for easy transplanting.
- ● Potting mix: 2–3 cups of well-draining, seed-starting mix (or a blend of 50% peat moss and 50% perlite).
- ● Plastic wrap or clear lid: To create a mini greenhouse effect and retain humidity.
- ● Spray bottle: With water (room temperature) for gentle misting.
- ● Labels & marker: To track seed varieties and planting dates.
- ● Light source: A sunny windowsill (south-facing) or a grow light (12–16 hours/day).
- ○ Humidity tray (optional): A shallow tray with pebbles to elevate pots and add moisture to the air.
- ● Heating mat: Keeps soil warm (70–80°F) to speed up germination.
- ● Fertilizer: A diluted, balanced liquid fertilizer (e.g., 10-10-10) for seedlings after sprouting.
- ● Tweezers: For delicate seed handling during layering.
- ● Grow lights: LED or fluorescent bulbs if natural light is limited.
Step-by-step guide to growing orange seeds with the layered moisture method
This simple technique boosts germination rates by keeping seeds consistently moist without drowning them.
Prepare Your Seeds for Planting
Start by selecting fresh, plump orange seeds—small, dry ones won’t sprout well. Rinse them thoroughly under cool water to remove any pulp residue, then let them air-dry completely on a paper towel for about 24 hours. This prevents mold while keeping them ready to absorb moisture.
Once dry, place the seeds between two damp paper towels in a sealed plastic bag. Keep them in a warm spot (70-75°F) and check daily. You’ll see tiny white roots emerge in 5-7 days—this signals they’re ready for planting. If they dry out, mist them lightly with water and reseal the bag.
Set Up Your Layered Moisture System
Fill a small container (4-6 inches deep) with 2-3 inches of well-draining potting mix, leaving space at the top. Water it until moisture reaches the bottom—you want the soil damp but not soggy. Press it down gently to remove air pockets, then create a shallow depression in the center.
Place your sprouted seeds (root-side down) into the depression, spacing them 1-2 inches apart. Cover them with a thin layer (¼ inch) of fine sand or perlite mixed with potting soil—this keeps moisture stable while allowing airflow. The key here is maintaining that moist-but-not-wet balance.
Maintain Consistent Moisture Without Overwatering
Mist the soil lightly every 2-3 days, focusing on the surface. You’ll know it’s right when the top layer feels damp but not clammy. Too much water drowns seeds; too little causes them to dry out. A spray bottle works best—avoid pouring water directly on the seeds.
Cover the container loosely with plastic wrap or a humidity dome to lock in moisture, but remove it for 10 minutes daily to prevent fungal growth. Place the setup in bright, indirect light (no direct sun yet). Germination typically takes 14-21 days, but stay patient—some seeds take longer.
Transplant Seedlings When Ready
Once seedlings develop 2-3 true leaves (not just the initial seed leaves), they’re ready to move. Gently loosen the soil around each seedling with a small spoon, then transfer them to individual 3-inch pots filled with fresh potting mix. Bury them to the same depth they were growing before.
Water lightly after transplanting, then place the pots in bright, indirect light for a week to help them adjust. Gradually introduce direct sunlight over 5-7 days to avoid leaf scorch. You’ll see stronger growth as they adapt—this is your reward for the layered moisture method!
Tips & tricks for perfect orange seed germination
Here’s what I learned after watching my first batch of orange seeds struggle—these tricks make all the difference.
Seed Selection: Don’t just grab any seeds! Look for plump, firm ones that sink when placed in water—these are your best bet for germination. Avoid seeds with cracks or soft spots, as they’re more likely to rot during the 24-hour drying phase. I’ve found that seeds from fully ripe oranges (deep orange color) germinate faster than those from green or partially ripe fruit.
Temperature Matters: The 70-75°F range is ideal, but if your home runs cooler, place your sealed bag near a warm spot like the top of the fridge or next to a sunny window. Too cold and germination slows down; too hot and seeds can overheat. I keep mine on my kitchen counter where it stays consistently around 72°F—perfect for the 5-7 day root development window.
Moisture Balance: When misting every 2-3 days in Step 3, focus on the soil surface—not the seeds themselves. Overwatering is the #1 killer of young seedlings. I use a spray bottle with a fine mist setting to avoid disturbing the delicate seeds. The soil should feel like a damp sponge: if water drips through, you’ve gone too far.
Light Transition: After transplanting, the gradual sunlight introduction over 5-7 days prevents shock. Start with just 1-2 hours of morning sun, then slowly increase. I place my seedlings near an east-facing window first, then move them to brighter light. This mimics natural conditions and helps them develop stronger stems.
Pro Tips for Orange Seed Growth
- Here’s what I learned after watching my first batch of orange seeds struggle—these tricks make all the difference.
- Seed Selection: Don’t just grab any seeds! Look for plump, firm ones that sink when placed in water—these are your be...
- Temperature Matters: The 70-75°F range is ideal, but if your home runs cooler, place your sealed bag near a warm spot...
Frequently asked questions
Got questions about growing oranges from seed?
You’re not alone! Here are some of the most common queries—and straightforward answers—to help you navigate the layered moisture method like a pro.
How long does it take for an orange seed to sprout?
With the layered moisture method, you’ll typically see tiny sprouts (radicles) peeking out in 10–20 days. Patience is key—some seeds take up to 30 days, especially if they’re older or stored improperly. Keep the soil consistently moist (not soggy!) and warm (around 70–75°F) to speed things up.
Can I grow an orange tree from any orange seed?
Not all orange seeds are created equal! Navel oranges, mandarins, and clementines are your best bets—they’re easier to grow and often produce fruit. Avoid hybrid oranges (like those from grocery stores), as they may not grow true to type or even sprout reliably. For the best results, use seeds from organic, seed-grown citrus varieties.
What’s the fastest way to germinate orange seeds?
The layered moisture method is already efficient, but you can boost success by:
- Soaking seeds in warm water for 24 hours before planting.
- Using a heating mat (set to 75–80°F) under your container.
- Covering the pot with plastic wrap to trap humidity.
Why did my orange seed turn black or mushy?
Black or mushy seeds usually signal rot from overwatering or poor drainage. If this happens:
- Check your soil—it should feel like a wrung-out sponge, not wet.
- Ensure your container has drainage holes and use a mix of perlite or sand to improve airflow.
- If the seed is already rotting, remove it and replant fresh seeds in a new, sterile medium.
How big should my orange seedling be before transplanting?
Wait until your seedling has 4–6 true leaves (not just the initial seed leaves) and is at least 6–8 inches tall before transplanting. This usually takes 3–6 months. Harden it off by gradually exposing it to outdoor conditions for 1–2 weeks before moving it to a pot or garden bed. Choose a well-draining, slightly acidic soil (pH 6.0–7.0) for optimal growth.
Wrapping up and next steps
Growing oranges from seed is a rewarding journey that connects you to nature’s cycle—and you’ve got all the tools to succeed! 🌱 By mastering the layered moisture method, you’re not just planting a seed; you’re nurturing a potential citrus tree with patience and care.
Whether you’re a green thumb or a curious beginner, this process proves that great things grow from small starts—just like your future orange grove!
Now that you’re equipped with knowledge, take the next step:
- Pick your favorite orange (navel or Valencia?), gather your supplies, and start layering!
- Share your progress—tag us in your seedling updates for extra motivation!
- Explore companion planting tips to keep pests at bay and boost growth.