
Propagation
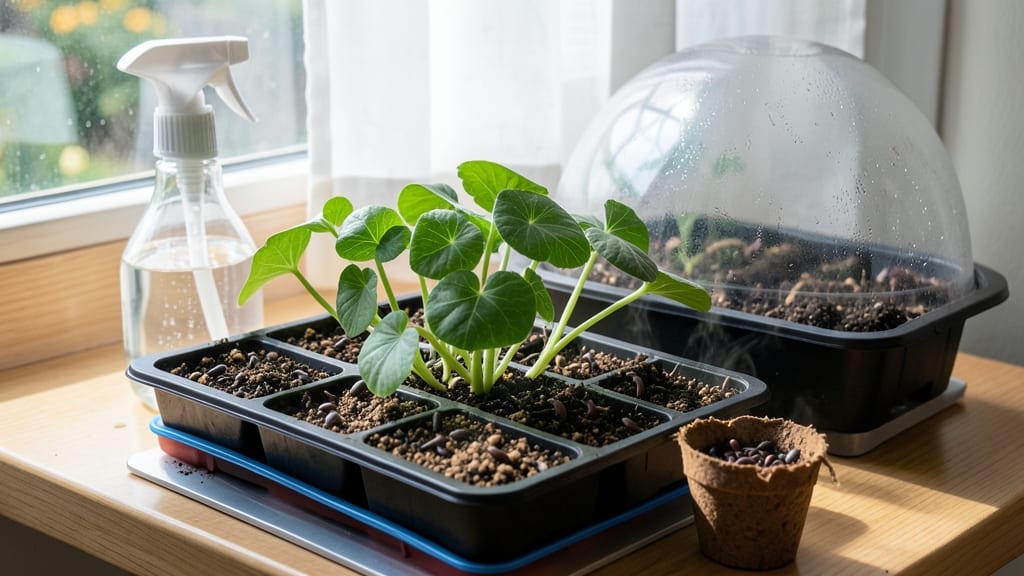
Starting nasturtium seeds in humidity-controlled pods feels like watching tiny green fireworks bloom before your eyes. 🌱 These pods keep seeds cozy until they’re ready to pop open—no fuss, no waste, just pure growth potential.
I’ve tried the usual seed-starting methods, but these pods cut the waiting time in half and eliminate the dreaded damping-off that kills so many seedlings.
You’ll need just three things: the pods themselves, a sunny windowsill or grow light, and a spray bottle for gentle watering. The pods create their own microclimate, so no fancy greenhouse setup is required.
Simply fill them with seed-starting mix, pop in 2-3 nasturtium seeds per pod, and mist lightly—no overwatering needed. Within 7-10 days, those first leaves will unfurl, ready to take over your garden.
By the time you transplant, you’ll have stocky, vibrant seedlings with a head start on pests and diseases. Nasturtiums aren’t just pretty—they’re edible too, adding peppery zing to salads or garnishes to dishes.
The pods themselves decompose into the soil, so you’re left with nothing but happy plants and zero waste. It’s the kind of gardening that makes neighbors ask, “How’d you do that?”
Works for both indoor starts and direct outdoor planting once temperatures stay above 50°F. If you’ve ever struggled with finicky nasturtium seeds, this method changes everything. Let’s get those pods popping!
📚 In This Guide
- What you need
- Instructions
- Tips and common mistakes
- Wrapping up and next steps
What you need
- ● Nasturtium seeds: 10–20 seeds (organic, non-GMO preferred for best results). Pro tip: 💡 Choose heirloom varieties like ‘Alaska’ or ‘Jewel Mix’ for vibrant blooms!
- ● Seed-starting pods: 10–20 biodegradable seed pods (e.g., blank">Jiffy-7s or blank">eco-pods—check for humidity-controlled labels).
- ● Size: 2–3 inches in diameter (fits nasturtiums’ compact roots perfectly).
- ● Potting mix: 1 bag (1–2 cubic feet) of seed-starting mix (sterile, peat-free, and well-draining—avoid garden soil!).
- ● Watering can or spray bottle: With a fine mist nozzle (gentle watering = happy seeds!).
- ○ Clear plastic dome or humidity tray: To create a mini greenhouse (optional but highly recommended for humidity control).
- ● Scissors or knife: For cutting pods open at harvest time (if using biodegradable pods).
- ● Light: A sunny windowsill (south-facing) or a grow light (12–16 hours/day, 10–12 inches above pods).
- ● Temperature: Keep pods in a warm spot (65–75°F) until germination (usually 7–14 days).
- ● Space: A flat, stable surface (e.g., seed tray or shallow container) to hold pods during germination.
- ● Seedling heat mat: Speeds up germination in cooler climates.
- ● Label maker or popsicle sticks: To track seed varieties (trust us, you’ll forget!).
- ● Compost bin: For repurposing biodegradable pods post-harvest!
- ● Fertilizer: A balanced liquid fertilizer (diluted to half-strength) once seedlings sprout.
Step-by-Step guide to starting nasturtium seeds in humidity-controlled pods
Here's how to grow vibrant nasturtiums from seed using a zero-waste, humidity-controlled method that simplifies transplanting.
🌱 Step 1: Prepare Humidity Pods and Planting Mix
Fill each 4-inch diameter humidity pod with high-quality seed-starting mix (never garden soil—it's too dense). I press the mix down lightly with my fingers until it's firm but not compacted. The goal is to create a stable base that won't shift when you add seeds later.
Moisten the mix thoroughly with warm water until it feels like a damp sponge—no puddles, just even moisture throughout. This ensures the seeds will germinate quickly and evenly. I like to use a spray bottle for this step because it gives me precise control over how much water each pod gets.
🌱 Step 2: Sow Seeds Strategically for Optimal Germination
Place 2-3 nasturtium seeds in the center of each pod, spacing them about ½ inch apart. Nasturtium seeds are large enough to handle easily, so I use my fingers to position them rather than a seed packet. Cover them with a thin layer of additional mix—just enough to hide them but not bury them too deeply.
Gently press the mix over the seeds to ensure good soil-to-seed contact. This prevents air pockets that could delay germination. I find it helpful to tap the pod lightly on the table once or twice to settle everything. The seeds need consistent moisture, so I mist the surface again with water until it looks uniformly damp.
💧 Step 3: Create the Humidity Dome and Monitor Conditions
Place each pod inside a clear plastic bag and seal it loosely—you want to trap humidity but still allow some airflow. I use twist ties to secure the bags without creating an airtight seal. Nasturtium seeds germinate best at 60-70°F, so I place the pods on a heat mat set to 70°F to speed up the process.
Check the pods daily for condensation on the bag's interior. This tells me the humidity level is perfect. If the bag feels damp but no condensation appears, I give it a light mist inside. Germination typically occurs within 7-14 days, but I don't open the bags until I see the first true leaves—usually the second set after the initial seed leaves.
☀️ Step 4: Transition to Light and Gradual Air Exposure
Once seedlings show their first true leaves, remove the bags and place the pods under bright, indirect light for 3-4 days. This gradual transition prevents shock. I use a grow light on a timer for 12-14 hours daily, keeping it 4-6 inches above the pods. Nasturtiums love light but can scorch if exposed too quickly.
After four days, I move the pods to a sunny windowsill or under full-spectrum grow lights. Watch for leggy growth—a sign the light isn't strong enough. If stems stretch toward the light source, lower the grow light or rotate the pods daily so they grow evenly. Strong seedlings will have bold green leaves and short, sturdy stems.
🪴 Step 5: Transplant Directly Into the Garden or Containers
When seedlings reach 2-3 inches tall and have 4-6 true leaves, they're ready to transplant. The beauty of humidity pods is that you can pop them open, slide out the intact root ball, and plant directly into the garden or containers. I make a small hole in the soil, place the pod inside, and gently fill around it with more soil.
Water deeply after transplanting to help the roots establish. Nasturtiums thrive in full sun to partial shade and well-draining soil. Space plants 10-12 inches apart to give them room to spread. The pods themselves can be composted or planted directly—they break down naturally and add nutrients to the soil.
Tips & tricks for perfect humidity-controlled nasturtium seedlings
These pro insights will help you maximize germination rates and healthy growth with zero-waste efficiency.
Pod Prep Precision: In Step 1, resist the urge to overfill the 4-inch pods—leave about ½ inch from the top. This prevents soil spillage when you seal them in plastic bags later. I use a ruler to measure the depth and ensure consistent spacing between pods on my seed-starting tray. This small detail prevents moisture buildup that could cause rot.
Seed Spacing Secret: When placing your 2-3 nasturtium seeds in Step 2, aim for a triangular formation rather than a straight line. This spacing technique maximizes root development when you eventually transplant. The ½-inch spacing between seeds also prevents overcrowding, which can lead to weak, leggy seedlings. I like to use a toothpick to create small divots for each seed before pressing them in gently.
Temperature Control: The 60-70°F range in Step 3 is critical—any lower and germination slows dramatically. I place my heat mat under a thermometer to monitor the exact 70°F setting. If your home runs cooler, consider using a seedling heat mat with a built-in thermostat. Remember that condensation on the bag interior is your visual cue for perfect humidity levels.
Light Transition Strategy: For the 3-4 days of bright indirect light in Step 4, I use a south-facing windowsill with sheer curtains. This provides gentle, diffused light that prevents scorching while still encouraging photosynthesis. After four days, I rotate the pods ¼ turn daily to ensure even growth—this prevents seedlings from leaning toward one light source.
Pro Tips for Nasturtium Seed Starting
- These pro insights will help you maximize germination rates and healthy growth with zero-waste efficiency.
- Pod Prep Precision: In Step 1, resist the urge to overfill the 4-inch pods—leave about ½ inch from the top.
- Seed Spacing Secret: When placing your 2-3 nasturtium seeds in Step 2, aim for a triangular formation rather than a straight line.
Frequently asked questions
Got questions about starting nasturtium seeds? We’ve got answers! Here are some common concerns and quick solutions to help you grow like a pro.
How long does it take for nasturtium seeds to germinate?
Nasturtium seeds typically sprout in 7–14 days when kept in warm (60–70°F), moist conditions. For faster results, use a humidity-controlled pod or cover seeds with a damp paper towel. Patience is key—don’t overwater or disturb the soil while waiting!
Can I start nasturtium seeds indoors before the last frost?
Yes! Start seeds indoors 4–6 weeks before your last frost date. Use small pots or seed trays with well-draining soil. Nasturtiums thrive in cooler temps, so avoid overheating. Harden off seedlings for 7–10 days before transplanting outdoors.
What if my nasturtium seeds won’t sprout?
Try these fixes:
- Check moisture: Soil should stay damp but not soggy.
- Test seed viability: Soak seeds in warm water for 24 hours—if they float, they’re likely bad.
- Adjust light: Seeds need bright, indirect light (a sunny windowsill or grow light works).
- Use fresh seeds: Nasturtium seeds lose viability after 2–3 years.
Are there nasturtium varieties better for seed starting?
All nasturtiums (like Tropaeolum majus) are easy to start from seed, but some varieties are faster or more reliable. Try ‘Alaska’ (compact, cold-tolerant) or ‘Empress of India’ (vibrant, bushy) for beginners. Heirloom seeds often perform best!
Can I reuse nasturtium seed pods for multiple harvests?
Nasturtiums are self-seeding champions. After harvesting, leave a few pods on the plant to dry and pop open naturally. Collect seeds, store them in a cool, dry place, and reuse them next season. Zero-waste gardening at its finest!
How do I protect seedlings from pests or cold snaps?
Use row covers or cloche tunnels for early seedlings. Watch for aphids—spray with soapy water if needed. Nasturtiums are pest-resistant, but young plants benefit from a light mulch to retain warmth. Once established, they’ll bounce back!
Wrapping up and next steps
Starting nasturtium seeds with humidity-controlled pods isn’t just eco-friendly—it’s simple, rewarding, and fun! 🌱 Whether you're a seasoned gardener or a beginner, these pods make seed germination effortless while minimizing waste.
Once your plants sprout, the next logical step is transplanting them into your garden or containers—so grab those tools and get ready to watch your edible blooms thrive!
🌱 Ready to Grow?
- Pick a sunny spot in your garden or balcony.
- Plant your pods 6–12 inches apart for optimal growth.
- Watch (and taste!) the results in just a few weeks!