
Lawn
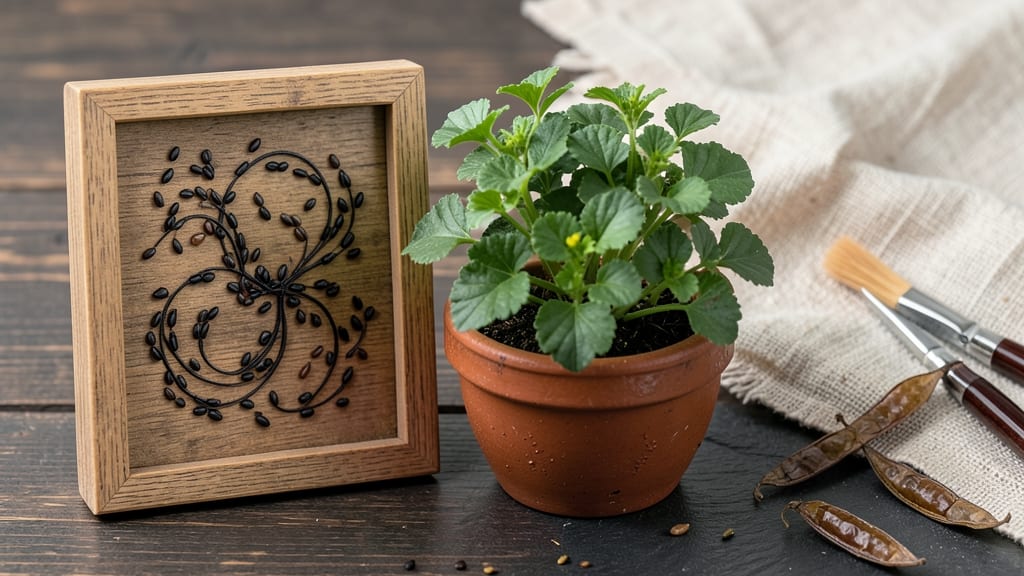
Your garden paths could look like edible masterpieces. ✨ Mustard seed art transforms ordinary walkways into vibrant, temporary canvases that bloom into beauty—no paintbrushes required. This isn't just decoration; it's a living work of art that attracts pollinators while adding color to your landscape.
The magic starts with simple supplies: mustard seeds, a stencil or freehand drawing, and a light dusting of soil. You’ll create intricate patterns—mandalas, stripes, or even your initials—that sprout into delicate yellow flowers within weeks. The best part? These designs fade naturally by summer, leaving no trace behind.
Imagine stepping onto a pathway where every footstep reveals a new surprise of tiny blooms. The contrast of bright yellow against green grass creates a striking visual effect, perfect for weddings, seasonal celebrations, or just adding whimsy to your yard.
This technique works in any climate and requires minimal maintenance—just water occasionally to keep the seeds happy. Whether you're a seasoned gardener or a complete beginner, mustard seed art lets you play with nature's palette without the commitment of permanent installations.
📚 In This Guide
- What you need
- Instructions
- Tips and common mistakes
- Wrapping up and next steps
What you need
- ● Mustard seeds: 1–2 lbs (organic, untreated for edible use) 🌻
- ● Garden soil or potting mix: 5–10 gallons (well-draining, enriched with compost)
- ● Water: Hose or watering can (for consistent moisture)
- ● Stencils or templates: Cardboard, vinyl, or reusable plastic (custom designs or pre-made patterns)
- ○ Garden twine or string: For marking pathways (optional but helpful)
- ● Hand trowel or rake: For soil prep and seed placement
- ● Spray bottle: Fine mist for delicate seedling care
- ● Kneeling pad: Comfort for long sessions (trust us, your knees will thank you!)
- ○ Optional: Edible flower seeds (e.g., nasturtiums, calendula) for border accents
- ● Organic mulch (straw or wood chips) to retain moisture
- ● Child-safe gloves (if handling large seed quantities)
- ● Sunny or partially shaded garden path (6+ hours of light daily)
- ● Clear, level ground (or a raised bed for elevation)
- ● Patience! Mustard seeds sprout in 7–14 days—watch them grow!
Step-by-Step instructions for creating mustard seed garden pathway art
Turn your garden into a living canvas with these easy, edible designs that bloom into beauty.
🌱 Step 1: Design Your Pattern and Prepare the Base
Start by sketching your design on paper first—simple shapes like flowers, animals, or abstract swirls work best. Mustard seeds are tiny, so keep your patterns between 1-2 feet wide for clarity. Once you're happy with your sketch, transfer it to the garden soil using a hula hoop or string to create clean outlines.
Clear the area of debris and lightly rake the soil to create a smooth, even surface. Press down any rocky spots so the seeds make good contact with the earth. This ensures even germination and prevents seeds from washing away during watering.
💧 Step 2: Plant the Seeds in Your Design
Use a seed spreader or fine-mesh sieve to distribute the seeds evenly along your marked lines. For intricate details, try a popsicle stick or toothpick to place individual seeds precisely. Press them lightly into the soil—just enough so they don't blow away, but not so deep they struggle to sprout.
Work in small sections at a time to maintain accuracy. If you're creating multiple designs, label each area with stakes so you can track which patterns need watering. I like to use chalk or biodegradable paint to mark the edges temporarily before planting.
☀️ Step 3: Water Gently and Maintain Moisture
Water immediately after planting with a gentle mist from a spray bottle or fine-rose watering nozzle. Mustard seeds need consistent moisture to germinate, so aim to keep the soil evenly damp (not soggy) for the first 7-10 days. You'll see tiny green shoots emerge when the seeds have absorbed enough water.
After germination, reduce watering to every 2-3 days, checking the soil with your finger. If the top ½ inch feels dry, it's time to water again. Avoid walking on the planted areas—they're delicate until the seedlings are 2-3 inches tall.
✂️ Step 4: Encourage Growth and Edible Blooms
Once your seedlings reach 3-4 inches tall, thin them to 1 inch apart within your design to give each plant room to grow. Use scissors to snip excess plants at soil level rather than pulling—this prevents disturbing the roots of remaining seedlings. The thinned plants can be transplanted nearby or added to salads.
Mustard flowers attract pollinators and add a pop of color. When blooms appear, you can harvest individual flowers for garnishes or let them self-seed for next year's designs. Deadhead spent blooms to encourage more flowers and prolong your edible artwork's display.
🪴 Step 5: Preserve and Enjoy Your Living Art
To extend the life of your mustard seed patterns, consider adding edible flowers like nasturtiums or calendula around the borders. These companion plants deter pests while adding to the visual appeal. Water in the early morning to reduce evaporation and prevent fungal issues.
Your designs will last 4-6 weeks before the mustard plants bolt and go to seed. Take photos to document your creations, then let the seeds scatter naturally for next year's surprise patterns. The best part? Every step of this process is completely edible and safe for pollinators.
Tips & tricks for perfect mustard seed garden pathways
Your living garden art deserves a little extra attention to flourish—here's how to elevate your mustard seed designs from charming to show-stopping.
Design Precision: When transferring your sketch to soil in Step 1, use a spray bottle with watered-down chalk to trace outlines—it disappears after watering and won't harm plants. For intricate patterns, try a stencil technique with fine mesh fabric stretched over your design, then sprinkle seeds through it for even distribution. This prevents the "blurry edges" I used to get when freehanding.
Seed Placement Technique: In Step 2, dampen your popsicle stick or toothpick before planting—this helps seeds adhere better to the tool and prevents them from sticking to your fingers. For large areas, mix seeds with a tiny bit of cornstarch (about 1 teaspoon per tablespoon of seeds) to create a "seed dust" that spreads more evenly through your sieve. Just don't use too much, or you'll smother the seeds.
Germination Guardian: The 7-10 day germination window in Step 3 is your critical phase. Cover newly planted areas with lightweight landscape fabric to retain moisture and block wind—it lifts right off when seedlings emerge. I've found that watering in the early evening reduces evaporation overnight, giving seeds that extra moisture boost they crave.
Thinning with Care: When thinning in Step 4, use clean, sharp scissors and cut at the soil line—never pull. The roots of your remaining plants will thank you by growing stronger. For extra precision, mark your 1-inch spacing with toothpicks before thinning. This visual guide prevents the "crowded look" that ruins your design's crisp lines.
Pro Tips for Mustard Seed Art
- Your living garden art deserves a little extra attention to flourish—here's how to elevate your mustard seed designs ...
- Design Precision: When transferring your sketch to soil in Step 1, use a spray bottle with watered-down chalk to trac...
- Seed Placement Technique: In Step 2, dampen your popsicle stick or toothpick before planting—this helps seeds adhere ...
Frequently asked questions
about mustard seed art—because creativity deserves clarity! Whether you're a first-timer or a seasoned gardener, these answers will help you bring your edible masterpiece to life with confidence.What’s the best time of year to plant mustard seed art?
Plant your mustard seed designs in early spring (after the last frost) or late summer for a fall display. Mustard seeds thrive in cool weather (50–75°F) and bolt in heat, so avoid planting during summer’s peak. For year-round fun, try fast-growing varieties like Tropic or Red Giant—they’ll bloom in as little as 30 days!
How long does it take for mustard seed patterns to grow and bloom?
Most mustard seed varieties bloom in 4–6 weeks after planting, but timing varies by type. For example:
- Tropic Mustard: 30–40 days (fastest option!)
- Red Giant: 45–60 days (bold, deep colors)
- White Pearl: 50–70 days (delicate, lace-like blooms)
Can I use mustard seed art in containers or just in garden beds?
Mustard seeds grow beautifully in containers, hanging baskets, or raised beds. For pathways, use shallow trays or seed tape to keep designs neat. Pro tip: Add a 1-inch layer of compost to containers to retain moisture—mustard seeds love consistent dampness but hate soggy soil.
What should I do if my mustard seed patterns look patchy or uneven?
Patchy growth often means uneven seed distribution or dry soil. Fix it by:
- Lightly raking the soil and reseeding sparse areas.
- Watering gently (use a spray bottle for fine details).
- Thinning seedlings to 1–2 inches apart if overcrowded.
Are there non-mustard seed alternatives for edible garden art?
Yes! Try these edible, fast-growing options for similar effects:
- Microgreens (e.g., radish, broccoli): Ready in 10–14 days.
- Clover: Forms lush green "carpets" in 3–4 weeks.
- Nasturtiums: Edible flowers with vibrant colors (bloom in 6 weeks).
- Sunflower microgreens: Tiny but striking (harvest in 7–10 days).
Wrapping up and next steps
Mustard seed art transforms your garden into a living, edible masterpiece—where beauty blooms and feeds pollinators! 🌸 With just a few simple materials and a splash of creativity, you’ve unlocked a sustainable way to elevate your outdoor space.
Whether you’re a seasoned gardener or a curious beginner, this project proves that art and nature thrive together.
Ready to take the next step? Start small: sketch your design on paper first, then bring it to life in your yard. Share your mustard seed creations with us—we’d love to see your edible artistry! 📸✨