
Size
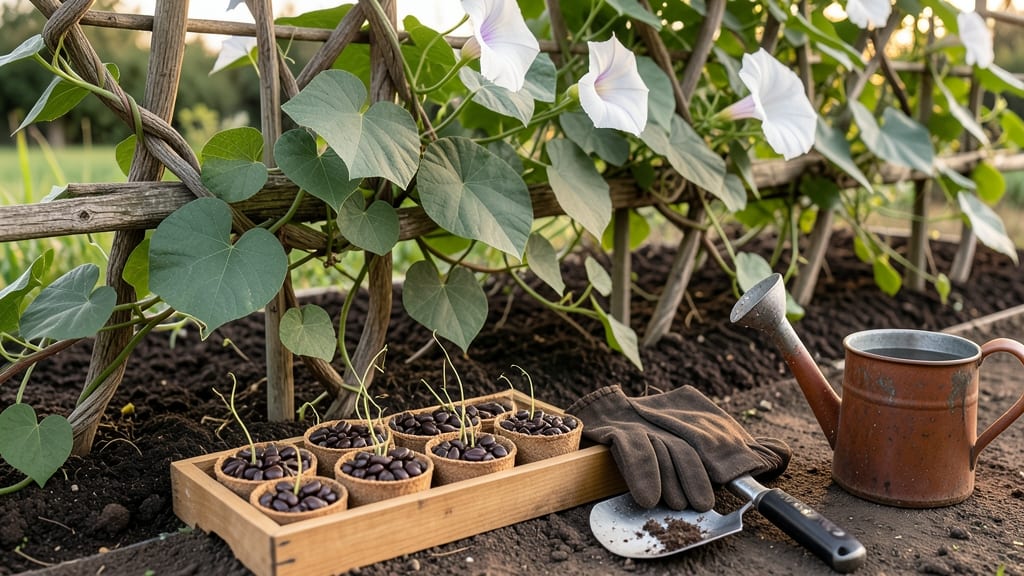
Growing moonflower seeds is the fastest way to turn your garden into a twilight dream. 🌙 These vines shoot up in just 5-7 days, and by summer, you’ll have fragrant, trumpet-shaped blooms that open only after dark—when fireflies dance around them like nature’s own spotlight.
The secret to success starts with well-draining soil and a sunny spot—at least 6 hours of direct sunlight daily. Plant seeds ½ inch deep in late spring after the last frost, and keep the soil consistently moist but not soggy.
Moonflowers climb fast, so give them 6-10 feet of vertical space (trellises or fences work perfectly).
By midsummer, you’ll be rewarded with velvety, heart-shaped leaves and those magical night-blooming flowers that smell like honey. The vines are annuals, so they’ll die back in fall, but they self-seed generously—meaning next year’s garden might just plant itself.
Watch for squash vine borers (tiny moths that lay eggs in stems) and powdery mildew in humid climates. Remove affected leaves promptly, and space plants 3-5 feet apart to improve airflow. With minimal effort, you’ll have a garden that comes alive after sunset—no blacklight needed.
📚 In This Guide
- What you need
- Instructions
- Tips and common mistakes
- Wrapping up and next steps
What you need
- ● Moonflower seeds: 10–20 seeds (or 1–2 packets if buying pre-packaged). Opt for organic or non-GMO seeds for best results!
- ● Growing containers: For direct sowing: A well-draining garden bed (6+ inches deep) with full sun exposure (6+ hours daily).
- ● For container growing: 5-gallon pots or larger (at least 12 inches deep) with drainage holes.
- ● Potting soil: 1–2 bags of high-quality, well-draining potting mix (or garden soil amended with compost).
- ● Trellis or support structure: A 6–8 ft tall trellis, fence, or sturdy stakes (moonflowers climb aggressively!).
- ● Watering can or hose: With a gentle spray nozzle for moisture control.
- ○ Mulch (optional but helpful): Straw or shredded leaves to retain soil moisture.
- ● Slow-release fertilizer (balanced 10-10-10 or organic options like compost tea).
- ● Seed-starting kit (if sowing indoors 2–3 weeks early).
- ● Pruning shears (for trimming vines or deadheading spent blooms).
- ● Plant markers (to label your moonflower patch if growing multiple varieties).
- ● Shade cloth (if your area gets intense afternoon sun—moonflowers tolerate partial shade).
Step-by-Step instructions for growing moonflowers from seed
Moonflowers are one of the fastest-growing vines you'll ever plant—here's how to get those dramatic 12-inch blooms overnight from tiny seeds.
🌱 Step 1: Choose the Right Location and Plant After Warmth Arrives
Moonflowers (Ipomoea alba) thrive in full sun (6+ hours daily) and won't tolerate frost—wait until after your last frost date when soil stays above 60°F. I plant mine in late May in most climates, but if you're in a warm zone, you can start as early as April. The vines grow aggressively, so give them 6-8 feet of vertical space or a sturdy trellis.
Here's the thing—moonflowers are annuals in most regions, so I always plant them after Memorial Day to avoid any surprise chilly nights. If you live in a short-season area, opt for fast-maturing varieties (like 'Moonlight') that bloom in 45-50 days instead of the standard 60-70 days.
💧 Step 2: Direct-Sow Seeds in Well-Draining Soil
Scatter seeds ½ inch deep in loose, well-draining soil—moonflowers hate soggy roots. Work in a handful of compost to give them a nutrient boost, but avoid heavy fertilizers, which can delay blooming. Space seeds 12 inches apart if growing in rows, or 18 inches apart if you want fewer but stronger vines.
Water gently right after planting, but don’t overdo it—moonflower seeds need consistent moisture to germinate, but they’ll rot if the soil stays waterlogged. You’ll see first sprouts in 5-10 days (that’s their fast reputation!). Once seedlings appear, thin them to the strongest 2-3 plants per trellis to avoid competition.
☀️ Step 3: Train Vines Up a Trellis for Maximum Blooms
Moonflowers climb using twining stems, so install a 5-6 foot trellis at planting time. As soon as vines reach 6 inches tall, gently guide them upward—don’t force them, or you’ll snap the delicate stems. I use wooden dowels or bamboo stakes because they’re sturdy enough to support the weight of blooms.
Here’s where it gets fun: moonflowers bloom only at night, opening their 3-inch white trumpets just as the sun sets. They close by mid-morning, so if you want to see them, you’ll need to check around dusk—or set up a nighttime timer light to capture their fleeting beauty. Prune spent blooms to encourage more flowers, but don’t cut back more than ⅓ of the vine at once.
✂️ Step 4: Maintain Water and Watch for Pests
Water deeply 2-3 times per week—moonflowers wilt fast in dry soil but bounce back quickly once hydrated. Mulch around the base with 2-3 inches of straw to retain moisture and suppress weeds. I’ve found that evening watering (after 6 PM) reduces fungal issues, since the leaves stay dry overnight.
Keep an eye out for aphids or spider mites, which love moonflower leaves. If you spot them, spray with neem oil or blast them off with a strong stream of water. Deer and rabbits usually avoid them, but if they’re a problem in your area, use chicken wire cages until vines are established.
⏰ Step 5: Extend the Season with Succession Planting
Since moonflowers bloom for only 4-6 weeks, I plant new seeds every 2 weeks from June through July to keep the show going. In warm climates, you can even get a fall bloom by planting in early September—just protect them from early frosts with row covers if needed.
Real talk: moonflowers are self-seeding machines, so you’ll likely find volunteers popping up next year. If you want to encourage more blooms, deadhead spent flowers regularly—but leave a few to scatter seeds for next season’s surprise vines.
Tips & tricks for perfect moonflower growth
These insider tricks will help you coax those magical night-blooming trumpets from tiny seeds—without the trial and error I went through my first year.
Soil Prep Matters: Before planting, mix in a generous layer of compost to give your moonflowers a nutrient head start, but resist the urge to over-fertilize. Too much nitrogen will send your plants into leafy overdrive instead of producing those dramatic blooms. I've found that a simple handful of compost per planting hole—about ¼ cup—gives just enough nutrients without risking fertilizer burn. The key is loose, well-draining soil that mimics their native sandy habitats.
Timing Secret: The 5-10 day germination window in Step 2 is your first clue that these seeds are eager to grow. To speed things up, soak seeds overnight in warm water before planting—they'll sprout faster and more uniformly. Just don't let them dry out afterward! I keep a spray bottle handy to mist the soil daily until sprouts appear. This little trick can shave off crucial days when you're racing against summer's end.
Trellis Technique: When your vines reach that 6-inch mark in Step 3, don't just toss them over a trellis—give them gentle guidance. I wrap each vine around the trellis once and secure it with a soft plant tie. This prevents the delicate stems from snapping when strong winds hit, which happened to me twice before I learned this trick. The vines will twine naturally once established, but that initial support makes all the difference for those first few crucial inches.
Night-Bloom Hack: To maximize your chances of seeing those fleeting blooms, set up a simple timer light on your phone or smart plug. Program it to turn on around 8:30 PM (just as the sun sets) and shine for 15-20 minutes. The light won't harm the flowers but will help you spot them against the dark background. I've captured some amazing nighttime photos this way—something I never would have seen otherwise.
Pro Tips for Moonflower Seed Grow A Garden
- These insider tricks will help you coax those magical night-blooming trumpets from tiny seeds—without the trial and error I went through my first year.
- Soil Prep Matters: Before planting, mix in a generous layer of compost to give your moonflowers a nutrient head start, but resist the urge to over-fertilize.
- Timing Secret: The 5-10 day germination window in Step 2 is your first clue that these seeds are eager to grow.
Frequently asked questions
Growing moonflower seeds can be magical, but new gardeners often have questions! Here are some of the most common ones to help you succeed:
How long does it take for moonflower seeds to germinate?
Moonflower seeds are fast—expect germination in 7–14 days if planted in warm soil (70°F+). Keep the soil moist but not soggy, and place them in a sunny spot. Pro tip: Soak seeds overnight before planting to speed things up!
Can I grow moonflowers from seed indoors first?
Yes! Start seeds 6–8 weeks before your last frost in small pots with well-draining soil. Keep them warm (70–80°F) under grow lights until sprouts appear. Transplant outdoors after the last frost when soil is warm. Warning: Moonflowers dislike cold—wait until nighttime temps stay above 50°F.
Are moonflowers annuals or perennials?
Moonflowers (Ipomoea alba) are tender annuals in most climates, meaning they die back after frost. However, in USDA Zones 9–11, they may return as perennials. If you love them, save seeds or replant yearly for continuous summer blooms!
Why aren’t my moonflower seeds sprouting?
Common culprits: cold soil (wait for warmth), dry soil (keep moist), or old seeds (use fresh seeds for best results). Try scratching the seed coat lightly with sandpaper to encourage germination. If planted too deep (>1 inch), they may rot—keep them shallow!
What’s a good alternative if moonflowers don’t thrive in my climate?
Try these fast-growing, heat-loving vines:
- Morning glories – Similar blooms, slightly hardier.
- Sweet peas – Fragrant and cold-tolerant (great for cooler areas).
- Cup-and-saucer vine – Drought-resistant with unique flowers.
Wrapping up and next steps
Growing moonflower vines from seed is a rewarding journey that brings fast, fragrant beauty to your garden with minimal effort! 🌙 With their quick germination and stunning night-blooming flowers, these vines are perfect for adding a touch of magic to trellises, fences, or even containers.
Now that you’re armed with the right tips, why not start your moonflower adventure today?
Your next step? Pick a sunny spot, grab those seeds, and let nature do the rest! Whether you’re a seasoned gardener or a beginner, moonflowers are a delightful way to transform your outdoor space into a summer paradise. Happy planting! 🌱