
Lawn
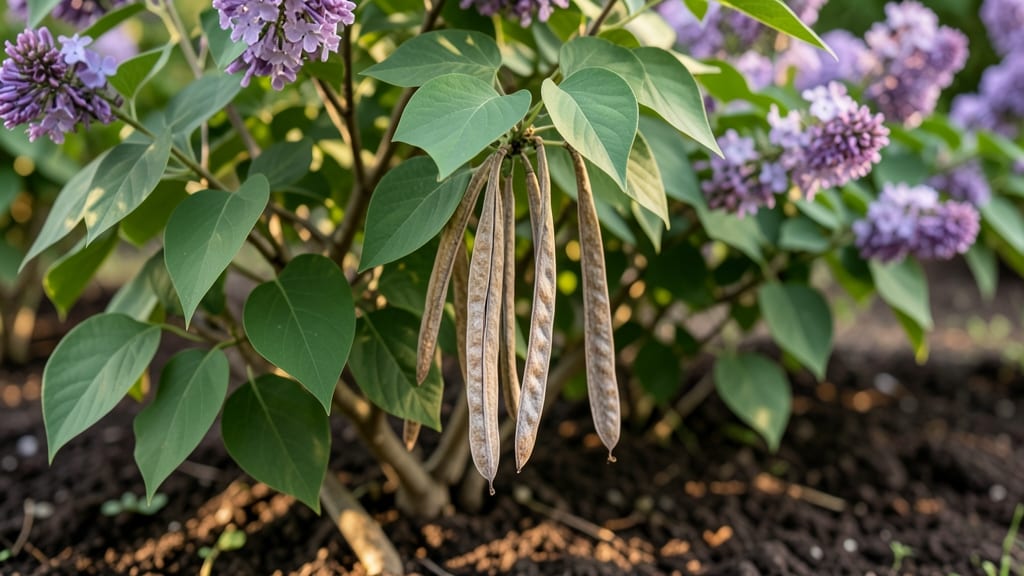
Those fuzzy lilac seed pods hold the secret to growing your own fragrant bushes from scratch. 🌿 I’ve turned dozens of dried pods into thriving seedlings, and the process is simpler than you’d think—especially with cold stratification.
The key is timing: harvest pods when they’re brown and papery, then mimic winter’s chill to break dormancy.
You’ll need just three things: mature seed pods, a plastic bag with damp peat moss, and patience. Seal the pods inside the bag, refrigerate for 60 days, and watch for tiny sprouts.
This method works even for stubborn seeds that refuse to germinate otherwise. The payoff? Fragrant purple blooms in just 3-4 years—far faster than waiting for a nursery plant.
Once sprouts appear, transplant them into pots with well-draining soil and keep them bright but not scorching. Lilacs hate soggy roots, so let the top inch dry between waterings. By late spring, you’ll have sturdy young plants ready to claim their spot in your yard.
This technique works for any lilac variety, from classic French lavender to dwarf varieties. Just remember: the earlier you stratify, the sooner you’ll smell that signature spring fragrance. Ready to grow your own?
📚 In This Guide
- What you need
- Instructions
- Tips and common mistakes
- Wrapping up and next steps
What you need
- ● Fresh lilac seed pods: Collect mature, brown pods from healthy lilac bushes (late summer/fall). Aim for 20–50 pods (more = better success rate!).
- ● Cold-stratification supplies: Small paper towels or coir seed mats (1–2 per pod).
- ● Ziplock gallon-sized bags (2–3 bags).
- ● Moistened potting mix (1–2 cups, well-draining).
- ● Growing containers: Small seedling trays (with drainage holes) or
- ● Individual 2–3 inch pots (10–20 pots, depending on seed pod quantity).
- ● Potting soil: 1–2 gallons of sterilized seed-starting mix (lightweight, peat-based or coco coir blend).
- ● Misting bottle or spray nozzle (to keep soil moist).
- ○ Plastic wrap or humidity dome (optional, for trays).
- ● Seedling heat mat (to maintain 65–75°F soil temps).
- ● Grow lights (12–14 hours/day if natural light is ≤6 hours/day).
- ● Fungicide (e.g., neem oil or hydrogen peroxide—1 tsp per quart of water—to prevent mold).
- ● Plant labels and permanent marker (track varieties!).
- ● Garden gloves (for handling seed pods and soil).
How to cold-stratify lilac seed pods for reliable germination
Cold-stratification mimics winter's natural process—here's how to coax lilac seeds into sprouting within two months.
🌱 Step 1: Harvest and Prepare the Seed Pods
Collect mature lilac seed pods when they turn brown and begin splitting open—usually late summer to early fall. Gently open each pod and remove the small, flat seeds inside. I like to work on a clean towel to catch any seeds that might pop out unexpectedly. Store them in a paper envelope until ready to stratify—plastic traps too much moisture and can cause mold.
If you're working with fresh pods, let them dry in a shady, well-ventilated spot for 3-5 days before handling. This prevents rot during stratification. Once dry, separate any empty or damaged seeds—they won’t germinate. You’ll need about 10-15 seeds per pot if you’re planning to grow multiple bushes.
❄️ Step 2: Cold-Stratify for 60 Days
Mix equal parts moistened peat moss and perlite in a shallow container—just enough to cover the seeds by 1 inch. Place the seeds on top, then sprinkle a light layer of the mix over them. The goal is to keep everything damp but not soggy; think of a wrung-out sponge. Seal the container in a ziplock bag and place it in your refrigerator’s crispier drawer (around 35-40°F).
Check the mix every 2 weeks—if it feels dry, mist it lightly with water. Avoid opening the bag too often, as temperature fluctuations can break dormancy prematurely. After 60 days, the seeds will have completed their cold treatment and be ready for planting. This step is critical—skipping it results in seeds that either rot or never sprout.
🪴 Step 3: Plant Stratified Seeds in Pots
Fill 4-inch pots with a sterile seed-starting mix (never garden soil—it’s too dense and may harbor diseases). Press the mix down gently to remove air pockets, then make small ¼-inch-deep holes with your finger. Place 1-2 seeds per pot—lilac seeds germinate slowly, so spacing them out avoids overcrowding later.
Cover the seeds lightly with additional mix, then water gently until the soil is evenly moist but not waterlogged. Place the pots in a bright, indirect light spot (like a north-facing window) and maintain a consistent temperature of 65-70°F. Germination can take 4-8 weeks, so patience is key. Keep the soil lightly moist—never let it dry out completely.
☀️ Step 4: Transplant Seedlings Outdoors
Once seedlings develop 2-3 sets of true leaves (not the initial seed leaves), they’re ready to move outside. Harden them off by placing the pots in a sheltered, shaded spot for 1-2 hours the first day, gradually increasing exposure over 10-14 days. Watch for wilting or yellowing leaves—this signals they’re not ready for full sun yet.
Transplant outdoors after the last frost date, spacing seedlings 6-8 feet apart to allow for mature growth. Lilacs thrive in full sun and well-draining soil. Mulch around the base with 2 inches of organic mulch to retain moisture and suppress weeds. The first year focuses on root establishment—avoid heavy pruning until the bush is 3-4 years old.
Tips & tricks for perfect lilac sprouts
Here's what nobody tells you about getting those lilac seeds to sprout reliably—these tricks saved me from years of frustration.
Harvest Timing: The key to successful germination starts with the right seed pods. Look for pods that are fully brown and beginning to split open naturally—this usually happens in late summer to early fall. If you harvest too early, the seeds inside won't be fully mature, and if you wait too late, they might have already released their seeds. I've found that pods collected in September give the best results, as they've had time to fully develop but haven't yet dried out completely.
Drying Strategy: When you first open those seed pods, you'll notice they're quite moist inside. This is why the 3-5 day drying period in Step 1 is absolutely critical. I learned this the hard way after trying to stratify fresh seeds directly—they would either mold or fail to germinate. Spread them out on a clean towel in a shady spot where they can air dry completely. You'll know they're ready when they feel dry to the touch and rattle slightly when shaken.
Stratification Environment: The refrigerator's crispier drawer at 35-40°F is perfect for this process, but here's the secret most people miss: consistency is everything. Those 2-week checks are crucial—not just to add water, but to monitor for any signs of mold or premature sprouting. I've seen seeds start germinating in the fridge if the bag was opened too often or if there were temperature fluctuations. Keep the bag sealed tightly between checks, and only open it when absolutely necessary.
Lighting Setup: While bright indirect light is ideal for the germination stage, I've found that a simple LED grow light on a timer works wonders. Place it about 6 inches above the pots and set it for 12-14 hours per day. This gives you more control than natural light, especially if you're doing this indoors during winter months. The consistent light helps prevent leggy seedlings that can occur with uneven natural light exposure.
Pro Tips for Lilac Bush Seed Pods
- Here's what nobody tells you about getting those lilac seeds to sprout reliably—these tricks saved me from years of f...
- Harvest Timing: The key to successful germination starts with the right seed pods. Look for pods that are fully brown...
- Drying Strategy: When you first open those seed pods, you'll notice they're quite moist inside. This is why the 3-5 d...
Frequently asked questions
Got questions about growing lilac bush seed pods? You’re not alone! Here are some of the most common queries—and their straightforward answers—to help you succeed.
When do lilac seed pods appear after flowering?
Lilac seed pods typically form 4–6 weeks after the flowers bloom in late spring. Look for small, green capsules that swell and turn brown as they mature—usually by early summer. If you’re impatient, cold-stratifying them (as covered in the article) speeds up germination!
How long does it take for lilac seeds to germinate?
With proper cold stratification (60 days in the fridge), lilac seeds usually sprout within 2–4 weeks after planting. Without stratification, germination can take months—or never happen! Patience is key, but don’t hesitate to check moisture levels if seeds sit too long.
Can I collect lilac seed pods from any lilac bush?
Yes, but not all lilacs produce viable seeds. Focus on common lilacs (Syringa vulgaris) or native species like Syringa meyeri. Avoid hybrid cultivars (e.g., ‘Dwarf Korean Lilac’), as their seeds may not grow true to the parent plant. When in doubt, ask a local nursery for seed-source recommendations!
What do I do if my lilac seed pods won’t open?
If pods stay closed, they’re likely underripe. Harvest them when they’re dry and brown (not green). To encourage opening, place pods in a paper bag for a week—gentle warmth and airflow often trick them into releasing seeds. If still stubborn, lightly crush the pod with a hammer (wear gloves!) to access the seeds inside.
Are there faster alternatives to growing lilac bushes?
If you’re eager for lilacs without waiting for seeds, consider:
- Container-grown saplings: Buy 1–2 year old bushes from nurseries for instant color.
- Layering: Bend a low branch to the ground, cover it with soil, and wait for roots to form (takes 1–2 seasons).
- Cutting propagation: Take 4–6 inch cuttings in early summer, dip in rooting hormone, and plant in moist perlite.
Wrapping up and next steps
Growing lilac bush seed pods from cold-stratified sprouts in just 60 days is a rewarding journey that connects you to nature’s cycles! 🌱 Whether you’re a beginner or a seasoned gardener, these delicate pods offer a chance to nurture new life with patience and care.
Now that you’re armed with the right techniques, why not take the next step? Share your progress with fellow plant enthusiasts, experiment with different stratification methods, or even gift a few sprouts to a friend—your green thumb is sure to inspire others!
🌟 Ready to Grow?
Start your lilac adventure today—your future blooms will thank you! 🌸