
Size
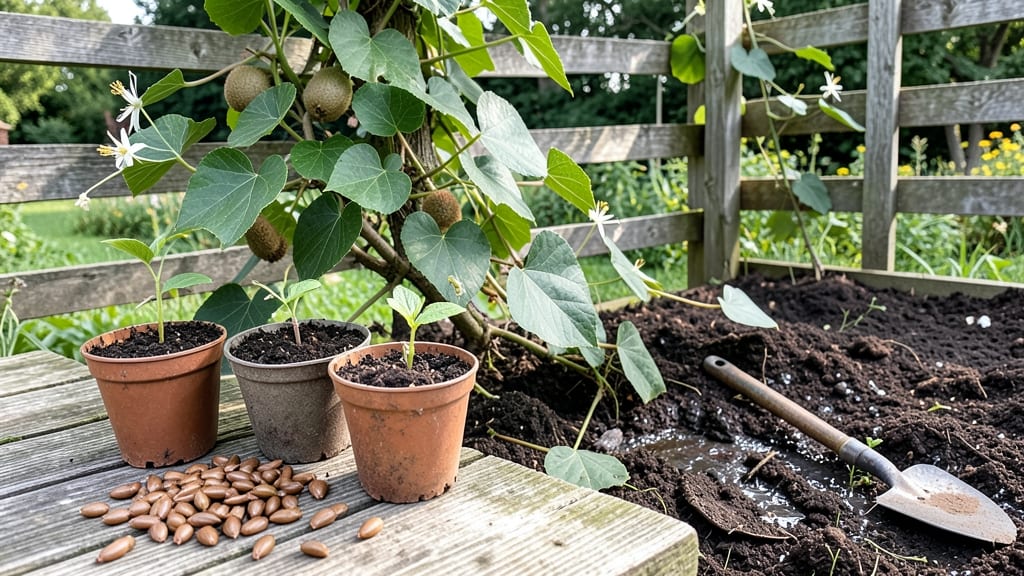
Growing kiwi plants from seed feels like unlocking a secret garden—except the wait for fruit is longer than you’d hope. 🌱 I’ve started dozens of kiwi seeds, and while they’re not as fast as tomatoes, the process is surprisingly straightforward once you know the tricks.
The key? Patience, the right soil mix, and a warm spot to coax those first sprouts.
You’ll need just a few things: fresh kiwi seeds (save them from store-bought fruit), a shallow tray or pot, well-draining potting mix, and a spray bottle for gentle watering. The seeds germinate best in 70-80°F soil, so a heat mat or sunny windowsill speeds things up.
Most seeds sprout within 2-4 weeks, though some take longer—don’t give up if yours lag behind.
Once sprouted, your seedlings will need bright, indirect light and consistent moisture (but never soggy soil). They’ll grow into vines that can climb 20+ feet, so plan for a trellis or sturdy fence.
Here’s the catch: kiwi plants from seed are unlikely to fruit for 5-10 years—they’re usually male, and even female plants need a pollinator. Still, the journey is rewarding, and you’ll have a stunning, fast-growing vine to enjoy along the way.
For faster fruit, consider grafting later, but even without it, these plants bring lush foliage and year-round interest. Whether you’re growing them indoors as a houseplant or outdoors in a warm climate, the process is beginner-friendly once you know the basics. Let’s get those seeds sprouting!
📚 In This Guide
- What you need
- Instructions
- Tips and common mistakes
- Wrapping up and next steps
What you need
- ● Kiwi seeds: 3–5 fresh, plump seeds (harvested from organic, unprocessed kiwis—avoid store-bought ones treated to prevent sprouting).
- ● Potting mix: 1 small container (4–6 inches deep) of well-draining seed-starting mix or a 50/50 blend of peat moss and perlite.
- ● Container: A 4–6 inch biodegradable pot (or a plastic nursery pot with drainage holes) for each seed.
- ● Plastic wrap or dome: To create a mini greenhouse effect (e.g., a clear plastic bag or a humidity dome).
- ● Spray bottle: For gentle watering (avoid soaking!).
- ○ Grow lights or sunny windowsill: A south-facing window or a 12–16 hour LED grow light (optional but helpful for weak light conditions).
- ● Tweezers: For careful seed placement.
- ○ Heating mat (optional): A seedling heat mat (set to 70–75°F) to speed up germination.
- ● Fertilizer: A balanced, water-soluble fertilizer (5-5-5 or 10-10-10) diluted to half-strength for young seedlings.
- ● Pruning shears: For trimming future vines (once your plant matures!).
- ● Trellis or stakes: Only needed for outdoor planting (kiwi vines need support!).
Step-by-Step guide to growing kiwi from seed
This method turns tiny kiwi seeds into thriving vines you can train year-round.
🌱 Step 1: Extract and Stratify Seeds for Germination
Start by scooping out the seeds from a fresh kiwi fruit—avoid seeds from store-bought varieties, as they’re often treated to prevent sprouting. Rinse them gently to remove any fruit residue, then place them in a small container with a damp paper towel. Fold the towel over the seeds so they’re lightly covered but not submerged.
Refrigerate the container for 4-6 weeks—this cold treatment (called stratification) mimics winter conditions and tricks the seeds into thinking spring has arrived. Check the towel weekly; if it dries out, spritz it lightly with water. You’ll know stratification worked when tiny white roots appear from the seeds.
💧 Step 2: Plant Stratified Seeds in Moist Potting Mix
Fill small 2-3 inch pots with sterile seed-starting mix (never garden soil—it’s too dense). Plant each seed about ½ inch deep, spacing them 1 inch apart in the pot. Press the soil lightly around the seeds so they stay in place but don’t compact it too tightly.
Water gently until the soil feels evenly moist—like a wrung-out sponge. Place the pots in a warm spot (70-75°F) with bright, indirect light. A sunny windowsill works, but avoid direct midday sun, which can overheat the soil. Cover the pots loosely with plastic wrap to retain humidity until sprouts appear.
☀️ Step 3: Provide Consistent Light and Warmth
Once the seeds sprout (usually 2-4 weeks after planting), remove the plastic wrap immediately—kiwi seedlings hate soggy conditions. Move them to a south-facing window or under a grow light for 12-14 hours of light daily. You’ll see strong growth when the first true leaves (not the initial seed leaves) emerge.
Keep the soil evenly moist but not soggy—stick your finger in the soil; if it feels dry ½ inch down, water lightly. Kiwi vines are sensitive to overwatering, so always check before adding more moisture. Rotate the pots weekly so the seedlings grow straight instead of leaning toward the light.
🪴 Step 4: Transplant and Train for Year-Round Growth
When seedlings reach 6 inches tall (about 3-4 months after planting), transplant them into 5-gallon containers with well-draining potting mix. Kiwi vines need strong support, so install a trellis or tomato cage right away—these vines can grow 20+ feet if given the chance.
Train the main vine along the trellis, pruning side shoots to encourage upward growth. Kiwi plants are dioecious, meaning male and female flowers grow on separate plants, so you’ll need at least 2 vines (one of each) for fruit. Keep the soil moist but well-drained, and fertilize lightly with a balanced fertilizer every 4-6 weeks during growing season.
⏰ Step 5: Overwinter and Prune for Next Year
In fall, reduce watering and move the containers to a cool (50-60°F), bright location for dormancy. Prune back any dead or weak growth, but leave 2-3 strong canes to regrow in spring. Kiwi vines are hardy once established, so with proper care, they’ll produce fruit in 3-5 years. Protect young plants from frost, and you’ll have a productive vine for decades.
Here’s the thing—kiwi seeds take patience, but the payoff is worth it. These vines are low-maintenance once established, and their exotic fruit makes them a conversation starter. Just remember: consistent moisture, plenty of light, and a sturdy trellis are your best friends in this process.
Tips & tricks for stress-free kiwi seed germination
These simple strategies will help you avoid common pitfalls and set your kiwi seeds up for success right from the start.
Stratification Success: The 4-6 week cold treatment is non-negotiable for kiwi seeds—they need this winter simulation to break dormancy. I've learned the hard way that skipping this step often results in seeds that never sprout. Place your container on the top shelf of your fridge where it's consistently cold (around 40°F) for best results. The key is patience—don't rush this process even if you're eager to see growth.
Lighting Setup: For Step 3, when you're providing that crucial 12-14 hours of light daily, consider using a simple LED grow light if natural light is insufficient. Position it about 6 inches above seedlings and adjust as they grow. I've found that fluorescent bulbs can work too, but they need to be closer (about 3 inches) and may require more frequent cleaning to prevent dust buildup. The goal is bright, indirect light that mimics spring conditions without overheating.
Transplanting Timing: The 6-inch height mark in Step 4 is your cue, but don't wait until the last minute. Kiwi seedlings establish roots slowly, so give them a week or two before transplanting if they're thriving. I use the "finger test"—if the soil feels dry just ½ inch down between waterings, your seedlings are ready. This timing helps prevent transplant shock, which can set back growth for weeks.
Overwintering Strategy: When preparing for dormancy in Step 5, move your containers to a location with consistent 50-60°F temperatures. A basement or unheated garage works well if it gets some light. I've had success using a simple thermometer to monitor temperatures—kiwi vines are surprisingly sensitive to temperature fluctuations during dormancy. Reduce watering to just enough to keep the soil from completely drying out, which usually means watering every 3-4 weeks.
Pro Tips for Kiwi Seed Grow A Garden
- These simple strategies will help you avoid common pitfalls and set your kiwi seeds up for success right from the start.
- Stratification Success: The 4-6 week cold treatment is non-negotiable for kiwi seeds—they need this winter simulation...
- Lighting Setup: For Step 3, when you're providing that crucial 12-14 hours of light daily, consider using a simple LE...
Frequently asked questions
Got questions about growing kiwi from seed? You’re not alone—this process can feel tricky at first! Here are answers to the most common queries to help you succeed.
How long does it take for kiwi seeds to germinate?
Kiwi seeds typically take 4–8 weeks to germinate, depending on temperature and moisture. Keep them in a warm (70–80°F), humid environment—like a seedling tray with a plastic cover—and stay patient! If no sprouts appear after 2 months, check for rot or dryness and adjust care.
Can I grow kiwi seeds indoors year-round?
Kiwi seeds thrive indoors with bright, indirect light (like a south-facing window) and consistent warmth. Use grow lights if natural light is weak. Just ensure pots have drainage holes to prevent root rot. Transplant outdoors after the last frost when soil is warm (60°F+).
What’s the best soil mix for kiwi seedlings?
Use a well-draining, slightly acidic mix (pH 6.0–6.5) like:
- 60% peat moss or coco coir
- 30% perlite or vermiculite
- 10% compost
How do I store kiwi seeds for future planting?
Kiwi seeds stay viable for 1–2 years if stored properly. Clean seeds, pat them dry, and store in a paper envelope or airtight container with silica gel packets in the fridge. Label with the date! Avoid freezing—they’ll lose viability faster.
Why are my kiwi seedlings turning yellow or wilting?
Yellowing leaves often signal overwatering or nutrient deficiency. Let soil dry slightly between waterings, and fertilize lightly (half-strength) with a balanced 10-10-10 formula every 4–6 weeks. Wilting can also mean underwatering—check soil moisture with your finger before adding more water.
Can I grow kiwi from store-bought kiwi seeds?
Yes, but expect female-only plants (store-bought kiwis are seedless hybrids). For fruit, you’ll need both male and female vines—save seeds from organic, heirloom kiwis (like Hayward) for better odds. Cross-pollination requires at least two plants nearby, ideally 30+ feet apart.
Wrapping up and next steps
Growing kiwi seeds is a rewarding journey that blends patience with the joy of nurturing life—even if your garden is small or your space is limited! 🌱 With the right techniques, like proper stratification and consistent care, you can turn tiny seeds into thriving vines year after year.
Whether you’re a beginner or a seasoned gardener, every seed planted is a step toward a bountiful harvest or a stunning ornamental addition.
Ready to take the next step? Start by planting your prepped seeds this weekend, then track their progress in a garden journal to refine your skills. Share your kiwi-growing wins with fellow gardeners—your success might inspire someone else to dig in! 🌟