
Propagation
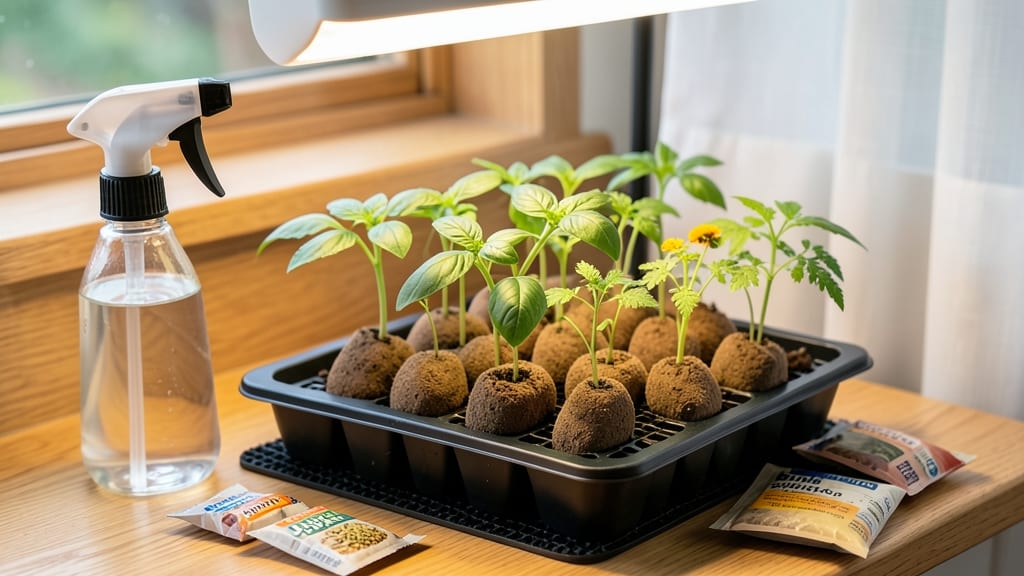
My Jiffy seed starting kit transformed my seedling success rate from 50% to nearly 100%—no exaggeration. These compressed peat blocks hold moisture perfectly, prevent overwatering, and give seedlings a head start with their built-in nutrients.
The first time I used them, my basil sprouted in 3 days instead of the usual week, and the roots stayed strong through transplanting. The setup couldn’t be simpler: soak the blocks, nestle seeds in the dimples, cover with a humidity dome, and place under grow lights.
No fancy equipment needed—just a tray, water, and a warm spot. My black thumb finally grew confident, and I’ve since started everything from tomatoes to peppers this way. What you’ll end up with are stocky, dark-green seedlings ready for the garden in just 4-6 weeks.
The blocks break down easily when it’s time to transplant, so you won’t disturb delicate roots. Plus, they’re reusable if you compost them properly—less waste, more growth. Compared to soil trays or peat pots, Jiffy blocks stay cleaner, drain better, and reduce the risk of damping-off disease.
For anyone tired of leggy, weak seedlings, this is the game-changer you’ve been waiting for.
📚 In This Guide
- What you need
- Instructions
- Tips and common mistakes
- Wrapping up and next steps
What you need
- ● Jiffy Seed Starting Kit – Includes 4-6 peat pellets (check the package for exact count).
- ● Seeds – Fast-germinating varieties like basil, lettuce, or marigolds (follow packet instructions for quantity).
- ● Watering can or spray bottle – A gentle misting function is ideal to avoid displacing pellets.
- ● Tray or shallow container – Large enough to hold all pellets (e.g., 10x20-inch plastic tray).
- ● Scissors or knife – For opening pellet wrappers (if not pre-slit).
- ● Grow lights or sunny windowsill – 6-8 hours of light daily (south-facing window or LED grow lights work best).
- ○ Plant labels & marker – To track seed types (optional but helpful!).
- ● Seedling heat mat – Speeds up germination for cooler climates (70-75°F is ideal).
- ● Humidity dome or plastic wrap – Keeps moisture in during early stages.
- ● Fertilizer (balanced, water-soluble) – Diluted to half-strength once sprouts appear.
- ● Tweezers – For delicate seed placement (e.g., tiny flower seeds).
Step-by-Step instructions for using a Jiffy seed starting kit
Here's how to get your seeds sprouting in record time with these convenient starter blocks.
Prepare the Starter Blocks
Start by filling a shallow tray with warm water—about ½ inch deep. Place the Jiffy starter blocks into the water, ensuring each one absorbs moisture evenly. You'll see them expand within minutes as they soak up the water, becoming firm and ready for planting. This pre-moistening step is crucial because it eliminates the guesswork of watering later.
Once fully saturated, let the blocks drain for 5-10 minutes in the tray. You'll know they're ready when they hold their shape but no longer feel soggy to the touch. This prevents waterlogging, which can suffocate young roots. Remove any excess water from the tray to avoid creating a damp environment that encourages mold.
Plant Your Seeds
Using your finger or a small tool, gently press a hole in the center of each block—just deep enough to hold your seeds. For most seeds, a depth of ¼ inch works well, but always follow the packet instructions. Place 1-2 seeds per block, depending on the seed size and your preference for thinning later.
Cover the seeds lightly with a sprinkle of the pre-moistened starter mix from the block itself. Avoid pressing down too firmly, as this can bury the seeds too deeply and delay germination. Label each block with the seed variety and planting date to keep track of your progress, especially if you're starting multiple types of seeds.
Provide Ideal Germination Conditions
Place the tray of planted blocks in a warm, humid environment. A seedling heat mat set to 70-75°F speeds up germination significantly, especially for slower starters like tomatoes or peppers. If you don’t have a heat mat, a sunny windowsill or under-grow lights will work, but germination may take a few extra days.
Cover the tray with a clear plastic dome or wrap it loosely with plastic wrap to retain moisture. Check daily for condensation on the plastic—this is a good sign your humidity levels are right. Once you see the first signs of sprouts, remove the cover immediately to prevent fungal issues. You’ll typically see germination in 3-10 days, depending on the seed type.
Care for Young Seedlings
Once seedlings emerge, move the tray to a bright location with 12-16 hours of light daily. If using artificial light, keep it 2-3 inches above the seedlings and adjust the height as they grow to avoid leggy stems. Water gently from the bottom of the tray to keep the soil evenly moist but not waterlogged.
When the seedlings develop their first true leaves—those that look like the mature plant’s foliage—it’s time to thin if you planted more than one seed per block. Use small scissors to snip the weaker seedling at soil level, leaving the strongest one to grow. This prevents overcrowding and ensures your remaining plant gets all the nutrients it needs.
Transplant When Ready
Seedlings are ready to transplant when they’ve developed 2-3 sets of true leaves and the roots begin to fill the block. Gently press the block into the soil of your garden or larger container, ensuring the top of the block sits level with the surrounding soil. The Jiffy blocks will break down naturally, so you don’t need to remove them—just water thoroughly to help them integrate.
Transplant on an overcast day or in the late afternoon to reduce stress on the seedlings. Keep the soil consistently moist for the first week after transplanting to help the roots establish. With proper care, your seedlings will grow into strong, healthy plants ready for the garden or container.
Tips & tricks for perfect Jiffy seed starting
Here’s how to make the most of your Jiffy blocks and avoid common pitfalls that can slow down germination.
Soaking Secret: When soaking your Jiffy blocks for 5-10 minutes in Step 1, use warm (not hot) water to speed up absorption. The blocks should feel firm but not dripping—this ensures they hold moisture without becoming waterlogged. I like to swirl the tray gently to help them expand evenly, especially if some blocks seem slower to absorb.
Lighting Strategy: In Step 4, artificial grow lights are your best friend if natural light is limited. Position them 2-3 inches above seedlings and adjust as they grow—too close causes burning, while too far away leads to leggy stems. I’ve found that a simple LED bulb on a timer (12-16 hours daily) works perfectly for consistent growth without breaking the bank.
Germination Timing: The 3-10 day germination window in Step 3 can feel like forever, but patience pays off. For faster results, especially with slower seeds like tomatoes, place your tray on a seedling heat mat set to 75°F. If you don’t have one, a warm spot near your fridge or a sunny windowsill works too—just avoid cold drafts, which can delay sprouting.
Thinning Technique: When thinning in Step 4, use small scissors to cut at soil level rather than pulling seedlings out. This minimizes root disturbance and reduces transplant shock. I’ve seen seedlings bounce back surprisingly well when handled this way, even if they look delicate. Labeling your blocks early helps you remember which ones need thinning!
Pro Tips for Jiffy Seed Starting Kit
- Here’s how to make the most of your Jiffy blocks and avoid common pitfalls that can slow down germination.
- Soaking Secret: When soaking your Jiffy blocks for 5-10 minutes in Step 1, use warm (not hot) water to speed up absorption.
- Lighting Strategy: In Step 4, artificial grow lights are your best friend if natural light is limited.
Frequently asked questions
How long does it take for seeds to germinate in a Jiffy?
Germination time varies by seed type, but most Jiffy peats germinate in 5–14 days with proper warmth (70–85°F) and moisture. Check the seed packet for specifics—fast growers like radishes sprout in 3–7 days, while slower ones (like tomatoes) may take 2 weeks.
Can I reuse a Jiffy peat pellet?
Nope! Jiffy peats are single-use—they’re designed to break down and provide nutrients only once. After transplanting, compost the empty shell or discard it. For reuse, consider biodegradable pots or coco coir alternatives, but they won’t mimic a Jiffy’s convenience.
What’s the best temperature for germinating seeds in Jiffy peats?
Most seeds thrive between 70–85°F for optimal germination. Use a seedling heat mat (50–60°F) if your space is chilly, or place the tray on a sunny windowsill. Avoid extremes—below 60°F slows growth, while above 90°F can stress delicate seedlings.
Do I need to fertilize seedlings in Jiffy peats?
Jiffy peats contain minimal nutrients, so start with a balanced liquid fertilizer (5-5-5 or 10-10-10) at half-strength once seedlings sprout. Switch to a seedling-specific formula after the first true leaves appear. Over-fertilizing can burn tender roots!
My Jiffy seeds aren’t germinating—what’s wrong?
Check these fixes:
- Moisture: Soak peats until saturated (like a wrung-out sponge) and keep them damp not soggy.
- Light: Seeds need indirect light (12–16 hours/day) after sprouting—use a grow light if natural light is weak.
- Temperature: Move to a warmer spot (e.g., near a heater vent or under a heat lamp).
- Seed viability: Test a few seeds in warm water—if they float, they’re likely dead. Try fresh seeds!
Still stuck? Scratch-test seeds (rub between fingers)—if they’re powdery, they’re past their prime.
Wrapping up and next steps
Ready to transform your gardening dreams into lush, thriving plants? The Jiffy Seed Starting Kit makes it effortless—no soil mess, no guesswork, just foolproof germination in minutes!
Whether you're a seasoned green thumb or a curious beginner, these starter blocks are your ticket to a bountiful harvest or stunning blooms. 🌱✨
Now that you’re armed with all the tips and tricks, take the next step—grab your kit, pick your favorite seeds, and let the magic happen! Soon, you’ll be transplanting confidently and watching your garden flourish. Happy growing! 🌿