
Lawn
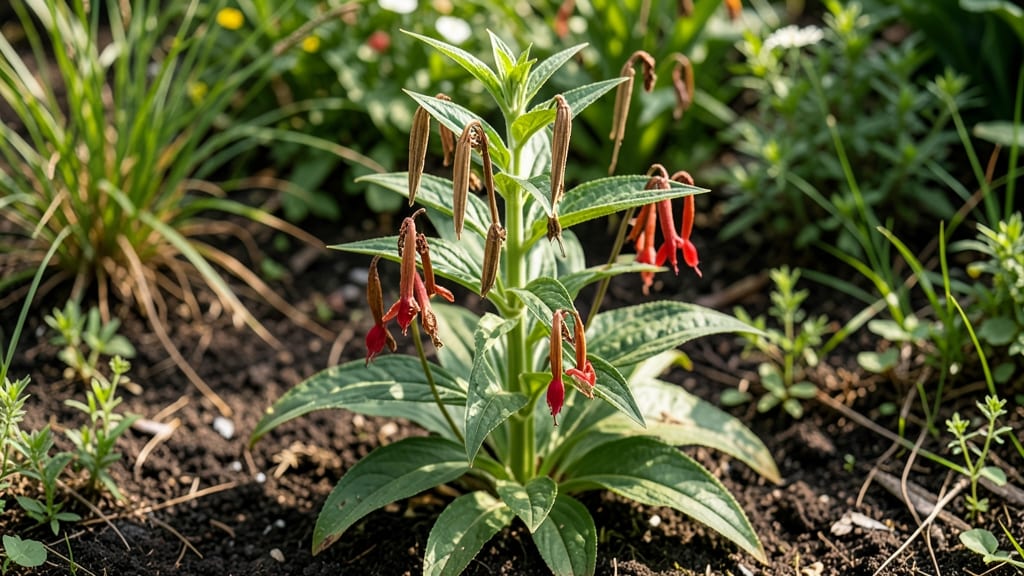
Harvesting hummingbird vine seed pods transforms last season’s vines into next year’s garden showstoppers. 🌱 The key is knowing exactly when to collect them—before they split open and scatter seeds everywhere—and how to store them so they stay viable through winter.
I’ve spent years perfecting this process, and the results? A reliable source of these vibrant climbers without buying expensive nursery plants.
The moment the pods turn from green to brown but haven’t yet cracked open is your window—usually in late fall before the first hard frost. Once collected, let them dry completely in a paper bag for a week, then crack them open to remove the flat, winged seeds.
These seeds can last 2-3 years if stored in a cool, dry place like a sealed container in your fridge.
Planting them in spring after the last frost gives them the warm soil they need to germinate. Scatter seeds on well-draining soil, press lightly into the top inch, and keep moist until sprouts appear in 2-4 weeks.
The vines grow fast once established, and with proper support, they’ll reward you with bright orange-red blooms that hummingbirds adore.
Common challenges? Dormancy is the biggest—some seeds need a cold period to germinate, which is why storing them in the fridge mimics winter conditions. If you’re impatient, soak seeds in warm water for 24 hours before planting to speed things up.
Just avoid overwatering once they’re in the ground—these vines hate soggy roots.
📚 In This Guide
- What you need
- Instructions
- Tips and common mistakes
- Wrapping up and next steps
What you need
- ● Mature hummingbird vine (Campsis radicans) plants – Ensure they’re at least 2–3 years old for optimal seed pod production.
- ● Sharp pruning shears or garden scissors – A bypass pair (not anvil) for clean cuts.
- ● Brown paper bags or breathable mesh sacks – 1–2 per plant (10–15 pods per bag).
- ● Rubbing alcohol (70% isopropyl) and cotton swabs – For sterilizing tools and preventing mold.
- ● Labeling tags & permanent marker – To track harvest dates and varieties.
- ● Plastic or glass storage containers with lids – Airtight for long-term seed storage (quart-sized or larger).
- ○ Fine-mesh strainer or sieve – For separating seeds from chaff (optional but helpful).
- ● Gloves – Protect your hands from thorns or sap.
- ● Twine or clips – To hang pods upside-down for drying (if not using bags).
- ● Hydrometer or moisture meter – For checking seed dryness (aim for <10% moisture).
- ● Desiccant packets – Place in storage containers to absorb excess moisture.
- ● Notebook or app – To log growing conditions and seed viability notes.
How to harvest and store hummingbird vine seed pods for long-term use
Here’s my foolproof method for collecting, drying, and storing hummingbird vine seed pods—guaranteed to keep them viable for next season’s planting.
🌿 Step 1: Identify and Harvest Ripe Seed Pods
Wait until the pods turn a deep brown and begin splitting open naturally—this signals they’re fully mature and ready for collection. I like to harvest on a dry, sunny morning when the pods are crisp and brittle. Use clean, sharp pruning shears to snip the entire seed pod cluster from the vine, leaving a small stem attached.
Don’t rush this step. Overripe pods may release seeds prematurely, while underripe ones won’t store well. If you miss the perfect window, you’ll know because the pods will start dropping seeds on their own—then it’s too late for quality storage.
⏰ Step 2: Dry the Pods Thoroughly Before Handling
Spread the harvested pods in a single layer on a clean, dry surface—like a mesh screen or paper towels—in a warm, well-ventilated area. Keep them out of direct sunlight to prevent overheating, which can damage the seeds inside. I’ve found that 3-5 days of drying at room temperature (70-75°F) works best for most climates.
Test for readiness by gently pressing a pod—it should crumble easily. If it still feels pliable, leave it a few more days. Humidity is the enemy here, so avoid drying in damp conditions or enclosed spaces where moisture lingers.
🪴 Step 3: Extract and Clean the Seeds
Once fully dry, place the pods in a clean paper bag and gently crush them by hand or with a rolling pin to release the seeds. Avoid using metal tools, as they can damage the delicate seed coats. Sift the mixture through a fine-mesh sieve to separate seeds from chaff and debris.
For extra purity, float the seeds in a bowl of water—the viable ones will sink while empty or damaged seeds float to the surface. Scoop out the good seeds with a spoon and pat them dry on a paper towel. This step ensures only the best seeds make it to storage.
💧 Step 4: Store Seeds in Airtight Containers
Transfer the cleaned seeds into small, airtight containers—like glass jars or vacuum-sealed bags—labeling each with the date and variety. Store them in a cool, dark place, such as a pantry or refrigerator, where temperatures stay between 40-50°F. This slows moisture loss and preserves viability for up to 2-3 years.
Never store seeds in the freezer unless you’re prepping for long-term (5+ year) storage, as the temperature fluctuations can degrade seed quality faster. Check containers periodically for signs of moisture or pests—discard any seeds that show mold or unusual odors immediately.
☀️ Step 5: Test Viability Before Next Season’s Planting
Before sowing, conduct a simple viability test by placing 10 seeds between damp paper towels in a sealed plastic bag. Keep them in a warm spot (75-80°F) and check daily. If 50% or more sprout within 7-10 days, your seeds are ready to plant. If germination rates are low, consider collecting fresh pods for a more reliable batch.
This test gives you peace of mind and helps you avoid wasting time on seeds that may not perform well. I always test a small batch first—it’s a small effort that saves big headaches later.
Tips & tricks for perfect hummingbird vine seed pod preservation
Between us, these little details make all the difference when it comes to keeping your hummingbird vine seeds viable for planting next season.
Harvest Timing: The deep brown color and natural splitting of pods are your clear signals—don't be tempted to harvest earlier. I've learned this the hard way after storing underripe pods that failed to germinate. Harvest on crisp mornings when pods are completely dry to the touch, and always leave that small stem attached. It helps maintain structural integrity during drying.
Drying Environment: While the 3-5 day drying window at 70-75°F works perfectly, I've found that adding a small fan on low setting can cut drying time by nearly 24 hours without risking overheating. Just keep it out of direct sunlight—those seeds are delicate! The key is creating airflow while maintaining consistent temperature. A sunny windowsill might seem convenient, but it can push temps above 80°F and damage the seeds.
Seed Cleaning Strategy: For the water float test, I recommend using lukewarm (not hot) water—it helps separate debris more effectively while keeping viable seeds from absorbing too much moisture. After scooping out the good seeds, I always give them one final air-dry on paper towels for 10-15 minutes before storage. This extra step prevents any residual moisture that could lead to mold during long-term storage.
Storage Containers: While glass jars work beautifully, I've had great success with resealable Mylar bags with oxygen absorbers for extended storage beyond 2-3 years. The bags take up less space and provide better protection against light and moisture. Just remember to squeeze out all air before sealing—those oxygen absorbers need room to work their magic! For short-term storage, I prefer glass because it lets me easily check seed condition without opening the container.
Pro Tips for Hummingbird Vine Seed Pods
- Between us, these little details make all the difference when it comes to keeping your hummingbird vine seeds viable for planting next season.
- Harvest Timing: The deep brown color and natural splitting of pods are your clear signals—don't be tempted to harvest earlier.
- Drying Environment: While the 3-5 day drying window at 70-75°F works perfectly, I've found that adding a small fan on low setting can cut drying time by nearly 24 hours without risking overheating.
Frequently asked questions
Got questions about harvesting and storing hummingbird vine seed pods? You’re not alone! Here are answers to the most common queries to help you tackle the process with confidence.
When is the best time to harvest hummingbird vine seed pods?
The ideal time to harvest seed pods is when they’ve turned dry and papery but before they split open—usually late summer to early fall. Wait too long, and the seeds will scatter naturally. Look for pods that crinkle slightly when squeezed but still hold their shape.
How do I know if the seeds inside are viable?
Viable seeds should be plump, firm, and dark-colored (often brown or black). If they’re shriveled, moldy, or discolored, they’ve likely lost viability. For extra peace of mind, conduct a float test: Drop seeds in water—viable ones sink, while hollow or dead ones float.
Can I grow hummingbird vine from store-bought seeds, or do I need to harvest my own?
Store-bought seeds will work, but harvesting your own ensures the best germination rates and adapts the plant to your local climate. If you’re buying seeds, choose organic, non-GMO options from reputable suppliers for the best results. Just note: Store-bought seeds may not attract as many hummingbirds as locally sourced ones!
How long can I store harvested seed pods before planting?
Properly dried and stored seed pods remain viable for 1–2 years in a cool, dark place (like a sealed jar in the fridge). To extend shelf life, remove seeds from pods and store them in a paper envelope with a silica gel packet. Avoid plastic bags—they trap moisture and speed up spoilage.
Why aren’t hummingbirds visiting my vine after I planted it?
Hummingbirds may avoid your vine if it’s not yet in bloom or lacks bright, tubular flowers. Ensure your plant gets full sun (6+ hours/day) and fertile soil. If blooms appear but hummers skip it, try adding a sugar-water feeder nearby to lure them in—once they discover the nectar, they’ll return!
Wrapping up and next steps
Harvesting and storing hummingbird vine seed pods doesn’t have to be a daunting task—with the right tools and techniques, you can enjoy a steady supply of seeds for years to come! 🌿 Whether you’re a seasoned gardener or just starting out, these pods offer a rewarding way to attract pollinators and expand your garden’s beauty.
Now that you’re equipped with the know-how, why not take the next step?
🌱 Ready to Grow?
- Plant a few seed pods in your garden this season and watch your hummingbirds thrive!
- Share your success with fellow gardeners—inspire others to try it too!
Happy gardening, and may your hummingbird vine seed pods bring joy (and buzzing visitors!) for seasons to come. 🐦⬛✨