
Lawn
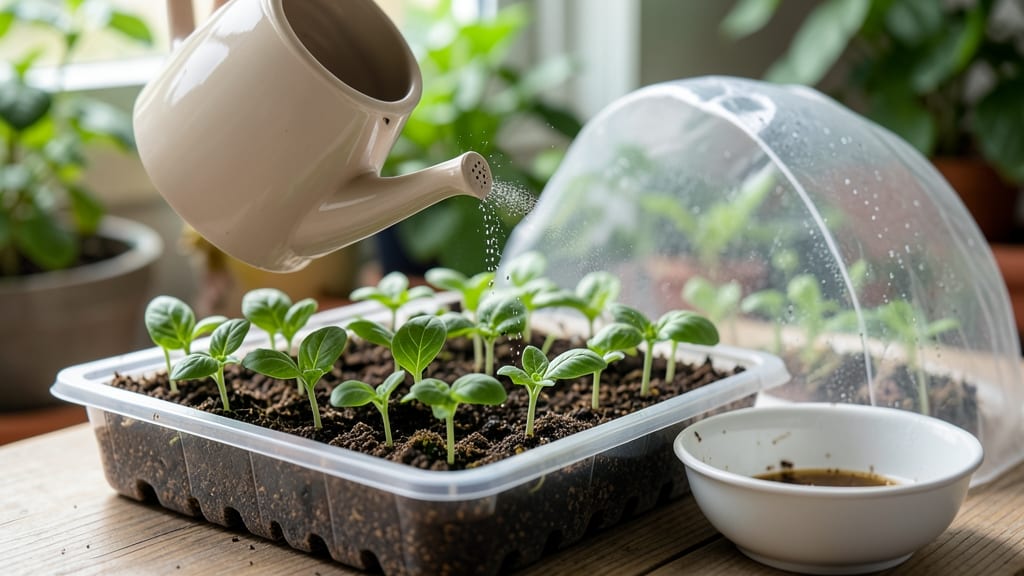
Watering seed trays properly is the secret weapon that turns flimsy seeds into thriving seedlings. ✨ The right moisture balance keeps seeds from drying out or drowning—two fates that kill more starts than pests ever will.
I’ve lost count of the trays I’ve watched fail from either too much or too little water, but this method works every time.
You’ll need just three things: a spray bottle for gentle watering, a tray with drainage holes, and a humidity dome or plastic wrap to lock in moisture.
The goal is to keep the soil consistently damp—not soggy, not bone-dry—like a wrung-out sponge. Overwatering suffocates seeds, while underwatering leaves them parched and unable to sprout.
Start by saturating the soil from below—place the tray in an inch of water for 10 minutes, then drain. After that, water only when the top inch feels dry, using a fine mist to avoid disturbing seeds.
A humidity dome keeps moisture steady, but check daily to prevent mold. Within a week, you’ll see tiny green hooks breaking through the soil—proof you’ve nailed the moisture balance.
Common mistakes? Letting trays sit in standing water or skipping the drainage layer. For best results, use a mix of perlite and peat moss to improve airflow, and never let seeds dry out completely.
Once sprouts appear, reduce watering slightly—too much now causes damping-off, a fungal disease that wipes out seedlings overnight.
📚 In This Guide
- What you need
- Instructions
- Tips and common mistakes
- Wrapping up and next steps
What you need
- ● Seed trays – 1-2 trays (with drainage holes; 10x20 inches or similar size works well for most seeds).
- ● High-quality seed starting mix – 1 bag (sterile, well-draining blend like Pro-Mix or FoxFarm; avoid garden soil).
- ● Watering can or spray bottle – 1 (with a fine rose nozzle to avoid disturbing seeds).
- ● Distilled or room-temperature water – Enough to lightly saturate the mix (chlorine-free if possible).
- ○ Tray cover or plastic wrap – 1 (optional but helpful for humidity; use a clear lid or wrap tightly).
- ● Flat surface or seed tray tray – 1 (to elevate trays and improve airflow).
- ● Bottom watering tray – 1 (to collect excess water and prevent soggy roots).
- ● pH testing kit – 1 (to check water hardness; ideal pH for most seeds: 5.8–6.2).
- ● Humidity dome – 1 (for delicate seeds like lettuce or herbs).
- ● Grow lights or sunny windowsill – Access to 6–8 hours of indirect light daily.
- ● Labeling tags – 1 pack (to track seed varieties and planting dates).
Step-by-step instructions for watering seed trays
Here's the method I swear by for keeping seed trays perfectly moist without drowning your future plants.
💧 Step 1: Choose the Right Watering Method
Seedlings hate soggy soil, but they also need consistent moisture to germinate. I always use a spray bottle with a fine mist setting for the first week—it gives you complete control over how much water reaches the soil. For larger trays, a watering can with a gentle shower head works better, but avoid pouring water directly from above.
This ensures water penetrates evenly without disturbing seeds or seedlings. You'll see the perfect moisture level when the soil surface looks slightly damp but not glistening. If you're using a humidity dome, skip this step until germination is complete—condensation inside provides all the moisture you need.
🌱 Step 2: Water Until Soil is Evenly Moist
Water the tray from the bottom whenever possible by placing it in a shallow tray of ½ inch of water for 10-15 minutes. This method prevents surface compaction and ensures roots develop downward. You'll know it's working when water appears at the surface but doesn't pool—drain any excess immediately.
For top-watering, apply water until it runs out the drainage holes. This flushing technique removes excess salts from the mix. I like to do this every 2-3 days until seeds sprout, checking moisture by lifting the tray—it should feel light but not bone dry. Overwatering now is the fastest way to kill seedlings before they even emerge.
⏰ Step 3: Adjust Frequency Based on Germination Stage
Before germination, keep the soil consistently moist (like a wrung-out sponge). After seeds sprout, reduce watering slightly—you only need to maintain top inch dry between waterings. I use my finger to check: if the top layer feels cool and dry, it's time to water again.
Watch for yellowing leaves or collapsed stems—these are signs of overwatering. If you see tiny black spots on seedlings, that's damping-off fungus, and you'll need to remove affected plants immediately. The key is consistency: seedlings can handle brief dry spells better than prolonged sogginess.
☀️ Step 4: Protect Watered Trays from Environmental Stress
After watering, move trays to a shady spot for 30-60 minutes to prevent temperature shock from cold water. Seedlings are most vulnerable right after watering. I place mine on a heat mat during germination to maintain 70-75°F soil temperature—this speeds up sprouting without requiring constant watering.
Group trays together to create a microclimate that retains humidity naturally. Avoid placing them near drafts or air vents, which dry soil unevenly. You'll notice healthier germination when trays stay clustered—seedlings will emerge more uniformly and stay stronger through their early days.
✂️ Step 5: Transition to Mature Watering Routine
Once seedlings develop their first true leaves (not the initial seed leaves), switch to watering from the top but still gently. Use a watering can with a narrow spout to aim at the soil, not the leaves. This prevents fungal diseases that thrive in wet foliage.
Now you can water less frequently—every 3-4 days—but more deeply, encouraging roots to grow downward. You'll see the difference in sturdy stems and dark green leaves. The goal is to build drought-resistant seedlings that won't wilt when you eventually transplant them.
Tips & tricks for perfect seedling moisture balance
These essential tricks will help you maintain that delicate balance between soggy and dry soil for thriving seedlings.
Soil Texture Test: The best way to check moisture is by lifting the tray—it should feel light but not bone dry. If it feels heavy, you've overwatered; if it feels completely dry, you've underwatered. I like to use my finger to test the top inch of soil: if it feels cool and dry, it's time to water again. This method is more reliable than guessing by appearance.
Heat Mat Strategy: Maintaining that 70-75°F soil temperature during germination speeds up sprouting without requiring constant watering. If you don't have a heat mat, place your trays on top of a warm appliance like a refrigerator (not too hot!) or use a seedling heat cable. The goal is to keep the soil warm but not hot—you should be able to touch it comfortably.
Environmental Grouping: Grouping trays together creates a natural microclimate that retains humidity. I place mine on a baking sheet with a thin layer of pebbles and a little water underneath to add extra moisture to the air around them. Just be sure to drain any excess water from the pebbles after 24 hours to prevent root rot. This simple trick helps maintain consistent moisture levels without overwatering.
Pro Tips for Water Seed Trays
- These essential tricks will help you maintain that delicate balance between soggy and dry soil for thriving seedlings.
- Soil Texture Test: The best way to check moisture is by lifting the tray—it should feel light but not bone dry.
- Heat Mat Strategy: Maintaining that 70-75°F soil temperature during germination speeds up sprouting without requiring constant watering.
Frequently asked questions
Got questions about keeping your seed trays perfectly moist without drowning your seeds? You’re not alone! Here are answers to the most common concerns—so you can grow with confidence.
How often should I water seed trays?
Water seed trays daily—but lightly! Aim for a misting or gentle watering to keep the soil consistently damp (like a wrung-out sponge). Overwatering suffocates seeds, while underwatering dries them out. Use a spray bottle or fine-rose nozzle for precision. Check soil moisture by pressing your finger in—if the top ½ inch feels dry, it’s time to water.
What if my seed tray stays too wet or dry?
Too wet?
Stop watering and let excess moisture evaporate. Place trays in a shady, well-ventilated spot (like a seedling heat mat with a fan) to speed drying. For dryness, cover trays with plastic wrap or a humidity dome to trap moisture. If mold appears, act fast—remove affected seeds and improve airflow.
Can I use tap water for seed trays?
Tap water is fine for most seeds, but if it’s chlorinated or hard, opt for filtered or rainwater. Chlorine can stress seedlings, while minerals in hard water may crust the soil. Let tap water sit out for 24 hours to dissipate chlorine, or use a water filter designed for plants.
What’s the best way to water without disturbing seeds?
Use a spray bottle or bottom-watering method to avoid displacing seeds. For bottom-watering, place trays in a shallow tray of water for 10–15 minutes—soil will draw up moisture evenly. Avoid pouring water directly on seeds, which can wash them away or create muddy conditions.
How do I tell if my seeds are getting enough water?
Healthy seeds show these signs:
- Soil: Dark and moist (not soggy or cracked).
- Seeds: Firmly pressed into soil, not floating.
- Seedlings: Plump, upright stems with vibrant leaves.
Wrapping up and next steps
Mastering the art of watering seed trays is all about balance—keeping your seeds happy without drowning them! 🌱 With the right tools, techniques, and a little patience, you’ll give your seedlings the best start possible.
Now that you’re armed with knowledge, it’s time to roll up your sleeves and put it into practice.
Your next step? Monitor, adjust, and celebrate those first sprouts! Keep a close eye on moisture levels, and don’t forget to document your progress. Happy growing—your future garden will thank you! 🌿✨