
Lawn
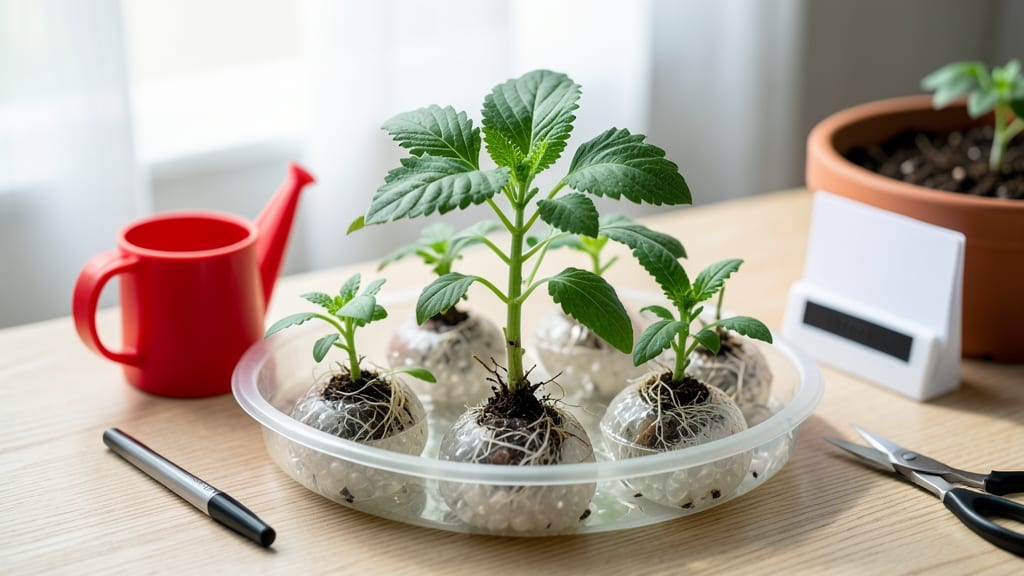
How to use seed starter pellets cuts your germination time in half—no more waiting weeks for stubborn seeds to break soil. 🌱 I’ve used them for everything from delicate herbs to finicky vegetables, and the difference is night-and-day compared to regular potting mix. These little compressed loam discs expand into perfect seed-starting cubes that hold moisture exactly where seeds need it.
The real magic happens in the first 24 hours: soak the pellets in water until they triple in size (about 10 minutes), then plant seeds directly into the soft center.
No transplant shock, no messy soil spills, and no guessing about drainage—just consistent, fast results. Even my black thumb can’t kill these when done right.
You’ll see sprouts in as little as 3-5 days with proper moisture, and seedlings stay compact and strong until they’re ready for soil. The cubes even break apart easily when transplanting, so roots stay intact. No more delicate handling or lost seedlings during the move to bigger pots.
Perfect for beginners, small spaces, or anyone tired of hit-or-miss germination. Here’s exactly how to get started—plus the one mistake that ruins everything (and how to avoid it).
📚 In This Guide
- What you need
- Instructions
- Tips and common mistakes
- Wrapping up and next steps
What you need
- ● Seed starter pellets: A 50-count pack (or more, depending on your needs) – these are typically made from compressed peat or coconut coir.
- ● Seedling trays or containers: A shallow tray with drainage holes (e.g., 1020-cell trays) or small pots (2-4 inches in diameter).
- ● Seeds: Choose fast-growing varieties like lettuce, herbs, or flowers for quick results!
- ● Water: Room-temperature water (avoid cold or chlorinated water).
- ● Scissors or knife: For trimming the pellets if needed.
- ○ Spray bottle (optional but helpful): For gentle watering without disturbing the seeds.
- ● Gloves: To keep your hands clean while handling pellets.
- ● Fertilizer (balanced or seed-starting formula): A diluted liquid fertilizer to boost early growth.
- ● Heat mat (for cold climates): Helps speed up germination for slow-starting seeds.
- ● Grow lights or sunny windowsill: Ensures seedlings get enough light (6-8 hours daily).
- ● Labeling tags or markers: To track seed varieties and planting dates.
Step-by-Step instructions for using seed starter pellets
Here's how I transform these simple pellets into perfect germination starters every time.
🌱 Step 1: Hydrate the Pellets Properly
Place your seed starter pellets in a shallow tray or container. Slowly pour warm water over them until they're fully saturated—you'll see them expand dramatically within 5-10 minutes. The goal is to double their size, creating a perfect growing medium for tiny roots.
Don't rush this step. If you pour too quickly, pellets may float or expand unevenly. I like to use a spray bottle for the final misting to ensure even saturation. Once expanded, they should feel firm but still slightly springy when pressed gently.
💧 Step 2: Prepare the Tray for Planting
Arrange the expanded pellets in your seed-starting tray, leaving about ½ inch between each pellet. This gives roots room to grow without competing for space. I always use the same tray size that matches my pellet quantity—this prevents overcrowding that leads to weak seedlings.
Press down very lightly to create a stable surface. You want the pellets to stay in place when you handle the tray, but not so firm that water can't penetrate easily. This is especially important for fast-germinating seeds that need consistent moisture right from the start.
☀️ Step 3: Plant and Water Your Seeds
Make a small indentation in the top of each pellet using your finger or a pencil. Place 1-2 seeds per pellet at a depth of about ¼ inch—this is crucial for fast germination. Cover lightly with a tiny pinch of the pellet material.
Water gently using a spray bottle until the surface looks evenly moist. Avoid overwatering here—the pellets already hold plenty of moisture, and excess water can cause seeds to rot before they sprout. You'll know you've done it right when the pellet surface looks damp but not glistening.
⏰ Step 4: Create Ideal Germination Conditions
Cover the tray with a clear plastic dome or plastic wrap to create a humid environment. Place it in a warm spot—70-75°F is ideal for most seeds. I use a seedling heat mat under my trays during cool seasons, and germination happens 2-3 times faster than without it.
Check daily for condensation on the dome. This is normal and helps maintain humidity, but if you see mold developing, remove the dome immediately and increase air circulation. Most seeds will sprout within 5-14 days, depending on the variety—watch for the first tiny green shoots breaking through the pellet surface.
🌿 Step 5: Care for Emerging Seedlings
Once seeds sprout, remove the dome immediately to prevent fungal growth. Place the tray under grow lights or in a south-facing window where they'll receive 12-16 hours of light daily. You'll notice seedlings growing toward the light—rotate the tray daily so they grow straight instead of leaning.
Water from the bottom by placing the tray in ½ inch of water for 10-15 minutes every 2-3 days. This method prevents overwatering while keeping roots hydrated. When seedlings develop their first true leaves (not the initial seed leaves), they're ready for transplanting into individual pots.
Tips & tricks for perfect seed starter pellets
Here's what I learned after perfecting my seed-starting routine—these tricks make all the difference.
Hydration Timing: Those 5-10 minutes of hydration are critical! I've found that using water at 75°F (like warm tap water) speeds up the process without risking overheating the pellets. If your pellets aren't expanding evenly, try breaking them up gently before rehydrating—they'll absorb water more consistently.
Seed Spacing Secret: The ½-inch spacing in Step 2 might seem generous, but trust me—it prevents root competition that leads to leggy seedlings. For especially fast-growing seeds like radishes, you can reduce this to ¼ inch, but never less. I've seen seedlings literally strangle each other when crowded!
Lighting Hack: When you're ready for Step 5's 12-16 hours of light, position your grow lights just 2-3 inches above the seedlings. This close proximity gives them the intensity they need without burning. I use a simple timer to automate the light cycle—no more remembering to turn them on!
Germination Rescue: If your seeds aren't sprouting within the 5-14 day window, don't give up yet. Try gently pressing the seed into the pellet with a toothpick to ensure good contact. Some seeds need this extra encouragement to break through their shells, especially in cooler conditions.
Pro Tips for Use Seed Starter Pellets
- Here's what I learned after perfecting my seed-starting routine—these tricks make all the difference.
- Hydration Timing: Those 5-10 minutes of hydration are critical! I've found that using water at 75°F (like warm tap wa...
- Seed Spacing Secret: The ½-inch spacing in Step 2 might seem generous, but trust me—it prevents root competition that...
Frequently asked questions
Got questions about seed starter pellets? You’re not alone! Here are answers to the most common queries to help you grow confidently with these handy tools.
What are seed starter pellets made of?
Seed starter pellets are typically made from peat moss or coconut coir, compressed into small, convenient discs. Once hydrated, they expand into light, airy loam—perfect for seedlings. They’re also often fortified with nutrients to kickstart growth!
How long do seed starter pellets take to expand?
Pellets usually expand fully within 5–10 minutes when soaked in water. For best results, place them in a shallow tray or bowl of water until they double or triple in size. Avoid over-soaking—they should be damp, not soggy!
Can I reuse seed starter pellets after germination?
Unfortunately, no—seed starter pellets are designed for one-time use. Once seedlings sprout, transplant them into larger pots or soil. The pellets break down over time and lose their structure, making them unsuitable for reuse.
What if my seedlings aren’t germinating?
Try these fixes:
- Check moisture: Keep pellets consistently damp (not waterlogged).
- Warmth matters: Place trays in a warm spot (70–75°F is ideal).
- Light exposure: Some seeds need darkness first—check seed packet instructions.
- Fresh pellets: If old, replace them with new ones for better results.
Are seed starter pellets worth the cost compared to soil?
Yes! Pellets save time, reduce mess, and provide consistent moisture and aeration—ideal for beginners. While they cost more upfront, they cut down on transplant shock and speed up germination. For high-value seeds (like herbs or flowers), they’re a smart investment!
Wrapping up and next steps
Seed starter pellets are your secret weapon for fast, fuss-free germination and healthy seedlings! 🌱 By following these simple steps—hydrating, planting, and nurturing—you’ll give your seeds the perfect head start in a controlled, nutrient-rich environment.
Whether you’re a beginner or a seasoned gardener, these pellets make growing greens easier than ever.
Now that you’re ready to dive in, pick your favorite seeds and get planting! Track your progress, experiment with different varieties, and soon you’ll be transplanting thriving seedlings into your garden or containers. Happy growing! 🌿✨