
Picking
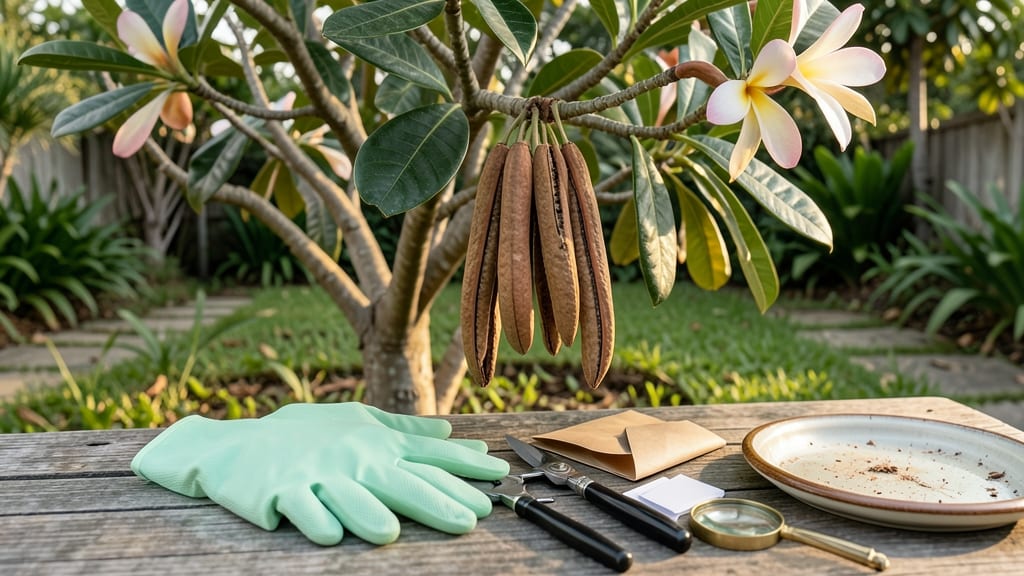
Harvesting plumeria seed pods at the right moment means the difference between viable seeds and dust. 🌺 The pods start green and firm, then swell and turn a rich, papery brown—this is your cue that nature’s ready to share its bounty.
One wrong twist, and you’ll lose everything; get it right, and you’ll have seeds to grow your own fragrant tropical plants. You’ll need just three things: sharp pruners for clean cuts, a bowl to catch the pods, and a pair of gloves (plumeria sap can irritate skin).
The real skill? Timing—harvest when pods split open naturally, usually in late summer or early fall, depending on your climate. Too early, and the seeds won’t germinate; too late, and they’ll scatter on their own.
The twist-and-pop method is simpler than it sounds: gently grip the pod and rotate it until it releases with a soft pop. Inside, you’ll find flat, dark seeds—each one a potential new plumeria.
Let them dry for a week before storing in a paper envelope; moisture is the enemy of long-term viability. Common mistakes include harvesting when pods are still green or storing seeds in plastic (which traps humidity).
With the right timing, you’ll end up with seeds that sprout reliably, giving you years of fragrant blooms from a single pod’s harvest.
📚 In This Guide
- What you need
- Instructions
- Tips and common mistakes
- Wrapping up and next steps
What you need
- ● Sharp, clean pruning shears or scissors – Sterilized and sharp to avoid damaging pods or spreading disease.
- ○ Gloves (optional but recommended) – Thin gardening gloves to protect hands from sap or prickly pods.
- ● Paper towels or cloth – For wiping sap or debris from pods and tools.
- ● Small container or paper bag – A breathable container (like a mesh bag) to store pods until processing.
- ● Permanent marker or label tags – To mark pods by variety or harvest date.
- ● Plastic wrap or sealable bags (for long-term storage) – To store dried pods in a cool, dry place.
- ● Disinfectant spray (70% isopropyl alcohol) – For sterilizing tools between cuts.
- ● Magnifying glass – To inspect pods for pests or damage before harvesting.
- ● Notebook or camera – To document pod maturity or plant traits for future reference.
- ● Seed-starting mix (if germinating later) – Ready for when you’re ready to plant those seeds!
Step-by-Step instructions for harvesting plumeria seed pods
Here's how I collect seeds without damaging the plant or wasting a single pod.
🌿 Step 1: Identify and Wait for Mature Seed Pods
Plumeria seed pods start green and firm, but they're ready to harvest when they turn tan or light brown and begin to split open naturally. You'll notice the pod's outer shell becoming papery and slightly brittle—this is your signal. I always wait until the pod opens just a crack on its own, which usually takes 4-6 weeks after flowering.
Don't rush it—green pods won't produce viable seeds. If you pick them too early, you'll end up with empty or shriveled seeds that won't germinate. Instead, watch for the telltale split and the fluffy seed floss inside becoming visible.
✂️ Step 2: Gently Twist and Pop Open the Pod
Use your fingers to grasp the pod's base where it meets the stem. Apply light pressure and twist gently—you'll hear a soft pop as the pod releases its seeds. The key is patience; forcing it will tear the pod and scatter seeds everywhere. I like to do this over a clean sheet of newspaper or a bucket to catch any stray seeds.
Once the pod opens, you'll see a cluster of flat, black seeds surrounded by fluffy white floss. This floss is nature's way of protecting the seeds, but it can make handling tricky. Let the floss dry completely before removing it—wet floss sticks to everything.
🪴 Step 3: Collect and Store Seeds Properly
Place the seeds in a paper envelope or small breathable bag—plastic traps moisture and causes mold. Label the envelope with the date and plumeria variety if known. Store the seeds in a cool, dry place (around 60-65°F) until ready to plant.
Plumeria seeds lose viability quickly, so plant them within 2-3 weeks of harvest. If you can't plant right away, refrigerate them in a sealed bag with a moist paper towel to maintain humidity. Check weekly for mold—discard any seeds that develop fuzzy growth.
🌱 Step 4: Prep Seeds for Planting (Optional)
For faster germination, I soak the seeds in lukewarm water for 12-24 hours before planting. This softens the tough outer shell and speeds up sprouting. After soaking, pat them dry gently with a paper towel—never rub, or you'll damage the seed.
Plant the seeds ¼ inch deep in a well-draining mix of 50% potting soil and 50% perlite. Keep the soil moist but not soggy and place the container in a warm, bright spot (avoid direct sun). Germination can take 2-4 weeks, so be patient—some seeds may take longer.
⏰ Step 5: Monitor and Transplant Seedlings
Once seedlings emerge, move them to a south-facing window or under grow lights for 14-16 hours daily. You'll know they're ready to transplant when they develop 2-3 true leaves (not the initial seed leaves). Handle seedlings carefully—they're delicate and break easily.
Transplant into 4-inch pots with fresh potting mix. Keep the soil consistently moist for the first 2 weeks after transplanting. After that, let the top inch dry out between waterings to prevent root rot. With proper care, your plumeria seedlings will grow into strong, flowering plants in 1-2 years.
Tips & tricks for perfect plumeria seed pod harvesting
Mastering this gentle technique ensures you get every viable seed without harming your plant.
Timing is Everything: The 4-6 week wait after flowering is non-negotiable—this is when the pods develop fully mature seeds. I've learned the hard way that rushing leads to shriveled seeds. Watch for that first tiny crack in the pod's shell, which signals perfect readiness. This natural opening means the seeds are ready to release without force.
Handle with Care: When twisting open the pods in Step 2, think "gentle persistence" rather than force. The pop you hear confirms you've done it right—the seeds should release cleanly into your container. If you hear a tear instead, you've gone too far. I always work over newspaper or a bucket to catch any stray seeds that might scatter during the process.
Storage Wisdom: That 60-65°F cool, dry spot is crucial for maintaining seed viability. I keep my seed envelopes in a pantry away from direct sunlight or heat sources. The moist paper towel trick for refrigeration works wonders if you can't plant immediately, but check weekly for any mold development—discard any affected seeds right away to prevent spreading.
Optional Prep for Faster Germination: The 12-24 hour lukewarm water soak in Step 4 is optional but highly recommended. I've found this softens the seed shells just enough to speed up sprouting by about 50%. Just remember to pat them dry gently—never rub—after soaking, or you risk damaging the delicate seed structure.
Pro Tips for Harvest Plumeria Seed Pods
- Mastering this gentle technique ensures you get every viable seed without harming your plant.
- Timing is Everything: The 4-6 week wait after flowering is non-negotiable—this is when the pods develop fully mature ...
- Handle with Care: When twisting open the pods in Step 2, think "gentle persistence" rather than force. The pop you he...
Frequently asked questions
Got questions about harvesting plumeria seed pods? You’re not alone! Here are some of the most common concerns—plus quick, actionable answers to keep your process smooth and stress-free.
When is the best time to harvest plumeria seed pods?
Harvest pods when they’re dry, brown, and slightly papery—usually 4–6 weeks after flowering. Avoid green pods (they’re not ready) or overly brittle ones (seeds may have already sprouted or dried out). Morning harvests prevent humidity-related mold risks.
What if my seed pods won’t open naturally? Can I force them?
Yes! Gently twist the pod’s seam with your fingers or tap it lightly on a hard surface. If it’s stubborn, soak it in warm water for 10–15 minutes to soften the fibers. Never cut—this damages the seeds inside. Patience pays off!
Do I need to clean the seeds after harvesting?
Rinse seeds under cool water to remove pulp, then pat them dry with a paper towel. Let them air-dry in a shaded spot for 24–48 hours. Store them in a paper envelope (not plastic) in a cool, dry place to prevent rot.
Can I grow plumeria from seeds if I don’t have a tropical climate?
Start seeds indoors 8–10 weeks before your last frost, using a heat mat to mimic tropical warmth. Plumerias thrive in zones 10–12, but with patience and greenhouse care, you can coax them along! Just know germination can take months. →
What do I do if my seeds mold or smell bad?
Discard any seeds with fuzzy mold or a sour odor immediately—this signals bacterial or fungal growth. To prevent this, harvest pods early, avoid damp conditions, and store seeds in a well-ventilated container. When in doubt, toss it out!
Pro Tip:
Label your seed pods with the harvest date and parent plant variety! Plumerias can cross-pollinate, and tracking helps you predict blooming colors and growth habits down the line.
Wrapping up and next steps
Harvesting plumeria seed pods is a rewarding way to propagate these fragrant beauties while embracing sustainability! By following these simple steps—from identifying ripe pods to gently extracting seeds—you’ll ensure healthy growth for future plants. Your patience and care today will bloom into a garden full of life tomorrow.
Ready to turn those pods into new plumeria trees? Next, explore how to plant and nurture your seeds—your green thumb is about to get even greener! 🌱