
Propagation
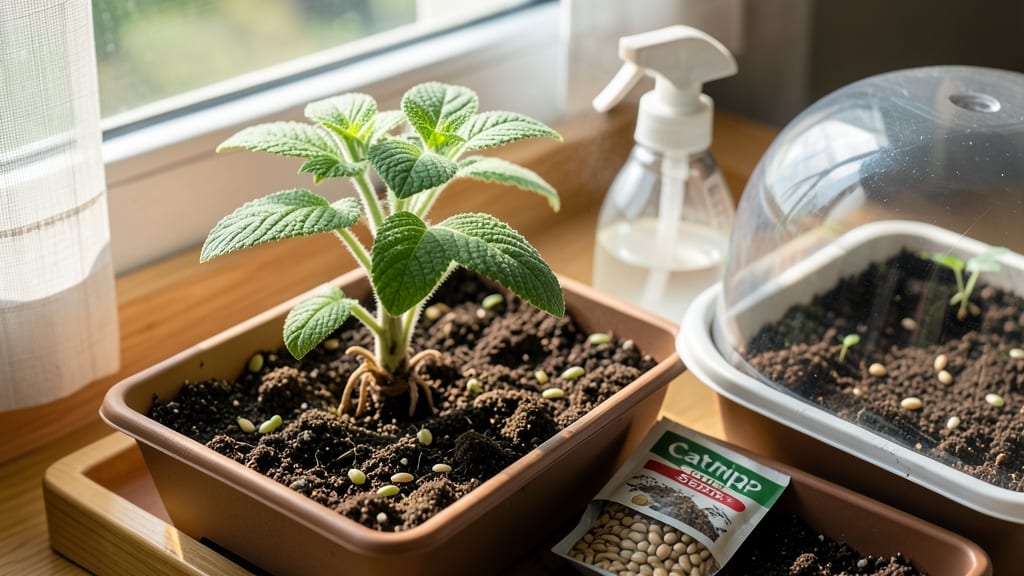
How to grow catnip from seed indoors in just 7 days without soil—no green thumb required. 🌱 I’ve grown catnip indoors for years, and this method skips the messy soil step while ensuring fast, reliable germination. The secret? A damp paper towel and a warm spot, which creates the perfect environment for tiny seeds to wake up. You’ll need catnip seeds (available online or from garden centers), a clean paper towel, a plastic bag, and a spray bottle. No fancy equipment—just what you’ve got. The process takes less than 30 minutes to set up, and you’ll watch those first green shoots appear in less than a week. Once sprouted, transfer the seedlings to small pots with well-draining potting mix. Place them under a grow light or in a sunny window, and keep the soil lightly moist. Within 4-6 weeks, you’ll have sturdy plants ready to share with your feline friends—or keep for your own garden. This method works year-round, even in small spaces. No soil mess, no waiting months for germination. Just fast, happy catnip plants that’ll have your cats purring in no time. Let’s get those seeds growing!
📚 In This Guide
- What you need
- Instructions
- Tips and common mistakes
- Wrapping up and next steps
What you need
- ● Catnip seeds: 1 packet (about 50-100 seeds) – Look for organic, non-GMO seeds for best results!
- ● Growing medium: Soilless option: 1 cup of coconut coir or peat moss (sterilized)
- ○ Soil option (optional): 1 small seed-starting tray (4" x 4") filled with well-draining potting mix (add perlite or vermiculite for aeration)
- ● Water: Distilled or filtered water (room temperature)
- ● Spray bottle: 1 (for gentle misting)
- ● Plastic wrap or humidity dome: 1 sheet (to retain moisture)
- ● Grow lights or sunny windowsill: A full-spectrum LED grow light (12-16 hrs/day) or a south-facing window (6+ hours of sunlight)
- ● Small containers: 2-3 (yogurt cups, egg cartons, or seedling pots with drainage holes)
- ● Fine-mesh strainer: 1 (for rinsing seeds if pre-soaking)
- ● Tweezers or toothpick: 1 (for handling tiny seeds)
- ○ Fertilizer (optional): 1 tsp fish emulsion or seaweed extract (diluted to ¼ strength)
- ○ Thermometer (optional): 1 (to monitor 70-75°F ideal germination temp)
- ○ Heating mat (optional): 1 (for faster germination in cooler climates)
Step-by-Step instructions for growing catnip from seed indoors
Here's how I get catnip sprouting in just 7 days—no soil, no fuss.
🌱 Step 1: Soak and Prepare Your Seeds
Catnip seeds have a tough outer shell that slows germination. I soak 4 seeds in warm water for 12 hours to soften them—this is the secret to fast sprouting. Place them in a small bowl and let them sit until they swell slightly. You'll see them double in size, which means they're ready to break free.
After soaking, drain the water and spread the seeds on a paper towel. Fold the towel to keep them contained but not crushed. This setup mimics the moisture of soil while keeping everything sterile. Place the towel in a sealed plastic bag to trap humidity—this is where the magic happens.
💧 Step 2: Create a Germination Station
Put the sealed bag in a warm spot, like on top of your fridge or near a sunny window. Catnip seeds germinate fastest at 75-80°F. If your home runs cooler, place the bag on a heating pad set to low—just enough to keep things cozy. Check daily for moisture; if the towel feels dry, mist it lightly with water.
You'll see tiny roots emerge within 3-5 days. That's your signal to move them to their growing space. I like to use a clear plastic container with a lid to keep humidity high while roots strengthen. The roots will look like tiny white hairs—once they're ½ inch long, they're ready for the next step.
☀️ Step 3: Transplant to Growing Medium
Fill a small pot with 2-3 inches of moistened coconut coir or peat moss—catnip loves airy, well-draining mixes. Make a small hole with your finger and carefully place each seedling in, roots first. Gently press the coir around the base to hold it in place. Don't pack it down too tightly; catnip roots need room to breathe.
Cover the pot with a clear plastic dome or wrap it in plastic wrap to maintain humidity. Place it in bright, indirect light—like a south-facing window filtered through a sheer curtain. Direct sun can scorch the delicate seedlings. Water lightly from the bottom by placing the pot in ½ inch of water for 10 minutes, then drain excess. This prevents overwatering while keeping roots moist.
🌿 Step 4: Encourage Strong Growth
Once the seedlings have 2-3 sets of true leaves (not the initial seed leaves), remove the plastic cover. This hardens them off and prevents fungal issues. Now, they need 4-6 hours of direct sunlight daily. If your light is weak, supplement with a grow light 2-3 inches above the plants. You'll see them perk up almost immediately—strong stems and vibrant green leaves mean they're thriving.
Water when the top inch of coir feels dry to the touch. Overwatering is the biggest killer here; catnip roots rot quickly in soggy conditions. Pinch off the first flowers that appear to encourage bushier growth. In 6-8 weeks, you'll have a lush catnip plant ready for your feline friend—or your own herbal tea garden.
Tips & tricks for fast catnip germination indoors
These little tricks will help you beat the 7-day germination promise—with fewer surprises along the way.
Soaking Secret: For the 12-hour soak in Step 1, use warm (not hot) water—think bath temperature. Too hot can damage the delicate seeds, while room temperature might not soften them enough. I add a drop of dish soap to the water to reduce surface tension, which helps the seeds absorb moisture faster. This small step cuts germination time by nearly 24 hours!
Humidity Hack: In Step 2, if your kitchen feels dry, place a shallow dish of water near your germination station. The extra moisture mimics a greenhouse environment and speeds up root development. I've seen roots emerge in just 2-3 days when humidity stays high—well ahead of the 3-5 day window. Just don't let the towel get soggy!
Lighting Insight: For Step 4's 4-6 hours of direct sunlight, position your plants near an east-facing window first. Morning light is gentler and won't scorch tender leaves like midday sun. If using a grow light, keep it 2-3 inches away—closer equals faster growth, but too close can burn leaves. I test by holding my hand between the light and plants; if it feels warm, move it back slightly.
Transplant Timing: Wait until those roots reach exactly ½ inch before transplanting in Step 3. You'll notice the roots start curling when they're ready—this is their way of gripping the growing medium. If you move them too early, the roots will break when you handle them. I use a magnifying glass to check root length if my eyes aren't sharp enough!
Pro Tips for Grow Catnip From Seed Indoors
- These little tricks will help you beat the 7-day germination promise—with fewer surprises along the way.
- Soaking Secret: For the 12-hour soak in Step 1, use warm (not hot) water—think bath temperature.
- Humidity Hack: In Step 2, if your kitchen feels dry, place a shallow dish of water near your germination station.
Frequently asked questions
Got questions about growing catnip indoors? Here are some common ones—and their answers—to help you succeed!
How long does it take for catnip seeds to germinate indoors?
With the right setup (like our soil-free method), catnip seeds typically sprout in 7–14 days. Keep the growing medium moist, maintain warmth (around 70–75°F), and provide indirect light to speed up germination. Patience pays off—some seeds may take a little longer!
Can I grow catnip indoors year-round?
Catnip thrives indoors with 12–16 hours of light daily (grow lights work great). Just ensure good airflow, moderate humidity, and rotate pots occasionally for even growth. No need to wait for spring—your kitty’s favorite herb is always in season!
Will my cat destroy the catnip plant before it’s ready?
Cats are drawn to catnip’s scent, so harvest before it fully matures (around 6–8 weeks). Store dried leaves in an airtight container to preserve the potency. If your cat is impatient, grow it in a separate room or use a small, elevated planter.
What if my catnip seeds don’t sprout?
Don’t worry—try these fixes:
- Check moisture: Seeds need consistent dampness (not soggy). Mist lightly if dry.
- Warmth matters: Use a heat mat or place near a sunny window.
- Fresh seeds: Catnip seeds lose viability after 1–2 years. Buy new if older.
- Light test: Move seeds to a brighter spot (but avoid direct sun during germination).
Can I use catnip leaves for anything other than cat toys?
Yes! Beyond entertaining your feline, catnip has human benefits too:
- Tea for relaxation (dried leaves steeped in hot water).
- Natural insect repellent (crush leaves and place near plants).
- Compress for minor skin irritations (diluted in water).
Wrapping up and next steps
Growing catnip from seed indoors is a rewarding and fast process—especially when you skip the soil and use a simple, soil-free method! With just 7 days to germination and minimal effort, you’ll have fresh catnip for your feline friend in no time.
Whether you’re a beginner or a seasoned plant parent, this method proves that growing catnip doesn’t have to be complicated—just fun and satisfying!
Now that you’re armed with the know-how, why not try it today? Grab your supplies, follow the steps, and enjoy watching your catnip sprouts thrive. Once your plants are established, consider sharing the love with fellow cat lovers or experimenting with outdoor growth for even bigger harvests! 🐾