
Propagation
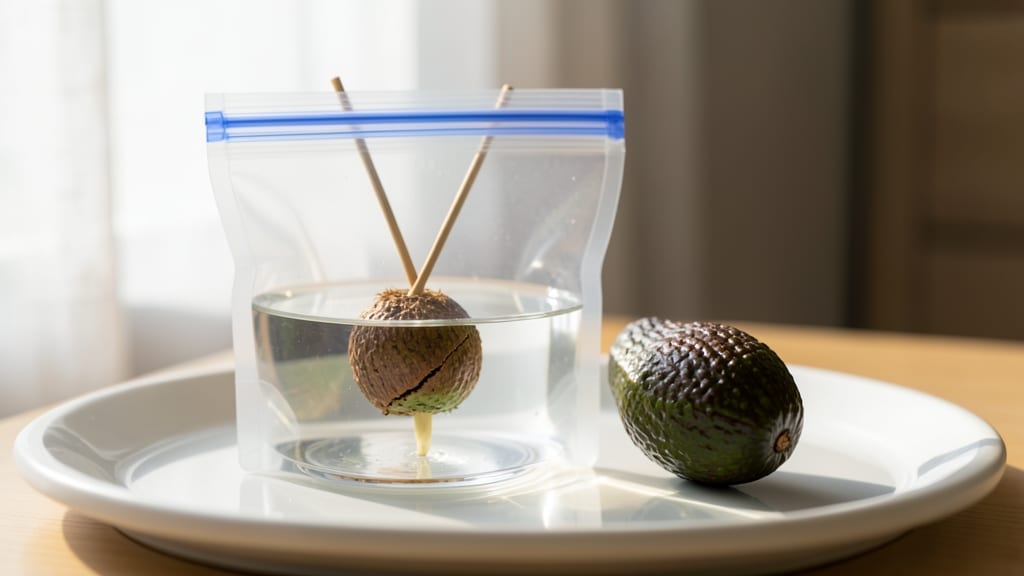
Germinating an avocado seed in a bag feels like watching a tiny miracle unfold—no fancy tools, just patience and a clear plastic bag. 🌱 I’ve tried the toothpick method, but this bag approach grows roots twice as fast without the hassle of constant water checks.
The secret lies in keeping the seed just damp enough while trapping humidity to encourage those first stubborn sprouts.
All you need is one ripe avocado, a sharp knife, a plastic bag with a twist tie, and a little space near a sunny window. The process takes about 2 weeks—no waiting months like some propagation methods.
You’ll see roots peek out first, then a tiny shoot, and before you know it, you’ve got a thriving seedling ready to pot up.
Mistakes happen when the seed dries out or rots from too much water, but this method is forgiving. Keep the bag in bright, indirect light and check weekly for moisture—just enough to keep the seed plump, not soggy.
The roots will grow long and strong, giving you a head start on growing a full-sized avocado tree.
Once the roots hit 2-3 inches, you can transplant into soil. Even if you never get fruit, watching that seedling grow is reward enough. Perfect for kids, small spaces, or anyone who’s ever wanted to grow something from scratch without the fuss.
📚 In This Guide
- What you need
- Instructions
- Tips and common mistakes
- Wrapping up and next steps
What you need
- ● 1 fresh, organic avocado pit – Choose a seed from a ripe avocado (the fresher, the better!)
- ● 1 clear plastic bag (quart-sized or larger) – A sealable bag with a zipper or twist-tie works best
- ● 2-3 paper towels or coffee filters – Keep them clean and slightly damp (not soaking wet!)
- ○ Toothpicks (2-4) – For suspending the seed (optional but helpful for drainage)
- ● Water (room temperature) – About ½ cup to keep the environment moist
- ● Small spray bottle – For gentle misting without over-saturating
- ● Rubbing alcohol (70% or higher) – To sterilize toothpicks or tools
- ● Plastic wrap or cling film – Extra moisture barrier if your bag isn’t airtight
- ● Pencil or marker – To label your bag (e.g., date or seed type)
- ● Grow light (LED or fluorescent) – If your space lacks natural sunlight
- ● Patience! Germination can take 2-6 weeks (but often 2-3 weeks with this method).
- ● A warm spot (ideally 70-80°F) away from direct sunlight at first.
- ● Basic space to store your bag (a windowsill, shelf, or desk works).
Step-by-step instructions for germinating avocado seeds in a bag
Here's the foolproof method I use to grow roots in just 2 weeks—no special tools, no stress.
🌱 Step 1: Prepare the Avocado Seed and Remove the Pit
Start with a fresh avocado pit—never one that's been sitting out for weeks. Rinse it under cool water to remove any remaining fruit. Use a sharp knife to carefully slice off the pointed top (this is where the seedling will emerge later). Then, slice the pit lengthwise to reveal the seed inside.
Here's the thing—don't peel away all the brown skin. Instead, gently pry it loose just enough to expose the seed itself. You'll see a shiny, white seed nestled inside. The remaining brown skin acts as a natural barrier that keeps moisture in while allowing air to circulate. Leave it attached for now.
🪴 Step 2: Insert Toothpicks and Suspend the Seed in a Jar
Take three toothpicks and insert them evenly around the seed, about ½ inch from the top. Space them roughly 120 degrees apart so they create a stable triangle. This is the key to keeping your seed suspended without it twisting or falling.
Place the jar upside down over the toothpicks so the seed sits just above the opening. The bottom of the seed (where the root will emerge) should dangle freely, while the top stays dry. Fill the jar with room-temperature water until it reaches about ½ inch below the seed. The water should touch the bottom of the seed but not the top.
💧 Step 3: Position for Indirect Light and Check Water Levels
Find a spot with bright, indirect light—a windowsill facing east or west works best. Direct sunlight will overheat the water and stress the seed. I like to place mine near a kitchen window where it gets morning light but stays cool in the afternoon.
Change the water every 2-3 days to prevent bacterial growth. You'll know it's time when the water looks cloudy or smells funky. Always use fresh, room-temperature water to avoid shocking the seed. Within 3-7 days, you'll see a small white root emerge from the bottom of the seed.
⏰ Step 4: Wait for Root Growth and Prepare for Transplanting
Keep the seed suspended until the root reaches about 2-3 inches long. This usually takes 2 weeks if you've maintained the water and light properly. You'll notice the root growing downward while the seed itself stays stable in the toothpicks.
Once the root is long enough, it's time to transition to soil. Fill a small pot with well-draining potting mix and make a hole about 1 inch deep. Gently lower the seed into the hole so the root hangs down naturally. Cover the top of the seed with about ¼ inch of soil—just enough to hold it in place but not bury it completely.
☀️ Step 5: Transition to Soil and Care for Your Seedling
Place the potted seed in a spot with bright, indirect light for the first week. Keep the soil lightly moist but never soggy—you want it to stay damp to the touch but not dripping wet. A spray bottle works great for gentle watering.
After about 2 weeks in soil, you should see the first signs of sprouting. The seedling will push through the soil with two small leaves. This is when you can gradually introduce it to more direct sunlight. Just don't rush it—too much sun too soon will scorch the delicate leaves.
Tips & tricks for fast avocado seed germination
Here's what I learned after watching three avocado seeds twist and fail before I got this right.
Toothpick Placement Secret: The ½-inch spacing from the top isn't just random—it's where the seed's natural balance point sits. If you place them too high, the seed will tip; too low, and it'll dangle awkwardly. I like to test stability by gently tapping the jar before filling with water. The seed should stay perfectly level without wobbling.
Water Level Watch: That ½-inch below the seed rule is critical. Any higher and the seed will rot; any lower and the root won't have enough moisture to start growing. I use a small measuring cup to check the water level every few days—just dip it in and look for the ½-inch mark on the cup's side. Room temperature is key too; cold water shocks the seed.
Light Positioning: East-facing windows are ideal because they provide morning light without the intense heat of afternoon sun. If you only have south-facing windows, place your seedling about 2 feet back from the glass during peak sun hours (11 AM-3 PM). I've seen seeds wither from too much direct light—it's like a sunburn for plants!
Root Growth Rescue: If your root stops growing after a week, it's usually because the water's stale or the light's too dim. Dump the old water, refill with fresh room-temperature water, and move to a brighter spot. Sometimes roots need a little encouragement—just like us when we hit a slump!
Pro Tips for Germinate Avocado Seed In Bag
- Here's what I learned after watching three avocado seeds twist and fail before I got this right.
- Toothpick Placement Secret: The ½-inch spacing from the top isn't just random—it's where the seed's natural balance point sits.
- Water Level Watch: That ½-inch below the seed rule is critical.
Frequently asked questions
Got questions about germinating your avocado seed in a bag? You're not alone! Here are some of the most common queries—and their answers—to help you succeed without the fuss.
How long does it take for an avocado seed to sprout in a bag?
With the right setup, you’ll typically see roots emerging in 2–4 weeks, while the first signs of a sprout (stem) can take 4–8 weeks. Patience is key—keep the bag in a warm, bright spot (but out of direct sunlight) and check weekly for progress. If nothing happens after 6 weeks, gently inspect for mold or rot.
Do I need to twist the toothpicks or change the water weekly?
Nope! This method skips the toothpicks entirely—just balance the seed over the bag’s opening and let gravity do the work. Refresh the water every 3–4 days to prevent bacteria buildup. Use room-temperature water to avoid shocking the seed. Pro tip: If the seed smells funky, it’s time for a change!
What if my avocado seed starts to rot or smell bad?
Smelly or mushy seeds are a red flag—usually caused by overwatering or poor airflow. Drain excess water immediately, rinse the seed with clean water, and let it dry for a day before resuming. If mold appears, discard the seed and try again with a fresh one. Keep humidity in check: the bag should stay damp, not soggy!
Can I reuse the same bag for multiple seeds?
Not recommended! Each bag should house one seed to avoid overcrowding and competition for resources. Reusing bags risks cross-contamination (mold, bacteria) or uneven moisture distribution. If you’re experimenting, sanitize the bag with a 1:10 bleach-water mix (rinse well!) between uses—but fresh is always best.
How do I know when the seed is ready to plant in soil?
Wait until you see 2–3 inches of roots and a 1–2 inch sprout before transplanting. Gently remove the seed from the bag, trim any tangled roots, and plant it halfway into moist potting soil. Keep the soil consistently damp (not wet) and place it in bright, indirect light. First leaves may take another 2–4 weeks!
Wrapping up and next steps
Germinating an avocado seed in a bag is a simple, rewarding project that brings life to something you might otherwise toss! With just a few supplies and patience, you can watch roots and stems sprout in as little as 2 weeks—no fancy tools or twisting required. 🌱
Now that you’ve mastered the method, why not keep the momentum going? Once your seedling is ready, transplant it into soil and nurture it into a thriving avocado tree. Share your progress with friends or even start a mini indoor garden—your green thumb is just getting started! 🌟