
Lawn
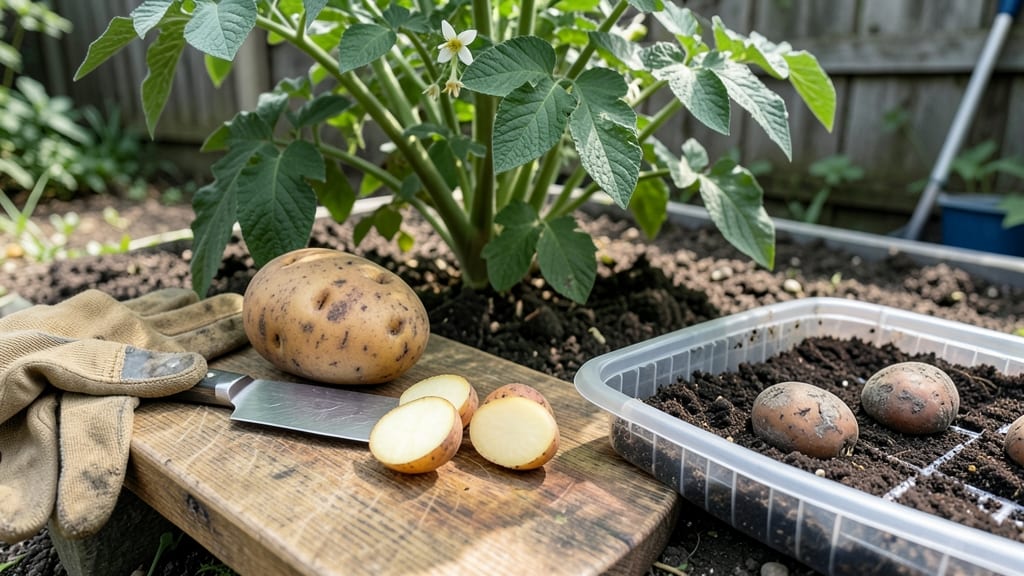
Cutting seed potatoes the right way doubles your harvest—no more wasting whole tubers. ✂️ I learned this after planting full potatoes and ending up with just 3-4 plants per hill.
The secret is slicing with purpose: each piece needs at least one or two eyes (those little dimples where sprouts emerge) and should weigh about 2 ounces. Too small, and they rot; too big, and they crowd the plant.
Start with certified seed potatoes (not grocery store ones—they’re treated to prevent sprouting). You’ll need a sharp knife, a clean cutting board, and a day or two to let the slices heal before planting.
The healing step is critical: it prevents rot and helps the cut edges harden. Store them in a cool, dark place with good airflow until planting time—usually 2-4 weeks before your last frost.
When planting, bury the slices 4 inches deep in loose, well-draining soil. The sprouts will push through in 1-2 weeks, and you’ll see stronger plants than if you’d planted whole potatoes. Each slice can produce a full, healthy plant—meaning one seed potato becomes 4-5 plants instead of just one.
Here’s the game-changer: never cut too close to the eyes. A ½-inch margin ensures the sprout has room to grow without breaking off. And if you’re in a hurry, skip the healing step—but expect a few more losses.
The extra effort pays off in a bigger, more productive harvest by summer.
📚 In This Guide
- What you need
- Instructions
- Tips and common mistakes
- Wrapping up and next steps
What you need
- ● Seed potatoes: Certified disease-free, medium to large (1–2 oz each). Aim for 5–10 potatoes per pound, depending on variety.
- ● Sharp knife: A clean, stainless-steel chef’s knife (8–10 inches) or a potato cutter for precision.
- ● Cutting surface: A wooden or plastic cutting board (avoid metal to prevent dulling the knife).
- ● Disinfectant: Rubbing alcohol (70%+) or bleach solution (1:10 water ratio) to sterilize tools and surfaces.
- ● Paper towels or newspaper: For drying cuts (absorbs moisture and prevents rot).
- ● Planting containers or garden bed: Well-draining soil (pH 5.0–7.0) or biodegradable pots (if starting indoors).
- ○ Optional (but helpful): Cinnamon or sulfur powder (sprinkle on cuts to prevent disease).
- ● Planting tags (label varieties if growing multiple types).
- ● Gloves (to keep hands clean and protect from prickly sprouts).
- ● Chilled seed potatoes: Store potatoes in a cool, dark place (40–50°F) for 4–6 weeks before planting to encourage strong sprouts.
- ● Weather check: Wait until after the last frost (or use row covers) and soil temps reach 45°F+.
- ● Sunlight access: Ensure your planting spot gets 6–8 hours of sunlight daily.
Step-by-step guide to cutting seed potatoes for planting
Here’s how I cut seed potatoes for planting—no twists, no wasted sprouts, just perfect slices ready to grow.
🪴 Step 1: Select and Prep Your Seed Potatoes
Start with certified disease-free seed potatoes (not grocery store potatoes—they’re treated to prevent sprouting). Let them sit in a bright, cool spot (50-60°F) for 4-6 weeks before cutting so they develop strong, healthy sprouts. Choose potatoes with 2-3 inch-long sprouts—these will grow into your plants.
Wash the potatoes gently under lukewarm water to remove dirt, then pat them dry with a clean towel. Avoid soaking—they’ll absorb too much water and rot when planted. If you see any soft spots or mold, cut those away with a sharp knife before slicing for planting.
✂️ Step 2: Cut Into Twist-Free Slices
Use a sterilized knife (wipe with rubbing alcohol) to cut each potato into 1-2 inch chunks, ensuring each piece has at least 1-2 healthy sprouts. Avoid cutting through sprouts—this weakens the future plant. I like to make flat cuts (not rounded) so the slices dry faster and heal better.
Here’s the trick: cut away from the sprouts so the slices don’t twist when drying. Place the cut pieces on a paper towel-lined tray in a shady, well-ventilated spot for 1-2 days. They’ll develop a slightly dry, calloused edge—this prevents rot when planted. Don’t let them dry out completely (they should still feel firm, not brittle).
💧 Step 3: Cure and Plant the Slices
After 1-2 days of drying, your slices are ready to plant. Dig 2-3 inch deep trenches in well-draining soil (add compost for nutrients) or fill planting containers with sterile potting mix. Space the slices 12 inches apart in rows 30 inches apart (for full-size potatoes) or 6-8 inches apart for smaller varieties.
Place each slice eyes-up (sprouts facing skyward) and cover with 1-2 inches of soil. Water lightly to settle the soil, then wait 10-14 days before adding more soil. This gradual covering encourages stronger roots and prevents disease. If planting in cold climates, wait until soil reaches 45°F—cooler temps slow growth.
☀️ Step 4: Maintain for Healthy Growth
Keep the soil consistently moist but not soggy—water when the top inch feels dry. As the plants grow, hill soil around the stems (mound up to 4-6 inches) to prevent greening (toxic solanine buildup) and encourage more tubers. Stop hilling when flowers appear—this signals the potatoes are nearly mature.
Watch for leaf yellowing (too much water) or stunted growth (not enough). If you see blackened stems, pull and compost the plant—it’s likely infected. With proper care, you’ll harvest plump, disease-free potatoes in 90-120 days.
Tips & tricks for perfect seed potato slices
Avoiding wasted sprouts and ensuring strong growth starts with these simple but game-changing tricks.
Sprout Selection: Look for sprouts that are 2-3 inches long—these are the best indicators of healthy growth potential. If you see any sprouts that are shriveled or blackened, trim them off completely before cutting. Healthy sprouts should be firm, white, and actively growing—this means your potato is ready for slicing.
Cutting Technique: When slicing in Step 2, make your cuts parallel to the potato's natural shape rather than trying to cut perfect circles. This creates flat surfaces that dry faster and heal better, reducing the risk of rot. I like to use a serrated knife for cleaner cuts—it requires less force and gives you more control, especially with larger potatoes.
Drying Conditions: The 1-2 days of drying in a shady, well-ventilated spot is crucial—don't rush this step! Place your tray in a spot with indirect sunlight and good airflow, like a covered porch or under a tree. If your climate is particularly humid, you might need to extend this to 3 days to ensure proper callusing. The goal is a slightly dry edge, not a brittle one.
Soil Temperature Tip: If you're planting in cold climates, wait until the soil reaches 45°F before planting—this prevents shock to your young sprouts. I've found that using a simple soil thermometer (they're cheap!) takes the guesswork out of timing. Cooler soil slows growth, so don't rush this step even if your potatoes are ready.
Pro Tips for Cut Seed Potatoes For Planting
- Avoiding wasted sprouts and ensuring strong growth starts with these simple but game-changing tricks.
- Sprout Selection: Look for sprouts that are 2-3 inches long—these are the best indicators of healthy growth potential.
- Cutting Technique: When slicing in Step 2, make your cuts parallel to the potato's natural shape rather than trying to cut perfect circles.
Frequently asked questions
1. How long before planting should I cut seed potatoes?
Cut your seed potatoes 2–4 weeks before planting to allow time for calluses to form on the cut edges. This reduces rot risk and encourages faster sprouting. Store them in a cool, dark place (like a basement or garage) with good airflow to prevent moisture buildup.
2. Can I use a regular kitchen knife, or should I get a special potato cutter?
A clean, sharp kitchen knife works fine for small batches, but a serrated knife or gardening knife makes the job easier. Avoid dull blades—they crush the potato, increasing rot risk. For large-scale planting, a dedicated potato slicer (like a seed potato cutter) speeds up the process and ensures uniform slices.
3. What if my cut potatoes don’t sprout before planting time?
Don’t panic! Plant them anyway—they’ll still grow, though sprouts may take longer to appear. If you’re in a cooler climate, opt for early-maturing varieties (like ‘Yukon Gold’ or ‘Red Pontiac’) that sprout faster. For extra insurance, place cut potatoes near a sunny window for a few days to jumpstart growth.
4. Should I treat the cuts with anything to prevent rot?
While not always necessary, a light dusting of cinnamon or wood ash can act as a natural antifungal. Avoid overdoing it—just a pinch on the cut edges suffices. For extra protection, let the slices dry for 1–2 days in a shaded area before planting. If using store-bought seed potatoes, follow the package instructions for pre-treatment.
5. What do I do if my cut potatoes turn mushy or moldy?
Mushy or moldy spots mean the potato is rotting—discard it immediately to prevent spreading. This usually happens from too much moisture or dirty cuts. To avoid it, use a sterilized knife, cut only what you’ll plant soon, and store potatoes in a paper bag (not plastic) for airflow. If mold appears, toss the whole batch.
Wrapping up and next steps
Cutting seed potatoes for planting is a simple yet powerful way to maximize your garden’s yield—just remember to let those slices cure and plant them eyes-up! With the right knife, patience, and timing, you’ll be on your way to a bountiful harvest.
Now that you’re ready, grab those spuds and get planting—your future potato patch is waiting! 🌱
For even more gardening tips, check out our guide on when to plant potatoes next!