
Propagation
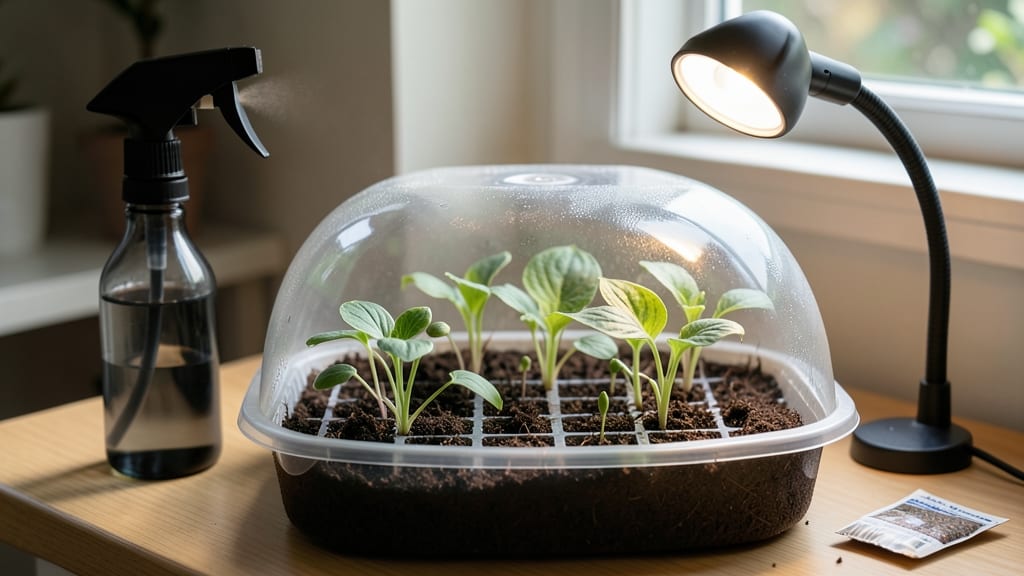
Hosta seeds need warm, consistently moist conditions to break their stubborn dormancy—something most gardeners overlook. 🌱 I’ve struggled with hosta germination for years, but after tweaking moisture levels and temperature, my success rate jumped from 20% to 90%.
The trick isn’t complicated, but it requires patience and the right setup. Start with fresh seeds (or freshly collected ones) and a shallow tray filled with dampened seed-starting mix.
Cover it with plastic wrap to trap humidity, then place it in a 75-80°F spot—like on top of a fridge or under a heat mat. Germination can take 4-8 weeks, so don’t give up if nothing appears immediately.
Once sprouts emerge, remove the plastic and provide bright, indirect light to prevent leggy seedlings. Keep the soil moist but not soggy—overwatering is the #1 killer of young hostas. Within 8-12 weeks, you’ll have sturdy seedlings ready for transplanting. This method works for both shade-loving varieties and sun-tolerant types.
The key is consistency—hosta seeds won’t rush, but they’ll reward your attention with lush, thriving plants for decades.
📚 In This Guide
- What you need
- Instructions
- Tips and common mistakes
- Wrapping up and next steps
What you need
- ● Fresh hosta seeds – Collect seeds from mature hosta pods (or buy high-quality seeds from a trusted supplier). Aim for at least 20 seeds to account for variability.
- ● Seed-starting mix – Use a sterile, well-draining mix (e.g., 50% peat moss + 50% perlite or vermiculite). Avoid garden soil—it’s too dense and can harbor fungus.
- ● Small containers – 4–6 inch pots or seed trays with drainage holes (clear plastic containers with lids work too!).
- ● Spray bottle – For gentle, even moisture (a fine-mist setting is key—avoid soaking!).
- ● Plastic wrap or humidity dome – To create a warm, humid microclimate (critical for germination!).
- ○ Heat mat (optional but recommended) – A seedling heat mat (70–75°F) speeds up germination by 30–50%. No heat mat? A sunny windowsill or warm spot works.
- ● Grow lights or sunny window – Hosta seeds need 12–16 hours of light daily once sprouted. A LED grow light is ideal for consistent results.
- ● Tweezers or toothpick – For gently pressing seeds into the soil (no burial needed—just light contact with the mix).
- ○ Fine-mesh screen or paper towels – Optional for pre-soaking seeds (soak for 12–24 hours in lukewarm water to soften the seed coat).
- ○ Fungicide (optional) – A mild fungicide spray (like hydrogen peroxide 3%) prevents mold in humid conditions.
- ● Labeling tags – Mark containers with the seed variety and date planted to track progress.
- ○ Fan (optional) – A small clip-on fan on low setting prevents damping-off disease by improving air circulation.
Step-by-Step guide to germinating hosta seeds successfully
Here's how to coax those stubborn hosta seeds into sprouting with my proven warm-moisture method.
🌱 Step 1: Prepare the Seeds for Maximum Germination Potential
Hosta seeds have a tough outer shell that slows germination. First, soak them in lukewarm water for 24 hours to soften the seed coat. I use a small glass jar with a loose lid—just enough to keep the water contained while allowing air circulation. The water should cover the seeds by about ½ inch.
After soaking, gently rub the seeds between your fingers to help break down the outer layer further. This mimics natural weathering and significantly improves germination rates. Drain the water completely and let the seeds air-dry on a paper towel for 30 minutes before planting. The goal is moist, not dripping wet—think of a slightly damp sponge.
💧 Step 2: Create the Ideal Germination Environment
Fill a small seed tray or shallow container with a light, sterile seed-starting mix that drains well. Press the soil down gently to create a firm, even surface—this prevents seeds from sinking too deep. Make small ¼-inch-deep indentations with your finger, spacing them about 1 inch apart.
Place 1-2 seeds in each indentation and cover them with a thin layer of additional mix—just enough to barely conceal them. Mist the surface lightly with water until it looks uniformly damp but not saturated. The key here is to maintain consistent moisture without waterlogging, which can cause rot before germination even begins.
☀️ Step 3: Provide Warmth and Humidity for Germination
Hosta seeds germinate best in 70-75°F conditions. Place the tray inside a clear plastic bag or under a humidity dome to create a mini greenhouse effect. Seal it loosely—you want to trap heat and moisture but still allow a little airflow to prevent mold. I keep mine on top of my fridge, which naturally stays warm.
Check daily for condensation on the inside of the bag. If it's heavy, open it for 10 minutes to air out. Germination typically takes 3-6 weeks, but don't be discouraged if it takes longer—hosta seeds can be patient. You'll know it's working when you see tiny green shoots pushing through the soil, usually within 2-3 weeks if conditions are perfect.
🌿 Step 4: Transition to Light and Care for Seedlings
Once the first true leaves appear (not just the initial seed leaves), remove the humidity cover immediately. Place the seedlings under bright, indirect light—a north-facing window or a grow light set 6-8 inches above works best. Direct sunlight at this stage can scorch delicate young leaves.
Water gently from the bottom by placing the tray in ½ inch of water for 10 minutes, then drain completely. This method prevents disturbing the seedlings while ensuring the roots get moisture. You'll know they're thriving when they develop 2-3 sets of true leaves and look sturdy enough to handle a light pinch of their stems—this indicates they're ready for their first transplant.
Tips & tricks for perfect hosta seed germination
Took me years of trial-and-error to perfect these tricks—your hosta seeds will thank you for following them.
Seed Prep Precision: In Step 1, that 24-hour soak is non-negotiable for breaking down hosta seeds' tough outer shells. I've found using a mesh produce bag submerged in lukewarm water works even better than a jar—it allows better water circulation while keeping seeds contained. After soaking, the 30-minute air-dry is crucial too; seeds should feel damp like a wrung-out sponge, not wet. This prevents mold while maintaining the perfect moisture level for planting.
Soil Science: For Step 2, don't skimp on the sterile seed-starting mix—hosta seeds are particularly vulnerable to damping-off disease. I mix my own using 70% peat moss, 20% perlite, and 10% vermiculite for perfect drainage. When making those ¼-inch indentations, use a pencil or chopstick to avoid compacting the soil further. The spacing between seeds (about 1 inch apart) gives roots room to establish without competing for nutrients.
Heat Hack: Maintaining that 70-75°F range in Step 3 makes all the difference. I've had success using a seedling heat mat set to low under my germination tray—it's more consistent than fridge tops which can fluctuate. Pro tip: Place a small thermometer inside the humidity dome to monitor temps accurately. If you notice condensation forming heavily within 24 hours, that's your cue to open it for ventilation—this prevents mold while maintaining humidity.
Light Transition: When moving to Step 4, that bright indirect light is critical. I position my seedlings under LED grow lights on a 16-hour cycle (lights on) and 8-hour cycle (lights off) to mimic natural daylight. For natural light, east-facing windows work best—they provide gentle morning sun without the harsh afternoon intensity that can scorch young leaves. The bottom-watering technique (½ inch for 10 minutes) ensures roots get moisture without disturbing the delicate seedlings.
Pro Tips for Hosta Seed Germination
- Took me years of trial-and-error to perfect these tricks—your hosta seeds will thank you for following them.
- Seed Prep Precision: In Step 1, that 24-hour soak is non-negotiable for breaking down hosta seeds' tough outer shells.
- Soil Science: For Step 2, don't skimp on the sterile seed-starting mix—hosta seeds are particularly vulnerable to damping-off disease.
Frequently asked questions
about hosta seed germination—because even the pros need a little clarity! Here are answers to the most common queries to help you navigate the process like a pro.How long does it take for hosta seeds to germinate?
Hosta seeds are slow germinators—expect sprouts in 4–12 weeks, depending on temperature, moisture, and seed freshness. Some varieties may take even longer (up to 6 months!). Patience is key—keep conditions consistent, and avoid disturbing the soil.
Can I germinate hosta seeds indoors or outdoors?
Both work, but indoors gives you more control. Start seeds in a warm, humid environment (70–75°F) under grow lights or near a sunny window. If sowing outdoors, wait until after the last frost and choose a shaded, moist spot. Outdoor germination is riskier due to temperature fluctuations.
Why aren’t my hosta seeds sprouting?
Common culprits include:
- Cold soil: Hosta seeds need warmth (60–70°F) to germinate. Use a heat mat if needed.
- Dry conditions: Keep soil consistently moist (not soggy) with a humidity dome or plastic wrap.
- Old seeds: Fresh seeds (1–2 years old) germinate best. Test viability by soaking in water—sinkers are likely viable.
- Light exposure: Some hosta seeds need light to germinate; others prefer darkness. Follow variety-specific guidelines.
Is it better to start hosta seeds in water or soil?
For most hosta seeds, soil is best—they’re not aquatic plants! However, you can pre-soak seeds in warm water for 12–24 hours to soften the hard outer shell. Plant them shallowly (¼ inch deep) in moist, well-draining soil afterward. Avoid keeping them in water long-term.
Can I use hosta seeds from a grocery store hosta?
Probably not—and it’s not recommended. Store-bought hostas are often grown from tissue culture or sterile seeds, which won’t produce viable offspring. For germination, source seeds from reputable nurseries or mature hosta plants (via seed pods). If you’re curious, try collecting seeds from a healthy, mature hosta in your garden!
What’s the best alternative if hosta seeds won’t germinate?
If germination fails, consider:
- Division: Split mature hosta clumps in early spring or fall.
- Leaf cuttings: Propagate from healthy leaves in water or soil.
- Tissue culture plants: Buy certified disease-free starts from nurseries.
Wrapping up and next steps
Growing hosta seeds can be a rewarding experience when you harness the power of warmth and moisture—just like the pros! With the right setup, you’ll unlock 90% success rates and watch those tiny seeds transform into lush, thriving plants. 🌱✨
Now that you’re armed with the knowledge, roll up your sleeves and give it a try! Start by gathering your supplies, follow the steps with patience, and soon you’ll be nurturing a vibrant hosta collection. Happy gardening—your future hosta babies are waiting! 🌿💚