
Lawn
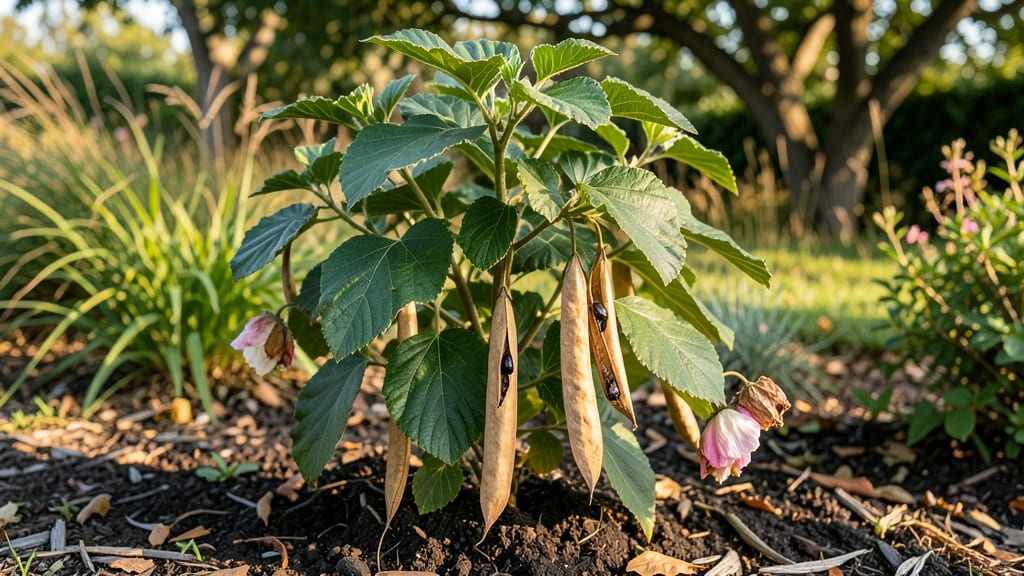
Collecting hardy hibiscus seed pods is like unlocking nature’s time capsule—each twist-resistant pod holds the potential for next year’s bold blooms. 🌿 The key is timing: harvest pods when they turn brown and papery but before they split open, usually in late fall.
I’ve learned that patience here pays off—rushing means losing seeds to squirrels or wind, while waiting too long risks dried-out viability.
Storage is where most gardeners stumble, but it’s simple: wrap pods in paper towels inside a sealed container with a silica gel packet to absorb moisture. Place it in the fridge for up to six months, checking occasionally for mold or dampness.
No fancy equipment needed—just a cool, dark spot and a little attention. These pods stay viable longer than store-bought seeds, giving you a head start every season.
Germination is where the magic happens. Soak pods overnight to soften the tough outer shell, then plant them shallowly in well-draining soil mix. Keep the soil consistently moist (not soggy) under grow lights or in a sunny window.
Within 2-3 weeks, you’ll see those first stubborn little sprouts pushing through—proof you’ve cracked the code on reliable hibiscus growth.
Troubleshooting is minimal if you follow these steps, but if seedlings lag, boost humidity with a plastic dome or adjust light exposure. Hardy hibiscus thrives on neglect once established, but those first few weeks demand your focus.
The payoff? Vibrant blooms that outlast summer’s heat and bring color back year after year.
📚 In This Guide
- What you need
- Instructions
- Tips and common mistakes
- Wrapping up and next steps
What you need
- ● Hardy hibiscus plants (mature, with fully developed seed pods—look for Hibiscus moscheutos or Hibiscus syriacus varieties).
- ● Pruning shears or sharp scissors (sterilized, with a 4-6 inch blade for clean cuts).
- ● Brown paper bags or breathable mesh bags (1-2 per plant, 12x18 inches or larger to accommodate pods).
- ● Labeling tags and a marker (to track varieties and harvest dates).
- ● Rubbing alcohol (70% or higher) and cotton swabs (for sterilizing tools between cuts).
- ● Plastic or glass seed storage containers (airtight, with desiccant packets included).
- ● Permanent marker or label maker (for marking containers with pod type and harvest year).
- ○ Gloves (optional but recommended) (nitrile or latex-free for sensitivity).
- ● Drying rack or screen (elevated, with 1/2-inch mesh for airflow).
- ● Hair dryer (cool setting) (to speed up drying if humidity is high).
- ● Seed viability test kit (for checking germination rates post-storage).
- ● Digital scale (to monitor pod weight during drying—aim for consistent moisture loss).
How to collect and store hardy hibiscus seed pods for next year's garden
Here's the simple method I use to save hibiscus seeds without the frustrating twist-and-snap struggle.
🌿 Step 1: Identify and Harvest Mature Seed Pods
Wait until pods turn from green to a dry, papery brown color—this means seeds are fully mature. Gently twist the pod between your fingers until it releases with a slight pop. If it resists, let it dry another week; forcing it too soon ruins the seeds inside.
Harvest on a dry morning after dew has evaporated. This prevents moisture from causing premature germination in the pods. I collect pods from multiple plants to ensure genetic diversity for stronger seedlings next season.
⏰ Step 2: Dry and Open the Seed Pods Properly
Spread the collected pods in a single layer on a clean, dry surface in a well-ventilated area out of direct sunlight. This prevents overheating and maintains seed viability. I use a baking sheet lined with paper towels for easy cleanup.
After 7-10 days, the pods should feel crisp and hollow when tapped. Open them carefully with a small knife or your fingers. Remove any remaining fluff or chaff, which can harbor mold. Store only the clean, plump seeds in a labeled envelope.
🪴 Step 3: Prepare Storage Containers for Long-Term Viability
Use airtight containers like glass jars or resealable plastic bags with silica gel packets to absorb excess moisture. I prefer small, labeled envelopes for individual varieties—this keeps things organized when planting time rolls around.
Store the sealed containers in a cool, dark place like a refrigerator or basement where temperatures stay between 35-45°F. Check them monthly for any signs of mold or dampness. Properly stored hibiscus seeds remain viable for 3-5 years, though germination rates drop after the second year.
🌱 Step 4: Test Germination Before Planting Next Season
About 4-6 weeks before your last frost date, test a few seeds by planting them in small pots with moist seed-starting mix. Keep them in a warm spot (70-75°F) with bright, indirect light. You should see sprouts within 10-14 days.
If germination is slow or uneven, soak the remaining seeds in warm water for 12 hours before planting. This softens the seed coat and encourages faster sprouting. Discard any seeds that float—they're empty and won't grow.
☀️ Step 5: Plant Viable Seedlings Outdoors
Once seedlings have 3-4 true leaves and nighttime temperatures stay above 55°F, transplant them outdoors. Choose a location with full sun and well-draining soil. Hibiscus plants thrive in slightly acidic soil (pH 5.5-6.5), so amend the soil if needed.
Water deeply after planting to settle the soil around roots, then maintain 1 inch of moisture in the topsoil. Mulch with 2-3 inches of organic material to retain moisture and protect roots from temperature swings. Your twist-resistant collection is now ready to grow into next year's vibrant blooms.
Tips & tricks for perfect hardy hibiscus seed pod collection
Avoid these common mistakes that can ruin your seed-saving efforts—and make the process even smoother than the instructions promise.
Harvest Timing: I can't stress enough how critical the dry morning harvest is. Dew on the pods can trigger premature germination, so wait until the sun has dried them completely. I've learned this the hard way—wet pods left overnight in a sealed bag turned into a moldy mess. If you're unsure, do the "twist test" again later that morning before collecting.
Drying Strategy: The 7-10 days for drying might feel like forever, but patience here prevents mold and maintains viability. I spread my pods on a mesh screen instead of paper towels—it allows even better airflow around each pod. Just avoid direct sunlight, which can overheat and damage the seeds inside. A well-ventilated closet or basement works perfectly.
Seed Selection: When opening those crisp pods, don't just grab any seed! Look for plump, dark seeds that feel heavy in your hand. Hollow or shriveled seeds won't grow, and any seeds with white fluff still attached should be discarded immediately. I use a fine-mesh sieve to separate the good seeds from chaff—it's worth the extra minute to save viable seeds.
Storage Check: That monthly check of your stored seeds might seem tedious, but it's worth it. I've found tiny mold spots that could have ruined entire batches if caught later. Use a small flashlight to inspect the corners of your containers where moisture often collects. If you notice any mustiness, transfer those seeds to a fresh container with fresh silica gel immediately.
Pro Tips for Hardy Hibiscus Seed Pods
- Avoid these common mistakes that can ruin your seed-saving efforts—and make the process even smoother than the instructions promise.
- Harvest Timing: I can't stress enough how critical the dry morning harvest is.
- Drying Strategy: The 7-10 days for drying might feel like forever, but patience here prevents mold and maintains viability.
Frequently asked questions
Got questions about harvesting and storing hardy hibiscus seed pods? You’re not alone! Here are some of the most common queries—and their answers—to help you master the process like a pro.
When is the best time to collect hardy hibiscus seed pods?
The ideal time is late fall or early winter, once the pods turn brown and papery but before they split open. This ensures maximum seed viability while avoiding premature dispersal. If you wait too long, seeds may scatter or lose germination potential.
Can I store hardy hibiscus seed pods over winter outdoors?
Not without risk! While hardy hibiscus pods tolerate cold, freezing temperatures can crack them, releasing seeds too early. Store them in a cool, dry place (like a garage or shed) in breathable paper bags until spring planting. For extra protection, wrap them in burlap or place them in a mesh bag.
What if my seed pods twist or refuse to open naturally?
Twisting is normal—it’s how hibiscus releases seeds! If pods are stubborn, gently squeeze them between your fingers (wear gloves) or use a small knife to make a tiny slit. Avoid forcing them open, as this can damage the seeds inside. Pro tip: Let pods dry completely first for easier extraction!
Are there alternatives to harvesting seed pods myself?
Yes! Buy pre-packaged seeds from nurseries or online retailers (look for ‘Hibiscus moscheutos’ varieties). If you prefer wild collection, check local parks or conservation areas—always obtain permission first. Just know store-bought seeds may lack the heirloom charm of home-harvested pods!
How long can I store hardy hibiscus seeds before they lose viability?
Under cool, dry conditions (35–40°F), seeds stay viable for 1–2 years. For longer storage, refrigerate them in an airtight container with a desiccant packet. Test germination annually by planting a few seeds—if they sprout, the rest are still good!
Wrapping up and next steps
Hardy hibiscus seed pods are a gardener’s secret weapon for reliable, twist-resistant storage—perfect for year-round use! 🌿 Whether you’re preserving seeds, crafting, or simply admiring their resilience, these pods offer effortless durability and low-maintenance care.
With the right tools and techniques, you can harvest, clean, and store them confidently, ensuring your garden thrives season after season.
Ready to put your new skills to work? Start by experimenting with a small batch of pods—try drying them indoors first, then transition to outdoor storage as you gain confidence. Happy harvesting! 🌱