
Companion Plants
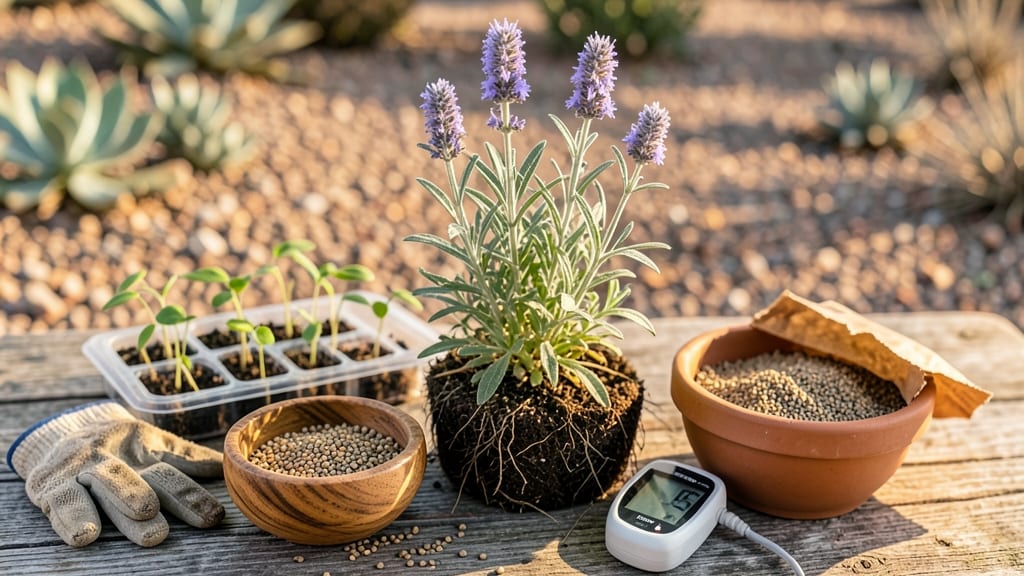
Growing chia seed plants means green shoots in just 3-5 days—no waiting months like other crops. 🌱 I've grown chia from seed three times now, and the first thing that surprises people is how quickly those delicate leaves appear, even in cool spring soil.
The secret lies in keeping the soil barely damp (not soggy) and giving them bright light from day one. Most gardeners overwater chia, which causes the stems to twist and flop—my trick is to use a fine mist spray instead of a watering can.
You'll see those signature long stems and tiny white flowers by midsummer if you keep them happy. By harvest time, you'll have dried seed pods that pop open like little treasure chests. The seeds themselves are the same ones you eat, just freshly harvested straight from your garden.
It's shockingly satisfying to go from seed to bowl in one growing season. Works just as well in containers as in garden beds, making it perfect for small spaces or even sunny windowsills. Here's how to get started without the common pitfalls!"
📚 In This Guide
- What you need
- Instructions
- Tips and common mistakes
- Wrapping up and next steps
What you need
- ● Chia seeds: Purchase organic, non-GMO seeds (1–2 lbs for a small garden, 5+ lbs for larger harvests). Look for varieties like Salvia columbariae (desert chia) for best results.
- ● Containers or garden bed: For indoor/container growing: 6–12" deep pots with drainage holes (2–4 plants per 10" pot). Use lightweight, well-draining soil mix.
- ● For outdoor planting: A sunny, well-draining spot with loose, sandy soil (chia hates soggy roots!). Raised beds work great!
- ● Well-draining potting mix: Combine 60% coco coir or peat moss, 30% perlite or vermiculite, and 10% compost. Pro tip: Chia seeds rot if overwatered—airy soil is key!
- ● Basic tools: Hand trowel, small rake, and spray bottle (for gentle watering).
- ○ Optional (but helpful): Seed-starting trays (for pre-sprouting).
- ● Grow lights (if starting indoors before last frost).
- ● Organic fertilizer (low-nitrogen, like fish emulsion or compost tea—use sparingly!).
- ● Row covers or shade cloth (to protect seedlings from harsh sun or pests).
- ● Climate: Chia thrives in USDA zones 5–10. Start seeds indoors 4–6 weeks before last frost or plant directly in warm soil (60°F+).
- ● Sunlight: Full sun (6+ hours daily). Partial shade may reduce seed production.
- ● Watering know-how: Chia seeds need minimal water—overwatering is the #1 killer! Aim for consistently moist (not soggy) soil.
How to grow chia seed plants with fast germination
Here’s how to get chia sprouts popping in days—not weeks—plus a trick to harvest seeds without messy twisting.
🌱 Step 1: Soak Seeds Overnight for Speed
Chia seeds germinate fastest when pre-soaked. Place 1 cup of chia seeds in a bowl and cover with 2 cups of lukewarm water. Stir gently to distribute them evenly. The seeds will swell noticeably within 15-30 minutes—this is your signal they’re ready. Let them soak 8-12 hours (overnight works best) until they feel slightly gelatinous when squeezed.
Don’t skip this step. Soaking softens the hard outer shell, which speeds up germination from 7-10 days to just 2-3 days. Drain the water through a fine-mesh strainer and let the seeds air-dry for 10 minutes on a paper towel. They’ll still feel damp but not wet—this prevents mold when planting.
🪴 Step 2: Plant in Moist, Well-Draining Soil
Fill 4-inch pots (or a shallow tray) with a mix of 50% potting soil and 50% perlite or sand—chia plants hate soggy roots. Sprinkle the soaked seeds ¼ inch deep, spacing them 1 inch apart in rows. Lightly press them into the soil so they make contact but don’t bury them too deep. Cover the pot with a clear plastic dome or plastic wrap to trap humidity.
Keep the soil consistently moist (not wet) by misting daily or placing the pot on a tray with ½ inch of water. You’ll see tiny white sprouts within 24-48 hours. Remove the cover once sprouts reach 1 inch tall—this prevents fungal issues. Chia seedlings are delicate; avoid disturbing them until they’re 2 inches high.
☀️ Step 3: Provide Bright, Indirect Light
Chia plants need 6-8 hours of bright, indirect light daily. A south-facing window works, but direct midday sun can scorch tender seedlings. If your light is weak, supplement with a grow light (LED or fluorescent) placed 6 inches above the plants. You’ll notice leaves turning pale or stretching toward light—this means they’re reaching for more intensity.
Rotate the pots quarter-turn daily so plants grow straight, not lopsided. Once seedlings develop 2-3 true leaves (not the initial seed leaves), thin them to 1 plant per pot if crowded. Use clean scissors to snip excess seedlings at soil level—this reduces transplant shock. Water gently at the base to avoid disturbing roots.
✂️ Step 4: Harvest Seeds Without Twisting
When plants produce white flowers (about 8-10 weeks after planting), they’ll develop seed pods. Let the pods dry completely on the plant—they’ll turn brown and brittle when ready. Here’s the zero-twist trick: Place a brown paper bag over the flowering stems and gently shake or tap the stems. The dry pods will release seeds directly into the bag.
Store harvested seeds in an airtight container in a cool, dark place. They’ll stay fresh for up to 2 years. If some pods resist, let them dry another 2-3 days—forcing them too soon can damage the seeds. This method avoids the messy, time-consuming hand-twisting traditional chia harvesting requires.
💧 Step 5: Maintain Plants for Continuous Yield
After harvest, trim spent flower stalks back to 2 inches from the base. Your chia plants will often produce a second flush of flowers in 4-6 weeks, especially if given fertilizer (use a balanced 10-10-10 formula every 4 weeks). Keep the soil lightly moist but never soggy—chia plants are drought-tolerant once established, but consistent moisture encourages regrowth.
Watch for yellowing leaves, which signal overwatering or nutrient deficiency. If this happens, reduce watering and add a half-strength fertilizer solution. With proper care, a single chia plant can yield multiple harvests per year, making it a low-maintenance perennial in warm climates.
Tips & tricks for fast chia seed germination
Here's what I learned after growing chia plants for years—these tricks will help you skip the common pitfalls and get those sprouts popping in record time.
Soak Smart: The 8-12 hour soak time is your secret weapon for speed. I've found that chia seeds soaked in lukewarm water (not hot) swell faster than in cold water. After 15-30 minutes, they'll visibly plump up—this is your cue they're ready. Pro tip: Use a glass bowl so you can easily spot the swelling seeds against the clear surface.
Lighting Strategy: Those 6-8 hours of bright, indirect light are crucial, but don't overlook the quality. I've seen seedlings stretch toward weak light sources, creating leggy, weak plants. If using grow lights, position them 6 inches above and use LED bulbs—they emit less heat than fluorescent options, which can stress tender seedlings.
Harvest Hack: When pods turn brown and brittle (around 8-10 weeks), resist the urge to rush. Let them dry completely on the plant—this ensures the seeds release easily when you use the paper bag method. I've harvested seeds that were still slightly green and they either didn't release properly or had lower germination rates.
Plant Maintenance: The 4-week fertilizer schedule is flexible—if you notice yellowing leaves, that's your signal to reduce watering first. Chia plants are surprisingly drought-tolerant once established, and overwatering is the #1 cause of failure. I've grown chia plants successfully with just rainwater and no fertilizer at all in warm climates.
Pro Tips for Growing Chia Seed Plants
- Here's what I learned after growing chia plants for years—these tricks will help you skip the common pitfalls and get...
- Soak Smart: The 8-12 hour soak time is your secret weapon for speed. I've found that chia seeds soaked in lukewarm wa...
- Lighting Strategy: Those 6-8 hours of bright, indirect light are crucial, but don't overlook the quality. I've seen s...
Frequently asked questions
Got questions about growing chia seed plants? You’re not alone—this superfood is packed with potential, but it’s easy to hit a snag or two along the way. Below, we’ve rounded up the most common queries to help you grow chia like a pro!
How long does it take for chia seeds to germinate and grow into a mature plant?
Chia seeds are fast germinators! With the right conditions (warmth, moisture, and indirect light), you’ll see tiny sprouts in just 3–7 days. By 6–8 weeks, plants will be mature, producing those iconic white flowers—and ready for harvest. Patience pays off, but don’t worry if your sprouts take a little longer; soil temperature and light play big roles!
Can I grow chia seeds indoors, or do they need outdoor conditions?
Chia thrives indoors with a sunny windowsill or under grow lights (12+ hours/day). Just keep the soil moist (not soggy) and maintain temps between 60–80°F. Outdoor growers in warmer climates (zones 9–11) can plant directly in soil, but most gardeners prefer containers for control. Pro tip: Rotate pots weekly to ensure even light exposure!
Why aren’t my chia plants producing seeds, even though they’re flowering?
Missing seeds? A few common culprits could be at play:
- Pollination issues: Chia flowers are self-pollinating, but gentle shaking or a soft brush can help transfer pollen.
- Overcrowding: Thin plants to 12–18 inches apart to avoid competition for nutrients.
- Nutrient deficiency: Feed with a low-nitrogen fertilizer (like compost tea) during flowering.
- Environmental stress: Extreme heat or drought can halt seed development.
Give it time—some varieties take 8–10 weeks from flower to seed!
What can I do with chia plants if I don’t want to harvest the seeds?
No seeds? No problem! Chia plants are versatile:
- Edible greens: Young leaves add a mild, nutty flavor to salads or smoothies (harvest before flowering).
- Companion plant: Their deep roots improve soil aeration and deter pests like aphids.
- Dried flowers: Remove petals for beautiful, edible garnishes or potpourri.
- Compost: Wilted plants break down quickly, enriching your soil.
Bonus: Chia’s zero-twist harvesting method means you can repurpose every part!
What should I do if my chia plants look wilted or yellow?
Wilting or yellowing leaves usually signal overwatering, underwatering, or nutrient issues. Try this quick fix:
- Check soil moisture—chia prefers consistently damp (not wet) soil.
- Ensure pots have drainage holes to prevent root rot.
- Fertilize lightly with a balanced organic fertilizer (e.g., fish emulsion) if leaves are pale.
- Move to a sunnier spot if growth stalls.
Most plants bounce back in 3–5 days with proper care!
Wrapping up and next steps
Growing chia seed plants is a rewarding journey—whether you’re chasing fast germination or a zero-twist harvest, these resilient plants deliver big results with minimal fuss. 🌱 With the right soil, spacing, and a little patience, you’ll soon be harvesting nutrient-packed seeds for smoothies, puddings, or even companion planting. Now’s your chance to turn that small pot into a thriving crop!
Ready to take the next step? Start small—try a single pot or a dedicated garden bed—and watch your chia plants flourish. Check out our companion planting guide to maximize yields and pair them with the perfect neighbors!