
Lawn
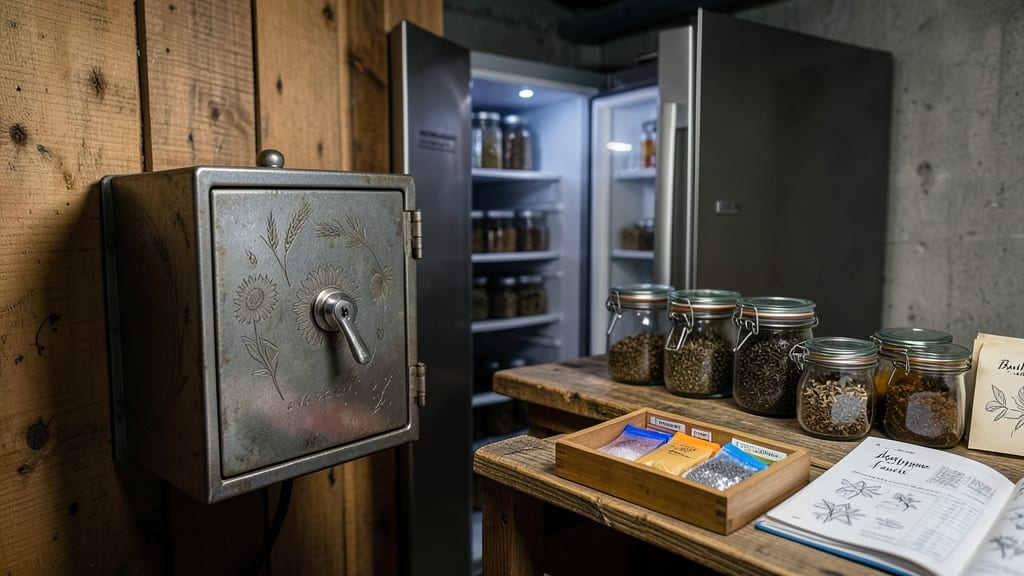
Proper garden seed storage means the difference between next year's thriving garden and a sad packet of dust. 🌱 I've learned the hard way that even the best seeds turn useless if you don't check their viability first—before you even think about drying or storing them.
That simple twist test could save you from replanting an entire garden. The process is simpler than you'd think: take a few seeds, wrap them in a damp paper towel, seal them in a bag, and wait. If they sprout within a week, you're golden.
No sprouts? Time to source fresh seeds. The key is doing this test before you commit to long-term storage—because once seeds are dried and stored, you won't know their condition until planting season rolls around.
Once you've confirmed viability, store seeds in airtight containers—mason jars or sealed envelopes work best—in a cool, dark place like your fridge or basement. Label everything with the variety and date, because even the best seeds lose potency over time.
With this method, your seeds stay fresh for 3-5 years (or longer for some varieties). This works for heirloom seeds, vegetable packets, or even saved seeds from your garden. The small effort now means a reliable garden later—no surprises at planting time.
📚 In This Guide
- What you need
- Instructions
- Tips and common mistakes
- Wrapping up and next steps
What you need
- ● Seeds: Freshly harvested or purchased seeds (check seed packets for variety and quantity).
- ● Paper envelopes or seed packets: 3x5" or 4x6" size, labeled with seed type, date, and variety (use a fine-tip marker). Quantity: 1 per seed type.
- ● Desiccant packets: Silica gel or clay-based (to absorb moisture). Quantity: 1-2 per storage container.
- ● Air-tight containers: Glass jars with tight-sealing lids (e.g., mason jars) or plastic containers with gaskets. Size: Medium to large (e.g., 16-32 oz). Quantity: 1-2 per seed type, depending on volume.
- ● Labeling supplies: Permanent markers (waterproof, fine-tip).
- ● Sticky labels or masking tape.
- ● Small funnel or scoop: For easy seed transfer into containers.
- ● Paper towels or coffee filters: For initial seed drying (if seeds are damp).
- ● Vacuum sealer: For long-term, moisture-free storage (great for large seed batches).
- ● Seed catalog or spreadsheet: To track seed viability, germination rates, and storage dates.
- ● Humidity/temperature monitor: To ensure your storage space stays ideal (35-40% humidity, 32-41°F).
- ● Freezer bags: For seeds you plan to store in the freezer (add desiccant before sealing).
- ● UV-protective containers: If storing seeds in a sunny area (e.g., amber glass jars).
Step-by-step guide to testing seed viability before storage
Here's how to ensure your seeds are ready for long-term storage—no guesswork involved!
🌱 Step 1: Gather Your Seeds and a Testing Medium
Collect seeds from your dried pods or packages and prepare a simple testing setup. You’ll need a few paper towels, a plastic bag, and a spray bottle for moisture. I like to use a clean, shallow container like a plastic takeout box—it keeps everything contained while allowing visibility.
Fold the paper towels into quarters and place them flat in the container. Arrange seeds about 1 inch apart in a single layer—crowding them can lead to mold or uneven results. This spacing gives each seed room to react independently to the moisture test.
💧 Step 2: Apply Moisture and Seal the Test
Lightly mist the paper towels with water until they’re damp but not soaked. You want the towels to feel like a wrung-out sponge—enough moisture to support germination but not enough to drown the seeds. Spritz the seeds gently to ensure they’re all in contact with the damp paper.
Seal the container with the plastic bag, leaving just a tiny gap for airflow. This creates a humid microclimate that mimics natural conditions. Place the sealed container in a warm spot, like on top of your fridge or near a sunny window. You’re looking for signs of life within 3-7 days—not a long wait for such critical info!
⏰ Step 3: Monitor for Germination Signals
Check the seeds daily for the first few days, then every other day after that. Viable seeds will begin to sprout tiny roots or show a slight swelling at the seed coat. I’ve seen some seeds pop open almost immediately, while others take the full week—patience is key here. Discard any seeds that remain unchanged after 7 days.
Healthy seeds will show clear signs of germination, like a visible root pushing through the seed coat or a slight green tip emerging. If you see mold or foul odors, toss the entire test immediately—this indicates contamination. The goal is to identify which seeds are still capable of growing, so focus on the ones that show progress.
🌿 Step 4: Prepare Viable Seeds for Storage
Once you’ve identified the viable seeds, let them dry completely before storing. Spread them out on a clean, dry surface in a single layer and allow them to air-dry for 24-48 hours. This step is crucial—moisture is the enemy of long-term seed storage, and any lingering dampness will shorten their lifespan.
Use a fan on low setting if your climate is humid to speed up the drying process. Once the seeds feel dry to the touch and show no signs of moisture, they’re ready for storage. I like to store them in airtight containers with silica gel packets to absorb any residual humidity—this keeps them viable for years.
✂️ Step 5: Label and Store for Future Planting
Label each storage container with the seed type, variety, and date of storage. I use small glass jars with tight-sealing lids because they’re reusable and easy to find in the dark. Store the containers in a cool, dark place like a pantry or basement, where temperatures stay between 32-41°F.
Check your stored seeds annually to ensure they remain dry and viable. Properly stored seeds can last anywhere from 1-10 years, depending on the type. This method ensures you’re only storing seeds that will actually grow, saving you time and money in the long run. Happy gardening!
Tips & tricks for perfect seed viability testing
These little-known tricks will help you maximize your seed testing success and avoid common pitfalls that waste precious gardening resources.
Container Selection: While a plastic takeout box works, I’ve found that using a clear glass or acrylic container gives you better visibility for monitoring germination without disturbing the seeds. The clear sides let you see sprouting roots without opening the container, which could introduce unwanted moisture. Plus, glass is easier to clean between tests!
Moisture Precision: The "wrung-out sponge" test is your best friend here. Use a spray bottle with a fine mist setting to avoid oversaturating the paper towels—too much water leads to mold instead of germination. I like to test the moisture level by squeezing a corner of the towel; it should feel damp but not dripping. This balance is critical for that 3-7 day testing window!
Temperature Control: While warm spots like your fridge top work, I’ve had the best success placing my seed tests directly on top of a refrigerator (not inside). This maintains a consistent temperature around 70-75°F without the risk of heat fluctuations from indoor lighting or direct sunlight. Pro tip: If your home is particularly cold, consider a seedling heat mat on low setting beneath the container.
Drying Strategy: For the 24-48 hour drying period, I’ve found that placing seeds on a wire cooling rack over a shallow tray speeds up evaporation while preventing moisture buildup underneath. In humid climates, I run a small fan on low setting aimed at the seeds for the first 12 hours—just enough to create gentle airflow without disturbing them. This method consistently gets my seeds bone dry in 24 hours, even in 80% humidity conditions.
Pro Tips for Garden Seed Storage
- These little-known tricks will help you maximize your seed testing success and avoid common pitfalls that waste precious gardening resources.
- Container Selection: While a plastic takeout box works, I’ve found that using a clear glass or acrylic container gives you better visibility for monitoring germination without disturbing the seeds.
- Moisture Precision: The "wrung-out sponge" test is your best friend here.
Frequently asked questions
How long can I store seeds before they lose viability?
Most vegetable seeds stay viable for 2–5 years when stored properly, while flower and herb seeds often last 1–3 years. Always check the seed packet for specific details—some varieties (like beans or peas) may last longer. Pro tip: Test a few seeds before planting to confirm germination rates!
What’s the best temperature and humidity for seed storage?
Ideal conditions are 32–41°F (0–5°C) and 30–50% humidity. A standard refrigerator (without freezing) works well, or use a sealed container with a desiccant packet in a cool, dark pantry. Avoid basements or garages—moisture and temperature swings can shorten seed life.
Can I reuse seed packets for storage?
Yes! Clean, dry packets are great for short-term storage (up to a year). For long-term use, transfer seeds to airtight containers (like glass jars or Mylar bags) with a silica gel packet to absorb moisture. Label everything with the seed type and date to stay organized!
What if my seeds won’t germinate after storage?
First, check for moisture damage (moldy or clumpy seeds) or pest activity (tiny holes or webbing). If seeds are dry but not sprouting, try a viability test: Plant a few in damp paper towels—if less than 50% sprout, consider sourcing fresh seeds.
Are there alternatives to traditional seed storage?
For small batches, vacuum-sealed bags or freezer storage (below 32°F/0°C) work well. Some gardeners even use clay seed pots buried in dry soil over winter. Just ensure your method blocks light, moisture, and pests—consistency is key!
Wrapping up and next steps
Proper garden seed storage is the secret to unlocking next season’s lush harvests! By mastering the twist-free viability check and drying techniques, you’ll preserve seeds like a pro—saving time, money, and effort.
Now that you’re armed with the right tools and tips, it’s time to put your knowledge into action.
Start by auditing your seed stash—label, test, and store them with confidence. Then, take the next step: share your success with fellow gardeners or dive deeper into seed-saving strategies for long-term sustainability. Happy growing—your future garden will thank you! 🌱✨