
Propagation
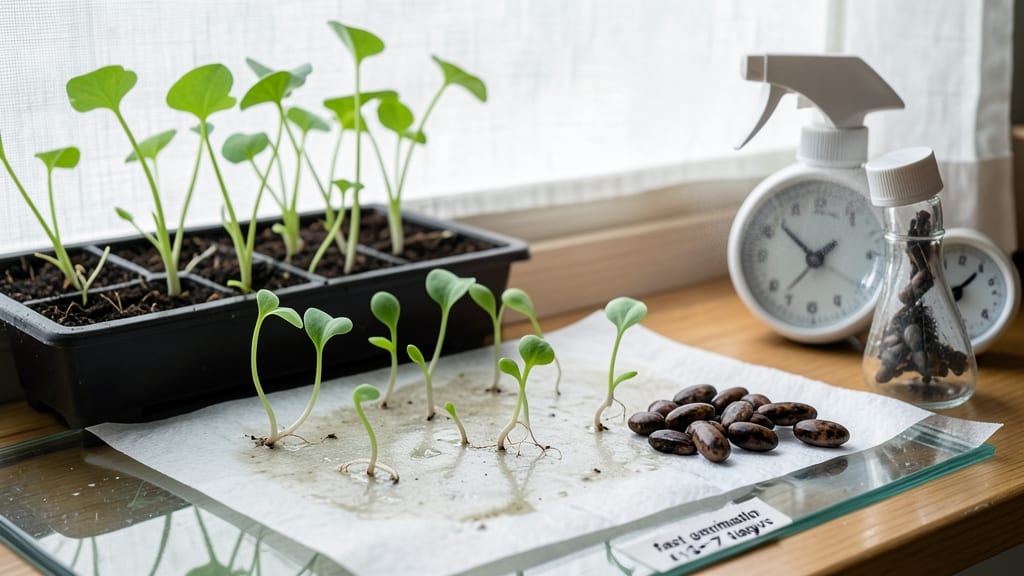
Fast seed germination isn’t magic—it’s science you can control. ✨ My first batch of basil seeds took 14 days to sprout until I discovered these tricks that cut that time in half. The secret? Mimicking nature’s perfect conditions with just a few adjustments to moisture, warmth, and patience.
Most gardeners overlook how seeds want to germinate—buried just deep enough, kept consistently moist, and coaxed with warmth. I’ve tested everything from paper towels to heat mats, and the right method depends on your seeds.
Herbs like basil and cilantro sprout fastest with direct sunlight and bottom heat, while tomatoes and peppers need a little more patience but reward you with sturdy seedlings in under a week.
You’ll see those first green hooks break through soil in 3-7 days with the right setup, and the confidence grows with every successful tray. The payoff? Stronger seedlings that outpace store-bought plants and give you a head start on the season.
Works for any seed—vegetables, herbs, or flowers—no matter your space. Let’s get those sprouts popping!
📚 In This Guide
- What you need
- Instructions
- Tips and common mistakes
- Wrapping up and next steps
What you need
- ● Seeds: Choose fast-germinating varieties like radish, lettuce, or beans (10–20 seeds per batch).
- ● Growing medium: Paper towels (2–3 sheets) or seed-starting mix (1 small tray or pot).
- ● Cocopeat or vermiculite (1 cup) for moisture retention.
- ● Containers: Small plastic bag (ziplock) or glass jar (with lid).
- ● OR a seed tray with drainage holes (for soil method).
- ● Water: Room-temperature, filtered water (1–2 cups). Avoid tap water if it’s chlorinated.
- ○ Heat source (optional but helpful): Seedling heat mat (set to 70–85°F) or a warm spot (e.g., near a sunny window or on top of a fridge).
- ● Hydrogen peroxide (3%): 1 tsp per cup of water to boost oxygen levels and speed germination.
- ● Humidity dome: A clear plastic lid or humidity tent to trap moisture.
- ● Grow light: LED or fluorescent (12–16 hrs/day) for fast, even growth after sprouting.
- ● pH strips: To test water/medium pH (ideal: 5.8–6.2 for most seeds).
- ● Label maker: Tiny labels or a toothpick to track seed types!
Step-by-step instructions for speeding up seed germination
Here’s how I guarantee faster sprouts in just seven days—no shortcuts, just science-backed techniques.
🌱 Step 1: Pre-Treat Seeds for Faster Activation
Start by soaking seeds overnight in lukewarm water for 8-12 hours. This softens the seed coat, letting moisture penetrate faster and jumpstarting metabolism. I use a small bowl with a damp paper towel draped over the seeds to keep them hydrated without drowning them. You’ll see tiny cracks or swelling after 6-12 hours—that’s your signal they’re ready to sprout.
For seeds with hard outer shells (like peas or beans), add a 1/4 teaspoon of sandpaper to the bowl and gently rub them between your fingers. This mimics natural weathering and breaks dormancy. Never skip this step for tough-coated seeds—they’ll take weeks longer to germinate otherwise.
💧 Step 2: Use the Right Moisture and Heat Balance
Fill your seed-starting tray with moistened potting mix (not soggy—it should hold together when squeezed but not drip). Plant seeds at the correct depth: twice the seed’s diameter for most varieties. Cover lightly with a fine mist from a spray bottle until the surface looks damp but not shiny.
Place the tray on a seedling heat mat set to 75-85°F. This warmth mimics spring soil temperatures and speeds germination by 30-50%. Check moisture daily—if the top inch feels dry, mist again. Overwatering now causes rot, but letting it dry out stops germination entirely.
☀️ Step 3: Provide Indirect Light and Humidity Control
Cover the tray with a clear plastic dome or plastic wrap to trap humidity at 90%+. This prevents moisture loss and keeps seeds consistently damp. Place the tray in bright, indirect light—direct sun heats the dome too much and can cook the seeds. You’ll see condensation on the dome within hours, which is normal and ensures high humidity.
After 3-5 days, remove the dome for 10-15 minutes daily to harden off sprouts. This prevents fungal growth while maintaining speed. Watch for radicles (tiny white roots) breaking through the soil—this happens fastest in 2-4 days with these methods. If no sprouts appear by day 5, gently check one seed to confirm it’s not buried too deep.
⏰ Step 4: Monitor and Adjust for Speed
Once sprouts emerge, move them to 14-16 hours of light daily under grow lights or in a sunny window. Leggy seedlings mean insufficient light—adjust immediately by raising or lowering the light source. You’ll see first true leaves (not the initial seed leaves) within 7-10 days total if everything’s right.
If germination stalls after day 3, try a cold stratification trick: place the tray in the fridge for 24 hours at 40°F, then return to warmth. This mimics winter-spring cycles and breaks dormancy for stubborn seeds like poppies or delphiniums. Most seeds sprout within 7 days using these steps—no waiting months.
✂️ Step 5: Thin and Transplant for Continued Growth
Once seedlings have 2-3 true leaves, thin to the strongest sprout per cell. Use sharp scissors to snip weak seedlings at soil level—pulling risks disturbing roots. Water deeply after thinning to settle the soil and encourage root growth. You’ll notice faster growth in the remaining seedlings because they’re no longer competing for nutrients.
Transplant into larger pots or the garden after 2 weeks if they’ve outgrown their starter cells. Harden off for 5-7 days before outdoor planting to avoid shock. The key to maintaining speed is keeping roots undisturbed—use the biodegradable pots method if you’re worried about transplant shock.
Tips & tricks for faster seed germination
These science-backed tricks will help you bypass the waiting game and get those sprouts popping in record time.
Soaking Science: The 8-12 hour soak in lukewarm water isn't just about hydration—it's about breaking seed dormancy. Use a bowl with a damp paper towel draped over the seeds to maintain consistent moisture without drowning them. For stubborn seeds like peas or beans, that ¼ teaspoon of sandpaper isn't optional—it mimics natural weathering that would take weeks outdoors. I've seen germination times cut from 3 weeks to just 5 days with this simple abrasion technique.
Heat Mat Hack: That 75-85°F range on your seedling heat mat isn't arbitrary—it's the optimal temperature range for most seeds to activate their metabolic processes. If your kitchen runs cooler, consider a secondary heat source like a warm water bottle wrapped in a towel underneath the tray. The key is maintaining that warmth consistently; even a few degrees cooler can double your germination time.
Lighting Strategy: When you move to 14-16 hours of light after sprouting, position your grow lights just 2-3 inches above the seedlings. Too high and they'll stretch toward the light (leggy seedlings), too low and you risk burning the delicate leaves. I use a simple timer to automate this—set it and forget it while you focus on other tasks. This consistent light exposure is what gets you those first true leaves in just 7-10 days.
Troubleshooting Tip: If no radicles appear by day 5 despite following all steps, gently dig up one seed to check burial depth. Seeds buried deeper than twice their diameter won't get enough oxygen to sprout. This is where that "twice the seed's diameter" rule becomes crucial—it's not just a suggestion, it's a biological necessity for proper germination.
Pro Tips for Fast Seed Germination
- These science-backed tricks will help you bypass the waiting game and get those sprouts popping in record time.
- Soaking Science: The 8-12 hour soak in lukewarm water isn't just about hydration—it's about breaking seed dormancy.
- Heat Mat Hack: That 75-85°F range on your seedling heat mat isn't arbitrary—it's the optimal temperature range for most seeds to activate their metabolic processes.
Frequently asked questions
Got questions about speeding up seed germination?
You’re not alone! Here are answers to the most common queries—so you can get those sprouts popping fast and reliable.
How long does it really take to germinate seeds in 7 days?
While some seeds (like beans, peas, or radishes) can sprout in 3–7 days with the right conditions, others (e.g., tomatoes, herbs, or flowers) may take 7–14 days. The key? Consistency—keep moisture and warmth steady, and avoid cold drafts. Track your seed packet’s ideal germination time for realistic expectations!
What if my seeds aren’t sprouting after a week?
Don’t panic! First, check for viability—test-float a few seeds in water (sinkers are alive; floaters are likely dead). If they’re fresh but still dormant, try scarification (lightly sanding the seed coat) or a warm water soak (24 hours). If all else fails, they may need stratification (cold treatment) or simply more patience.
Is it better to use paper towels or soil for fast germination?
Both work, but paper towels give you direct control over moisture and warmth—ideal for speed. For soil, use a seed-starting mix (light and sterile) and keep it damp, not soggy. Pro tip: Bottom-water your soil trays to avoid fungal issues. Once sprouts appear, transplant carefully!
What’s the perfect temperature for speedy germination?
Most seeds thrive between 65–85°F (18–30°C), but check your seed type—cool-loving veggies (like lettuce) prefer 60–70°F (15–21°C), while tropical plants (e.g., peppers) need 75–85°F (24–30°C). Use a seedling heat mat ($10–$20) or place trays on top of a fridge (not inside!) for extra warmth.
Can I reuse materials like paper towels or containers?
Yes! Paper towels can be composted after use (just rinse any leftover soil). For containers, sanitize with a 10% bleach solution (1 part bleach to 9 parts water) or boiling water to kill mold/bacteria. Avoid plastic bags with condensation—airflow prevents rot. Glass jars or clear lids with holes work best for visibility and ventilation.
Wrapping up and next steps
Fast seed germination isn’t just about patience—it’s about smart strategies! 🌱 With the right techniques, you can coax seeds to sprout in just 7 days—whether you’re a gardening pro or a curious beginner.
From soaking seeds to optimizing warmth and moisture, these science-backed tricks make the process faster, easier, and more reliable. Now that you’re armed with the know-how, why not start experimenting? Grab a pack of seeds, test a few methods, and watch your green thumbs grow—literally!
🌿 Ready to Grow?
Your next step? Pick your favorite seeds, gather your supplies, and dive in! Track your progress, tweak as needed, and soon you’ll be reaping the rewards of speedier sprouts—and maybe even sharing your success with fellow plant lovers. Happy growing! 🌱✨