
Propagation
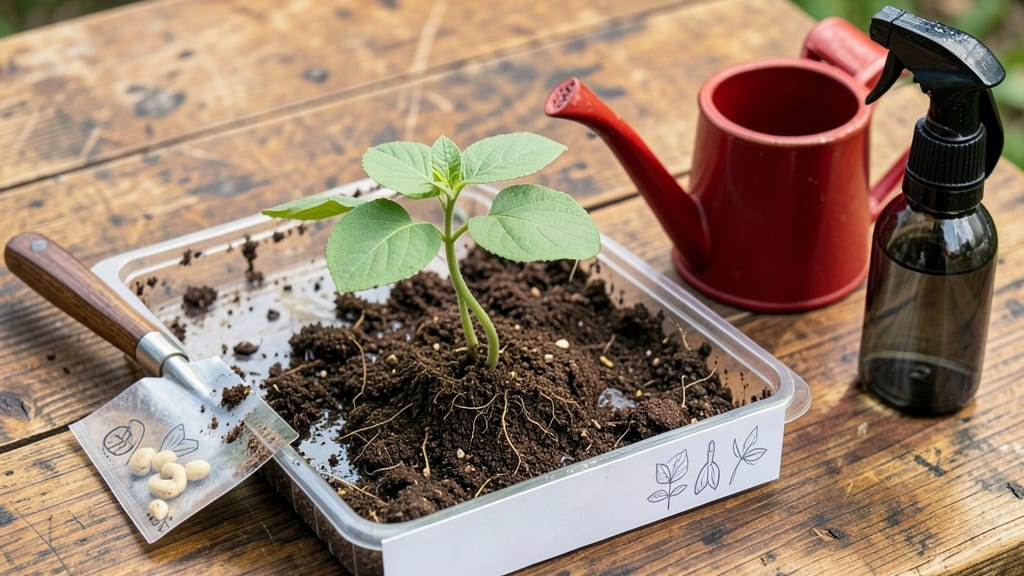
Explain seed germination—it’s the magical process that turns a tiny seed into a thriving plant, and here’s how to unlock it reliably. 🌱 The process starts with water waking up the seed’s dormant life, then heat and oxygen kick it into action, and finally light guides the sprout toward sunlight. My first batch of seedlings failed because I didn’t realize how picky they are about moisture and warmth. You’ll need three things: consistent moisture (not soggy), warmth (70-85°F for most seeds), and patience (some take days, others weeks). The right setup—whether a seed tray, damp paper towels, or a heated mat—makes all the difference. I swear by a simple spray bottle and a clear plastic bag to keep humidity high without drowning roots. Once you see the first green hook (the hypocotyl), you’re halfway there. The real test comes when true leaves appear—that’s when you know the seed “won.” Troubleshooting starts with checking your conditions: too cold? Too dry? Seeds need encouragement, not guesswork. This method works for everything from fast-sprouting radishes to stubborn heirloom tomatoes. The key is treating seeds like tiny athletes—they perform best with the right training conditions. Let’s get those sprouts growing!
📚 In This Guide
- What you need
- Instructions
- Tips and common mistakes
- Wrapping up and next steps
What you need
- ● Seeds: Choose fresh, high-quality seeds (e.g., beans, lentils, or radish). Aim for 5–10 seeds for a small experiment or 20+ seeds for larger batches.
- ● Growing Medium: Paper towels or coffee filters (2–4 sheets per batch, dampened but not soaked).
- ● Potting soil (sterilized, well-draining mix—2–3 cups for a small container).
- ○ Optional: Coconut coir or vermiculite for moisture retention.
- ● Containers: Plastic bag or sealed container (e.g., Ziploc bag, mason jar, or small tray).
- ● Small pots or egg cartons (for soil-based germination, 3–5 inches deep).
- ● Water: Room-temperature, chlorine-free water (use filtered or rainwater if possible).
- ● Spray bottle (for gentle watering—8–12 oz capacity works well).
- ○ Thermometer (optional but helpful): Monitor temperatures between 60–85°F (15–29°C), depending on seed type.
- ● Humidity dome or plastic wrap: Creates a mini greenhouse effect (use if not using a sealed container).
- ● Light source: Bright, indirect light (e.g., grow light or sunny windowsill) once sprouts emerge.
- ● Notebook & pen: Track seed types, planting dates, and germination progress!
How seed germination works: the science behind getting sprouts to break through
Here's the breakdown of what happens—and how to control it—for predictable germination every time.
🌱 Step 1: Understand the Four Key Requirements for Germination
Every seed needs four things to wake up: moisture, oxygen, proper temperature, and light (or darkness, depending on the seed). Moisture softens the seed coat and activates enzymes inside, while oxygen fuels the early root growth. Temperature determines how fast the seed germinates—most seeds need 60-85°F for reliable sprouting.
Light plays a tricky role: some seeds (like lettuce) need light to germinate, while others (like tomatoes) prefer darkness. Check your seed packet—if it says "light required," place them on the soil surface. If it says "dark," cover them lightly. I always test a few seeds in both conditions to see what works best in my setup.
💧 Step 2: Prepare the Ideal Moisture Environment
Start by soaking seeds overnight in lukewarm water for 8-12 hours if they have hard coats (like beans or peas). This softens the outer layer so roots can push through faster. For most seeds, though, you just need evenly moist—not soggy—soil. Fill your container with the seed-starting mix and water it until it feels like a damp sponge.
Here's the thing—too much water drowns seeds, while too little stops germination. Press seeds into the soil at the correct depth (usually twice the seed's diameter) and cover lightly. Mist the surface with a spray bottle until the soil looks dark and moist but not glistening. You'll know it's right when a drop of water sits on top for a few seconds before being absorbed.
☀️ Step 3: Control Temperature for Fast and Even Germination
Seeds germinate fastest at their optimal temperature range—check your packet, but most veggies prefer 70-75°F. A seedling heat mat set to 75-85°F gives you the most reliable results, especially in cooler climates. Without one, place your tray on top of the fridge or near a warm spot in your home.
Watch for condensation on the container's lid or cover—this means the humidity is perfect. If you see mold instead of sprouts after 5-7 days, the environment is too damp. Remove the cover immediately, let the soil dry slightly, and try again with less water next time. Real talk: I've lost entire trays to mold before, but now I check for condensation daily.
⏰ Step 4: Monitor for the First Signs of Life
Germination times vary wildly—some seeds (like radishes) sprout in 3-5 days, while others (like okra) take 10-14 days. The first sign is usually a tiny radicle (the embryonic root) pushing through the seed coat. Within 24-48 hours, you'll see the shoot emerge from the soil.
This is the moment that matters: once the shoot appears, remove any cover immediately to prevent damping-off disease. Keep the soil consistently moist but never soggy—you'll see seedlings wilt if they dry out or rot if they're too wet. I like to use a spray bottle to water from below the leaves, which keeps the stems dry and reduces disease risk.
🌿 Step 5: Transition to Light for Healthy Seedling Growth
As soon as you see the first true leaves (not the initial seed leaves), move seedlings to bright, indirect light for 12-16 hours daily. South-facing windows work, but most homes don't have enough intensity—supplement with a grow light if needed. Leggy seedlings (long, weak stems) mean your light is too far away or not strong enough.
Rotate the tray a quarter turn daily so seedlings grow straight toward the light instead of bending. You'll notice stronger stems and darker green leaves within a week—that's your signal everything is working. If leaves turn yellow, it's usually a sign of overwatering or poor drainage. Adjust your care and watch them bounce back within a few days.
Tips & tricks for perfect seed germination
These practical insights will help you troubleshoot common germination challenges and maximize your success rate.
Seed Selection Tip: Always check your seed packet for specific germination requirements. Some seeds (like chard) need light to sprout, while others (like tomatoes) prefer darkness. I've learned this the hard way—planting lettuce seeds too deep in the dark can prevent germination entirely. For seeds with hard coats like beans or peas, the overnight soaking for 8-12 hours is non-negotiable—it softens the seed coat and speeds up the process by up to 50%.
Temperature Control: While the 70-75°F range works for most vegetables, some seeds (like peppers) prefer 80-85°F for optimal germination. If your home runs cooler, place your seed trays on top of the fridge or use a seedling heat mat set to 75°F. I keep mine near my kitchen window during the day where it naturally warms up—just make sure it doesn't exceed 85°F or seeds may overheat.
Humidity Watch: The condensation test is your best friend—if you see moisture droplets on the container lid after 5-7 days, you're golden. But if you notice fuzzy mold instead of sprouts, it's time to act fast. Remove the cover immediately, let the soil dry slightly for a day, then restart with less water. I've lost entire trays to mold before, but now I check condensation daily and adjust moisture levels accordingly.
Light Transition Timing: The moment you see the first true leaves (not the initial seed leaves), move seedlings to bright, indirect light for 12-16 hours daily. Leggy seedlings are a clear sign your light source isn't strong enough—supplement with a grow light if needed. I rotate my trays a quarter turn daily to ensure even growth, and within a week you'll notice stronger stems and darker green leaves. If leaves turn yellow, it's usually a sign of overwatering or poor drainage.
Pro Tips for Explain Seed Germination
- These practical insights will help you troubleshoot common germination challenges and maximize your success rate.
- Seed Selection Tip: Always check your seed packet for specific germination requirements. Some seeds (like chard) need...
- Temperature Control: While the 70-75°F range works for most vegetables, some seeds (like peppers) prefer 80-85°F for ...
Frequently asked questions
Got questions about seed germination?
You’re not alone! Here are answers to the most common queries—from timing to troubleshooting—to help you grow confidently.
How long does it take for seeds to germinate?
Germination time varies by plant. Fast growers like radishes sprout in 3–7 days, while slow starters (e.g., beans, tomatoes) may take 7–21 days. Check the seed packet for specifics! Pro tip: Keep soil consistently moist and warm (70–85°F) to speed things up.
What if my seeds aren’t sprouting after 2 weeks?
Don’t panic—seeds can take longer, but here’s how to troubleshoot:
- Check moisture: Soil should feel like a damp sponge, not soggy.
- Test depth: Some seeds (e.g., lettuce) need light—plant them shallowly.
- Verify viability: Soak a few seeds in water; if they sink, they’re likely good.
- Adjust conditions: Some seeds (like peas) need cold stratification.
Can I germinate seeds without soil?
Try paper towel germination for faster, controlled sprouting:
- Moisten a paper towel and place seeds between two layers.
- Roll it up and secure with a rubber band.
- Store in a warm, dark place (e.g., a sealed bag).
- Check daily—transplant when roots are ½-inch long.
Does temperature affect seed germination?
Yes! Most seeds germinate best in warm soil (70–85°F), but some (like lettuce) prefer cooler temps (60–70°F). Use a seedling heat mat for cold climates or pre-sprout indoors near a sunny window. Too hot? Seeds may rot; too cold? They’ll stall. Aim for consistency!
Why did my seeds rot instead of sprouting?
Overwatering or poor drainage is the usual culprit. To prevent rot:
- Use well-draining soil (add perlite or sand if needed).
- Water gently—bottom-watering (placing pots in shallow water) helps.
- Avoid compacting soil around seeds.
- Use sterilized containers (clean pots or fresh seed-starting mix).
Wrapping up and next steps
Understanding seed germination isn’t just about science—it’s your ticket to growing lush, thriving plants from scratch! 🌱 From ensuring the right conditions to troubleshooting hiccups, every step plays a role in unlocking nature’s potential. Now that you’re equipped with the know-how, why not put it into action?
Start small—try germinating a few seeds in a sunny windowsill or a mini greenhouse. Watch them sprout, and let that first green shoot inspire your next gardening adventure! 🌟 Your green thumb is closer than you think—plant that seed today!