
Lawn
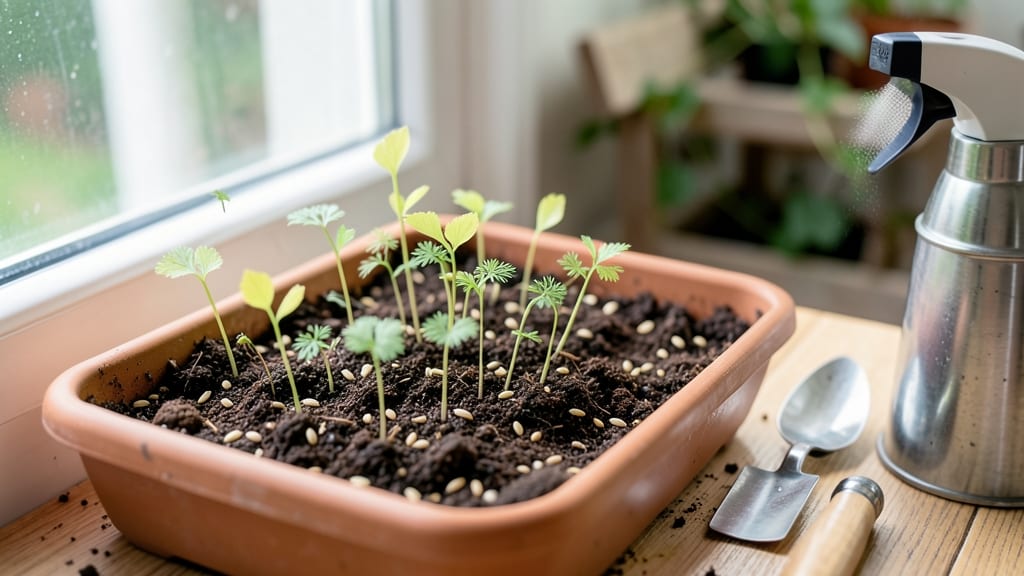
Dill seeds sprout faster than almost any herb I’ve tried—within 5-7 days if you nail the conditions. 🌱 The trick isn’t just patience; it’s creating the perfect cozy environment where those tiny seeds feel like they’re back in their Mediterranean meadow.
Too cold or dry, and they’ll sulk. Too wet, and you’ll lose them to mold before they even wake up. Start with a warm, damp seed-starting mix (not garden soil) in a shallow tray or small pot. Plant seeds just ¼-inch deep—any deeper, and they’ll struggle to break through.
Keep the soil consistently moist (think damp sponge, not soggy), and cover with plastic wrap or a humidity dome to trap warmth. A 70-75°F spot—like a sunny windowsill or under grow lights—is ideal. Once those first pale green leaves appear, you’ll know you’ve done it right.
Thin seedlings to 12-18 inches apart (they’ll get bushy!) and watch them race toward harvest. The first snips are ready in just 3-4 weeks—faster than store-bought dill, and way more flavorful. Pro tip: If germination stalls after a week, try a bottom heat mat (60-65°F) to jumpstart stubborn seeds.
And plant extra—dill self-seeds like crazy, so you’ll have fresh leaves for months without replanting.
📚 In This Guide
- What you need
- Instructions
- Tips and common mistakes
- Wrapping up and next steps
What you need
- ● Dill seeds: 1–2 tablespoons (about 15–30 grams) of organic, non-GMO dill seeds (ensure they’re labeled for sprouting if possible).
- ● Sprouting container: A quart-sized mason jar with a mesh lid (or a sprouting lid with a fine screen), OR
- ● A plastic or glass sprouting tray with drainage holes (8x12 inches or larger).
- ● Water: Filtered or distilled water at room temperature (avoid tap water with chlorine).
- ● Cheesecloth or fine mesh screen: For covering the jar/tray if your lid doesn’t have a screen.
- ● Rubber band or jar ring: To secure the cloth/mesh in place.
- ● Colander or sink: For rinsing sprouts (a fine-mesh strainer works best).
- ● A small hand sprayer for gentle rinsing (reduces water waste).
- ● Grow lights or sunny windowsill: If sprouting indoors (12+ hours of light/day).
- ● Grow mat or paper towels: For drainage if using a tray (prevents soggy sprouts).
- ● Food dehydrator or oven: For drying sprouts into seed bombs or powders (if desired).
- ● Notebook or app: To track germination progress (e.g., SproutTracker).
- ● Clean workspace (sanitize jars/trays with vinegar or boiling water to prevent mold).
- ● Patience! Dill sprouts typically germinate in 3–5 days (ready to harvest in 7–10 days).
- ● Access to cool (60–75°F) conditions—avoid heat or direct sunlight during germination.
How to grow dill seed sprouts indoors in just days
Here's how to get fresh dill sprouts in under a week—no greenhouse needed.
🌱 Step 1: Soak Seeds to Speed Germination
Place 1 tablespoon of dill seeds in a small bowl and cover with warm water (not hot). Let them soak for 4-6 hours—this softens the seed coat and triggers faster sprouting. You'll see them swell slightly, which means they're ready to go.
Drain the water through a fine-mesh strainer, then give the seeds a quick rinse under cool water. This removes any excess moisture that could cause mold. I like to use a clean kitchen towel to blot them dry—just pat gently so they stay plump but don't stick together.
💧 Step 2: Set Up a Moist Growing Environment
Line a shallow tray or plate with a damp paper towel or a thin layer of cotton mesh. Spread the soaked seeds evenly across the surface, leaving about ½ inch between each one. Cover with another damp paper towel or mesh layer, then place everything in a sealed container like a plastic bag or Tupperware.
This creates a mini greenhouse effect—ideal for dill's fast germination. Store the container in a warm spot, like on top of the fridge or near a sunny window. Check daily and mist the towels with water if they feel dry to the touch. You should see tiny sprouts in just 2-3 days.
☀️ Step 3: Provide Bright Light for Strong Growth
Once the sprouts reach about 1 inch tall, transfer them to a well-lit area. A south-facing window with 4-6 hours of direct sunlight works, but grow lights are better for consistent growth. If using natural light, rotate the tray daily so sprouts grow straight instead of leaning.
Keep the growing medium moist but not soggy—dill sprouts rot quickly if overwatered. I like to mist them lightly every 12 hours or when the towels feel dry. You'll know they're thriving when the stems are firm and the leaves are bright green.
✂️ Step 4: Harvest When Ready for Fresh Flavor
Dill sprouts are ready to harvest when they reach 2-3 inches tall, usually within 5-7 days of planting. Snip the stems just above the base with clean scissors or fingers. For continuous harvests, trim the longest sprouts first—this encourages new growth.
Use your fresh sprouts immediately in salads, sandwiches, or as a garnish. If storing, wrap them in a damp paper towel and keep in the fridge for up to 5 days. The key to keeping them fresh is avoiding moisture buildup—never store them in a sealed container.
Tips & tricks for growing perfect dill sprouts
Here's what I wish I'd known before my first attempt—these tricks will help you avoid common pitfalls and get the fastest, healthiest sprouts.
Soaking Secret: The 4-6 hour soak is non-negotiable for dill seeds—they need this time to soften their tough outer shell. I've tried shorter soaks (as little as 2 hours) and ended up with uneven sprouting. If you're in a hurry, you can soak overnight (up to 12 hours), but don't exceed that or the seeds may develop mold.
Lighting Strategy: That 4-6 hours of direct sunlight in Step 3 is crucial for strong growth, but natural light can be inconsistent. If your window light is weak, supplement with a simple LED grow light (even a cheap one) for 6-8 hours daily. I placed mine just 6 inches above my sprouts—close enough to see the leaves perk up noticeably within hours.
Moisture Balance: The 12-hour misting schedule is your friend, but don't overdo it. I learned this the hard way when my sprouts developed black spots from too much moisture. Always check by touching the paper towels—if they feel damp but not wet, you're good. A spray bottle with a fine mist setting works best for gentle hydration.
Harvesting Hack: When your sprouts reach 2-3 inches, harvest them just before you plan to use them. The flavor peaks at this stage, and they'll stay fresh longer than you'd expect. For continuous harvests, trim the longest sprouts first—this prevents overcrowding and encourages new growth from the base. I've kept a small batch going for weeks this way!
Pro Tips for Dill Seed Sprouts
- Here's what I wish I'd known before my first attempt—these tricks will help you avoid common pitfalls and get the fastest, healthiest sprouts.
- Soaking Secret: The 4-6 hour soak is non-negotiable for dill seeds—they need this time to soften their tough outer shell.
- Lighting Strategy: That 4-6 hours of direct sunlight in Step 3 is crucial for strong growth, but natural light can be inconsistent.
Frequently asked questions
Got questions about growing dill seed sprouts?
You’re not alone! Here are some of the most common queries—plus quick, practical answers to help you sprout like a pro.
How long does it take for dill seeds to sprout?
Dill seeds are fast—typically sprouting in 3 to 7 days when kept moist and warm (70–75°F). If you’re impatient, soak seeds overnight in warm water to kickstart germination. Just don’t over-soak, or they’ll drown!
Can I grow dill sprouts indoors without sunlight?
Use a grow light (12–16 hours/day) or place your sprouting tray near a sunny window. Dill sprouts need light to stay green and avoid becoming leggy. A seedling heat mat can also speed up germination in cooler spaces.
Why are my dill seeds not sprouting?
Check these first:
- Moisture: Keep seeds damp (not soggy) with a spray bottle.
- Temperature: Too cold (<60°F) slows growth; too hot (>85°F) can kill seeds.
- Age: Old seeds (over 1 year) may lose viability. Test a few first!
What’s the best way to harvest dill sprouts?
Harvest when sprouts are 1–3 inches tall (about 7–10 days after planting). Snip with clean scissors just above the soil, leaving roots intact for regrowth. Rinse gently, pat dry, and store in a sealed container in the fridge for up to 5 days. Pro tip: Freeze extras in ice cube trays for later!
Can I use dill sprouts the same way as mature dill?
Yes! They’re milder and fresher than dried dill, perfect for:
- Salads (adds a bright, tangy kick!)
- Soups, yogurt, or hummus as a garnish
- Baked goods (think dill-infused bread or crackers)
What if my sprouts get moldy?
Mold is a red flag—stop sprouting immediately! Discard affected batches (never eat moldy sprouts). To prevent mold:
- Use food-grade sprouting trays and rinse thoroughly.
- Avoid overcrowding seeds.
- Harvest within 10 days to minimize risk.
Wrapping up and next steps
Growing dill seed sprouts is a rewarding way to enjoy fresh, flavorful herbs year-round with minimal effort! Whether you're a seasoned gardener or a beginner, these fast-germinating sprouts are a game-changer for your kitchen—packed with nutrients and easy to cultivate. 🌱✨
Now that you’re armed with the how-tos and answers to common questions, why not take the next step? Start a small batch of dill sprouts this week—your taste buds (and health) will thank you!
For even more green goodness, explore other quick-sprouting herbs like alfalfa or radish to diversify your harvest.