
Lawn
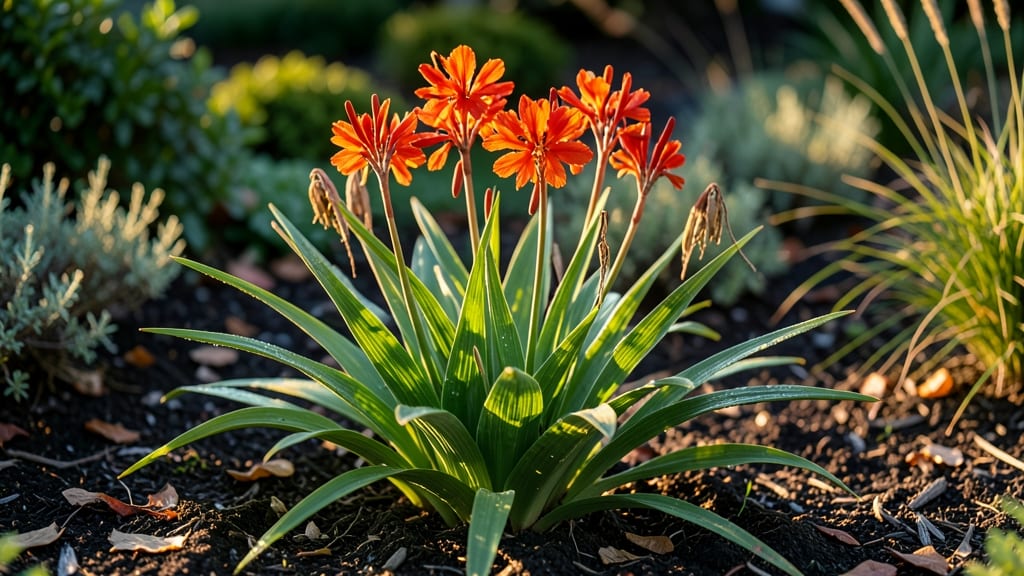
Those twisted crocosmia seed pods are nature’s way of saying "save me for next spring." 🌱 While most gardeners propagate crocosmia from corms, the seeds inside these dramatic pods can work—if you harvest them at the right time and handle them carefully.
I’ve learned the hard way that waiting too long means brittle pods that crumble before you can collect a single seed.
The best time to harvest is when the pods turn tan and dry but haven’t split open yet—usually late fall in most climates. Cut the stems just above the soil line with clean pruners, then twist the pods gently to release the seeds.
Store them in a paper envelope in a cool, dry place until planting season. Unlike corms, seeds take patience: germination can take 6-12 months, so don’t expect instant results.
What you’ll end up with are tiny, dark brown seeds that look more like specks than planting material. But when they finally sprout—often in spring or early summer—you’ll have delicate, grass-like foliage that grows into mature plants by their second year.
The key is consistency: keep the soil moist but not soggy, and avoid transplanting until the seedlings are at least 3-4 inches tall.
If your seeds aren’t germinating, check for freshness—older seeds lose viability fast. Try stratifying them (mimicking winter) by refrigerating them for 4-6 weeks before planting.
And here’s the plot twist: even if germination rates are low, the experiment is worth it for the unexpected color variations you might discover in your garden.
📚 In This Guide
- What you need
- Instructions
- Tips and common mistakes
- Wrapping up and next steps
What you need
- ● Pruning shears or sharp scissors – For clean cuts without damaging stems.
- ● Garden gloves – Protect your hands from thorns and rough stems.
- ● Paper bags or breathable mesh bags – 2-3 bags (8x10 inches each) to collect pods.
- ● Newspaper or paper towels – For drying and separating pods.
- ○ Small paintbrush or soft brush – Optional, for gently cleaning debris from pods.
- ● Air-tight containers (glass jars or resealable bags) – For long-term storage (quart-sized or larger).
- ● Labeling tags & permanent marker – To track pod varieties and harvest dates.
- ● Desiccant packets – For extra-dry storage environments.
- ● Twist ties or rubber bands – To bundle stems before drying.
- ● Magnifying glass – For inspecting seed viability up close.
- ● Spray bottle with water – For misting pods during drying (if humidity is low).
Step-by-step guide to harvesting crocosmia seed pods safely
Here's how to collect crocosmia seed pods without damaging the plant or wasting a single seed.
🌱 Step 1: Identify Mature Seed Pods
Crocosmia seed pods mature when they turn a dry, papery brown and begin splitting open at the seams. Look for pods that are fully elongated—typically 3-4 inches long—and have lost their vibrant green color. The pods should feel light and brittle when gently squeezed between your fingers, signaling they're ready for harvest.
Wait until the pods are fully mature but still intact. If you harvest too early, the seeds inside won't be fully developed. I always check pods in late summer or early fall, depending on your local climate. The key is to catch them just before they burst open naturally—this ensures maximum seed viability.
✂️ Step 2: Harvest with Precision
Use clean, sharp pruning shears or scissors to snip the entire seed pod from its stem. Cut about 1/4 inch above the base where the pod attaches to the plant. This prevents damaging the plant's foliage while ensuring you get the full pod intact.
Handle the pods carefully—they're delicate and can split open if squeezed too tightly. Place them in a paper bag or open mesh container to allow airflow. Never store harvested pods in a sealed plastic bag, as trapped moisture accelerates mold growth. I like to label each bag with the harvest date to track seed freshness.
🪴 Step 3: Dry and Prepare for Storage
Spread the harvested pods on a clean, dry surface in a well-ventilated area away from direct sunlight. This prevents overheating while allowing them to dry completely over 5-7 days. You'll know they're ready when the pods feel completely dry and papery to the touch, with no lingering moisture.
Once fully dry, gently twist each pod open to release the seeds. I place a sheet of white paper beneath the pods to catch the tiny seeds easily. The twisting motion should be firm but controlled—too much force can crush the seeds. Store the seeds in a sealed, airtight container with a desiccant packet to maintain dryness.
💧 Step 4: Store for Long-Term Viability
Place the dried seeds in a labeled envelope or small container and store them in a cool, dark place. A refrigerator's crisper drawer is ideal for maintaining 35-40°F temperatures, which preserves seed viability for up to 2 years. Label the container with the harvest date and variety, if applicable.
Check stored seeds annually for signs of mold or pest activity. If you notice any discoloration or unusual odors, discard the batch immediately. Properly stored crocosmia seeds should remain firm and dark-colored. This method ensures you'll have fresh seeds ready for planting whenever you're ready to expand your garden.
Tips & tricks for perfect crocosmia seed harvesting
Here's what nobody tells you about harvesting these delicate pods without losing a single seed.
Timing is Everything: The 5-7 day drying period is non-negotiable—this is when the seeds fully mature and become viable. I've learned the hard way that rushing this step leads to shriveled, non-viable seeds. Place your drying pods in a spot with consistent airflow (like a screened porch) to maintain even drying without direct sunlight, which can cause overheating and premature seed release. The pods should feel completely hollow when tapped gently.
Harvesting Technique: When using pruning shears, make your cut at a 45-degree angle just above the base where the pod meets the stem. This creates a clean break that won't tear the plant tissue. For stubborn pods, gently wiggle them back and forth while cutting to avoid crushing the seed chamber inside. I keep a small bowl nearby to catch any seeds that might prematurely release during harvest—every seed counts!
Storage Wisdom: The 35-40°F refrigerator temperature is your best friend for long-term viability. I store my seeds in small glass vials with silica gel packets rather than just airtight containers—this extra moisture control extends their shelf life beyond the 2-year mark. For variety tracking, I use masking tape labels with both the harvest date and variety name written in permanent marker. This system has saved me from mixing up seed batches over the years.
Pro Tips for Crocosmia Seed Pods
- Here's what nobody tells you about harvesting these delicate pods without losing a single seed.
- Timing is Everything: The 5-7 day drying period is non-negotiable—this is when the seeds fully mature and become viab...
- Harvesting Technique: When using pruning shears, make your cut at a 45-degree angle just above the base where the pod...
Frequently asked questions
Got questions about crocosmia seed pods?
You’re not alone! Here are some of the most common queries gardeners have—plus quick, practical answers to keep your harvest smooth and your garden thriving.
When is the best time to harvest crocosmia seed pods?
Harvest seed pods when they turn tan or brown and begin to split open naturally—usually late summer to early fall (August–October, depending on your climate). Wait too long, and the seeds may scatter or attract pests. Pro tip: Morning harvests prevent humidity from causing mold.
How do I safely remove seed pods without damaging the plant?
Use clean, sharp scissors or pruners to snip pods at the base, leaving at least 1-2 inches of stem attached. Avoid tugging—this can uproot the plant or leave behind stubborn remnants. Bonus: Wear gloves; some varieties have slightly prickly stems!
Can I store crocosmia seed pods for later planting?
Yes! Let pods dry completely in a well-ventilated, shady spot for 1–2 weeks. Store them in a paper bag or envelope (not plastic) in a cool, dark place. Seeds remain viable for 1–2 years if kept dry. Warning: Check periodically for mold or pests.
What if my seed pods twist or resist when cutting?
Twisted pods are normal—they’re tough to harvest because of their fibrous stems. Try these fixes:
- Soak the base in warm water for 10 minutes to soften the stem.
- Use long-nose pliers to grip and twist off stubborn pods.
- Harvest on a dry, sunny day when stems are less flexible.
What do I do with leftover seed pods after harvesting?
Don’t toss them! Use them for:
- Compost (chopped pods break down quickly).
- Dried arrangements—their twisted shapes add texture to winter bouquets.
- Seed paper (mix with pulp for eco-friendly planting cards).
Quick Troubleshooting Table
| Issue | Solution |
|---|---|
| Pods won’t open | Store in a paper bag with a few dry rice grains to absorb moisture. |
| Seeds sprouting too soon | Keep pods in the fridge (35–40°F) to slow germination. |
| Mold on stored pods | Discard affected pods; never store in sealed containers. |
Wrapping up and next steps
Crocosmia seed pods are a gardener’s hidden gem—packed with zero-waste potential and easy harvesting tricks! With the right tools and a little patience, you can transform these twist-resistant pods into long-term storage solutions or even fresh plantings.
Whether you’re a seasoned green thumb or just starting out, every pod counts toward a more sustainable garden. 🌱
Ready to put your new skills to the test? Grab your gloves and head outside—your next gardening adventure starts now! 🌿