
Propagation
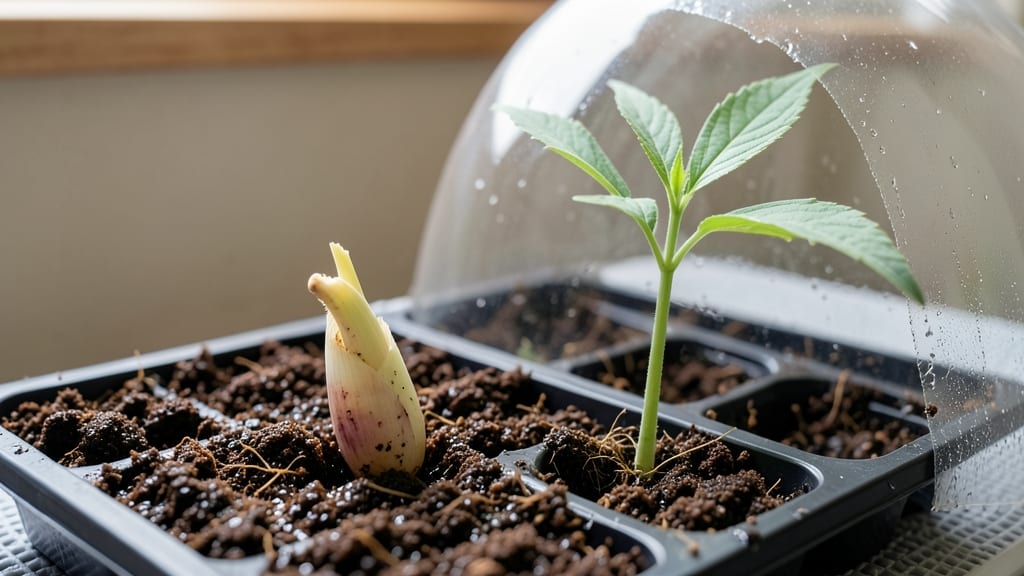
Corn seed germination thrives on consistent moisture to break dormancy and sprout within a week—without drowning them. 🌱 I’ve learned that too much water suffocates the seed, while too little leaves it parched, and neither helps those first tender shoots.
The trick is keeping the soil damp like a wrung-out sponge, not soggy.
Start with a shallow tray or seed-starting mix in a container where you can monitor moisture closely. Plant seeds just ½ inch deep in warm soil (70-85°F) and maintain even dampness—never let it dry out, but avoid puddles.
A spray bottle works best for gentle hydration, and covering the tray with plastic wrap creates a mini greenhouse effect.
Within 3-7 days, you’ll see the first signs of life: white radicles pushing through the soil, followed by the first leaves. That’s when you’ll know your moisture balance is perfect. The key is patience—corn seeds are slow to start but reward you with sturdy seedlings once they break through.
If germination stalls, check for cold soil or uneven moisture. Corn hates inconsistency, so adjust your setup until you see those first green tips. Once they’re up, thin to the strongest sprouts and prepare for transplanting in 2-3 weeks.
📚 In This Guide
- What you need
- Instructions
- Tips and common mistakes
- Wrapping up and next steps
What you need
- ● Corn seeds: 10-20 fresh, non-GMO seeds (preferably heirloom or organic for best results).
- ● Germination tray or container: A shallow, wide tray (10" x 12" or larger) with drainage holes, or a repurposed plastic container with a lid.
- ● Growing medium: Option 1: 2-3 paper towels or coffee filters (unbleached, seed-safe).
- ● Option 2: 2-3 inches of moistened peat moss or coco coir (sterilized and dampened to 60-70% moisture).
- ● Spray bottle: 8-16 oz with a fine mist nozzle (for gentle hydration).
- ○ Plastic wrap or humidity dome: Clear plastic wrap or a clear lid to retain moisture (optional but highly recommended).
- ○ Thermometer (optional but helpful): A small digital thermometer to monitor soil/towel temp (ideal range: 70-85°F).
- ● Scissors or knife: For cutting paper towels or trimming plastic wrap.
- ● Measuring cup: 1 cup for adjusting moisture levels in coco peat/peat moss.
- ● Warm water: Distilled or dechlorinated water (lukewarm, ~75°F).
- ● Grow lights or sunny windowsill: A south-facing window or a LED grow light (12-16 hrs/day) for indirect light exposure after sprouting.
- ● Notebook & pen: To track moisture levels, seed progress, and germination dates.
- ● 💡 Sterilize your setup: Wipe down trays and tools with a 10% bleach solution (1 part bleach to 9 parts water) to prevent mold.
- ● 🌡️ Keep it cozy: Place your tray in a warm spot (like on top of a fridge) to speed up germination.
- ● ✨ Avoid overwatering: Moisten the medium only when dry to the touch—corn seeds rot in soggy conditions!
Step-by-step instructions for germinating corn seeds successfully
Here's how to coax those stubborn corn seeds to sprout reliably in just a week.
💧 Step 1: Pre-Soak Seeds for 12 Hours
Fill a clean container with lukewarm water (about 80°F) and add your corn seeds. The outer coating slows germination, so a 12-hour soak softens it considerably. You'll see the seeds swell slightly—this is your signal they're ready. I like to use a shallow dish with a lid to keep the water from evaporating too fast.
Don't skip this step. Dry seeds can take 2-3 weeks to sprout, but soaked seeds pop in 5-7 days. Drain the seeds thoroughly after soaking—excess moisture will rot them before they even sprout. Shake them gently in a colander to remove all water droplets.
🌱 Step 2: Prepare Warm, Moist Germination Medium
Corn seeds need warmth to germinate, so I use a simple mix of 50% peat moss and 50% perlite in a shallow tray. Moisten the mix until it feels like a wrung-out sponge—damp but not dripping. Fill the tray to about 2 inches deep, leaving space at the top for the seeds.
Here's the thing—corn seeds are sensitive to temperature swings. Place the tray on a seedling heat mat set to 80-85°F. If you don't have one, a sunny windowsill with a heating pad underneath works too. The soil should stay consistently warm—cold soil will stall germination completely.
🌿 Step 3: Plant Seeds and Maintain Humidity
Space the soaked seeds 1 inch apart in the prepared tray, pressing them ½ inch deep into the moist medium. Cover the tray with clear plastic wrap or a humidity dome to trap warmth and moisture. This creates the tropical conditions corn seeds love to sprout in.
Check daily but don't lift the cover—condensation inside is perfect. You'll see tiny white roots emerge first, then the shoot will push upward. If the soil surface dries out, mist lightly with warm water (never cold). Overwatering now will suffocate the seeds before they sprout.
☀️ Step 4: Provide Light and Monitor Progress
Once the first green shoots appear (usually 3-5 days after planting), remove the cover immediately. Place the tray under grow lights or in a sunny window—corn seedlings need 12+ hours of light daily to prevent leggy growth. Keep the heat mat on for another 2-3 days to encourage strong root development.
You'll know you're on track when the first true leaves (not the initial seed leaves) appear. These will look like narrow, pointed blades. If seedlings look pale or stretch toward the light, they need more intensity. Healthy seedlings have sturdy stems and deep green color—never yellow or wilted.
⏰ Step 5: Transplant When Ready
After 7-10 days, when seedlings have 2-3 inches of growth and 2-3 true leaves, they're ready for their final containers or garden bed. Harden them off by placing outside in partial shade for 1 hour daily, gradually increasing to full sun over 5-7 days.
Real talk: Corn seedlings are fragile. Handle them by the leaves, never the stems, to avoid damaging roots. Plant them 1 inch deeper than they grew in the tray—the extra soil encourages strong root systems. Water deeply at transplanting to help them establish quickly.
Tips & tricks for perfect corn seed germination
Here's what nobody tells you about getting your corn seeds to sprout reliably—and fast.
The Soak Test: After your 12-hour soak, drop a seed on a paper towel. If it leaves a slight damp spot but doesn't stick, it's ready to plant. Too wet? Let it air dry for 10 minutes. Too dry? Soak another 30 minutes. This simple check prevents rot before sprouting even begins.
Temperature Troubleshooting: If your seeds aren't sprouting after 5 days at 80-85°F, check your heat source. A cheap heat mat might not maintain consistent warmth—try placing the tray on top of a refrigerator (not inside) for more stable heat. Corn seeds need this warmth constantly, not just intermittently.
Humidity Hack: In Step 3, if condensation isn't forming on the plastic wrap within 24 hours, your humidity level is too low. Place a small bowl of warm water inside the tray with the seeds. The extra moisture mimics tropical conditions and speeds up germination by 24-48 hours.
Light Transition: When removing the cover at Day 3-5, don't expose seedlings to direct sunlight immediately. Place them under indirect light first for 2 hours, then gradually increase exposure. Sudden bright light causes seedlings to "sunburn" before they can develop protective pigments.
Pro Tips for Corn Seed Germination
- Here's what nobody tells you about getting your corn seeds to sprout reliably—and fast.
- The Soak Test: After your 12-hour soak, drop a seed on a paper towel.
- Temperature Troubleshooting: If your seeds aren't sprouting after 5 days at 80-85°F, check your heat source.
Frequently asked questions
about corn seed germination—here’s what you need to know before sprouting your seeds!How long does it take for corn seeds to germinate?
Under ideal conditions (warmth, moisture, and darkness), corn seeds typically germinate in 5–10 days. This article’s 7-day moisture-controlled method speeds up the process by maintaining consistent humidity. Patience is key—don’t disturb the seeds during this time!
Can corn seeds germinate in cold weather?
Corn seeds struggle to germinate below 50°F (10°C). For cold climates, start seeds indoors near a heat source (like a seedling mat) or wait until soil temperatures reach at least 60°F (15°C) before planting outdoors. A germination chamber can help if you’re eager to get started early!
What if my corn seeds aren’t sprouting after a week?
First, check for moisture—seeds need to stay damp (not soggy) but not dry out. If using the moisture-controlled method, ensure the container isn’t leaking. Try re-wetting the paper towels and placing them back in a warm, dark spot. If no sprouts appear after 2 weeks, the seeds may be old or non-viable—test a few in warm water to see if they swell.
Can I use regular paper towels for germination?
Yes! Unbleached, seed-free paper towels work great—just avoid colored or scented varieties, as chemicals can inhibit growth. For best results, fold them into a double-layer to retain moisture longer. If you’re short on supplies, a damp cotton cloth or coffee filter also works in a pinch.
Do I need to fertilize corn seeds before planting?
Nope! Fertilizer isn’t needed during germination—in fact, it can harm tender sprouts. Once seedlings have 2–3 leaves and are ready for transplanting, use a balanced, low-nitrogen fertilizer (like 10-10-10) to support early growth. Focus on well-draining, nutrient-rich soil instead.
Wrapping up and next steps
Mastering corn seed germination is all about patience, precision, and the right conditions—just like nurturing a tiny plant into a towering stalk! 🌱 With the right moisture, warmth, and care, you’ve got everything you need to see those first sprouts break through in just 7 days.
Whether you’re a beginner or a seasoned gardener, every seed you plant is a step toward a thriving harvest.
Ready to take the next step? Start small—try a few seeds in a controlled environment to refine your technique, then scale up as your confidence grows. Happy growing, and may your garden be as bountiful as your efforts! 🌾✨