
Lawn
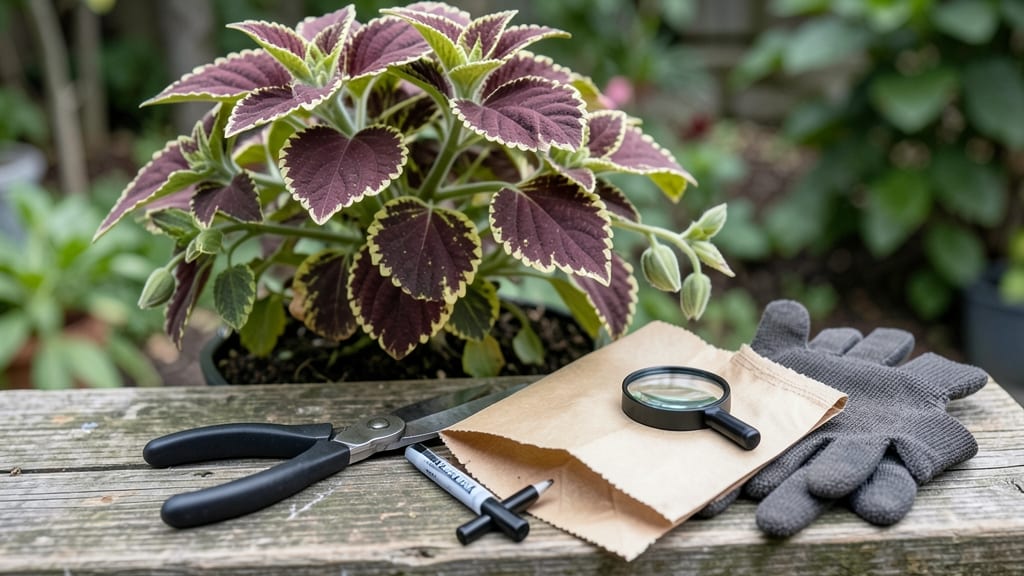
Coleus seed collection isn’t your usual gardening adventure—it’s more like a detective hunt for tiny, twisty pods hiding among the leaves. 🌿 I’ve spent years growing coleus, and while most gardeners just propagate from cuttings, there’s something thrilling about saving seeds for next year’s vibrant plants.
The key? Knowing when those pods are ready and how to check if they’ll actually grow.
You’ll need patience and a keen eye—mature seed pods turn from green to brown, then split open when ripe. Harvest them carefully to avoid damaging the stems, then let the seeds dry completely before storing.
The twist? Many store-bought coleus plants are sterile hybrids, so even if you collect seeds, they might not grow true to the parent. That’s why I always keep a few cuttings as backup.
Once dried, store seeds in a cool, dark place for up to a year. Germination takes 10-21 days in warm soil, but success depends on seed viability. If your plants produce few seeds, don’t stress—coleus thrives from cuttings, and that’s often the easier route.
Still, there’s pride in knowing you grew something from seed, even if it’s just for the experiment.
For best results, pair seed collection with cutting propagation. That way, you’ve got both a backup plan and a chance to grow something new. Whether you’re saving seeds for next year or sticking to cuttings, the goal is the same: more color in your garden. Let’s get those pods checked!
📚 In This Guide
- What you need
- Instructions
- Tips and common mistakes
- Wrapping up and next steps
What you need
- ● Mature coleus plants: Choose healthy, non-hybrid varieties (true hybrids won’t produce viable seeds). Aim for at least 3-5 plants for better yield.
- ● Scissors or pruning shears: Sharp, clean tools to snip seed pods (sterilize with rubbing alcohol for hygiene).
- ● Paper bags or envelopes: Brown kraft paper (breathable) or seed-saving envelopes (labeled!) to store seeds. Use 1-2 bags per plant.
- ● Drying surface: A wire rack, screen, or clean cardboard to air-dry pods (avoid humidity!).
- ○ Fine-mesh sieve or sifter: For separating seeds from chaff (optional but handy for bulk collections).
- ● Permanent marker & labels: Write plant variety, date, and location on each bag (trust us, you’ll thank us later!).
- ● Humidity-controlled storage: A sealed jar with silica gel packets or airtight container to preserve seed viability for 2-3 years.
- ● Magnifying glass: For inspecting seed pods and spotting ripe, brown seeds (vs. green/unripe ones).
- ● Plant journal/notebook: Track seed sources, germination rates, and notes on parent plants for future reference.
- ● Spray bottle with water: Lightly mist pods if your climate is very dry (prevents cracking too soon).
Step-by-Step guide to testing coleus seeds for viability
Here’s how to check if your homegrown coleus seeds will sprout next year—no guesswork involved.
🌱 Step 1: Harvest Mature Coleus Seed Pods
Wait until the seed pods turn from green to brown and begin splitting open naturally. These pods are the only reliable source of viable seeds—green pods won’t produce anything usable. Use clean, dry scissors to snip the pods off the stems, being careful not to crush them. Store the pods in a paper envelope (plastic traps moisture and encourages mold) in a cool, dark place until fully dry.
You’ll know they’re ready when the pods crumble easily between your fingers. If they feel hard or springy, leave them another week. The drying process can take 2-4 weeks, depending on your humidity levels. I like to check them weekly by gently squeezing one—if it opens and releases seeds, the rest are ready.
💧 Step 2: Extract and Prepare Seeds for the Viability Test
Open the dried pods over a clean sheet of white paper to collect the tiny, papery seeds. Coleus seeds are so light they’ll float away if you’re not careful—tap the pods gently rather than shaking them. Once collected, spread the seeds evenly on the paper to air-dry for an additional 24 hours to ensure any lingering moisture evaporates.
This step is critical because damp seeds won’t germinate properly in your test. If you’re impatient, you can speed up drying by placing the seeds in a single layer on a wire rack in a warm, dry spot (like near a sunny window). Just avoid direct sunlight, which can overheat and damage the seeds.
⏰ Step 3: Perform the Twist Test for Quick Viability Check
Take a small handful of seeds between your thumb and index finger. Gently twist them—viable seeds will feel slightly rough and resist breaking, while non-viable ones will crumble into dust. This method works because healthy seeds have a firm outer coating, while old or dead seeds lose their integrity. Set aside the viable-looking seeds for your germination test.
Discard the seeds that turn to powder in your fingers—these won’t sprout. The twist test saves you from wasting time planting seeds that won’t grow. I usually do this test in batches of 20-30 seeds at a time to compare results easily. If more than 50% pass, your seeds are worth testing further.
🌿 Step 4: Conduct a Germination Trial
Moisten a paper towel with water (just damp, not soaked) and place 10-15 viable seeds in a single layer on one half of the towel. Fold the towel to cover the seeds, then place it in a sealed plastic bag. Store the bag in a warm spot (70-75°F) away from direct light. Check daily for sprouts, which should appear in 7-14 days if the seeds are fresh.
This low-tech method mimics natural conditions while giving you fast results. If 50% or more of the seeds sprout within two weeks, they’re viable for planting. If fewer than half sprout, your seeds may be old or stored improperly. The germination trial is your final confirmation before deciding whether to save seeds for next year.
☀️ Step 5: Store Viable Seeds Properly for Next Year
Once confirmed viable, transfer the seeds to an airtight container lined with a silica gel packet to absorb excess moisture. Label the container with the coleus variety and the date. Store it in a cool, dark place (like a refrigerator’s crisper drawer) where temperatures stay between 35-45°F. Under these conditions, coleus seeds remain viable for 2-3 years, though germination rates drop after the first year.
I always test a few seeds from last year’s batch before planting to avoid surprises. If germination slows significantly, it’s time to start collecting fresh seeds. Proper storage is the key to ensuring your next season’s coleus collection is as vibrant as the last.
Tips & tricks for perfect coleus seed viability testing
These simple strategies will help you avoid common pitfalls and maximize your chances of saving viable coleus seeds for next season.
Harvesting Timing: The 2-4 week drying period for seed pods is crucial—don't rush it! Humidity plays a huge role here. If your pods aren't crumbling after 2 weeks, check your humidity levels. A small hygrometer can help you monitor this. I've found that pods in dry climates (under 40% humidity) often dry faster, while humid areas (over 60%) may need the full 4 weeks. If you're impatient, place pods in a single layer on a wire rack near a dehumidifier to speed up drying without risking heat damage.
Handling Delicate Seeds: When extracting seeds from pods in Step 2, I can't stress enough how fragile these tiny seeds are. Instead of shaking pods directly over your collection paper, try this: Place pods in a clean, dry jar with a tight lid, then gently roll the jar back and forth on a flat surface. This motion releases seeds without creating dust clouds that float away. Also, use a fine-mesh sieve lined with paper to catch any seeds that might still escape during tapping.
Twist Test Refinement: The twist test in Step 3 works best when you test seeds at room temperature—not straight from the fridge. Cold seeds feel firmer than they actually are, giving false positives. For most accurate results, let seeds sit at room temperature for at least 30 minutes before testing. Another pro move: Compare seeds side by side. Place a viable seed and a non-viable seed (you can identify these by their powdery texture) next to each other—you'll quickly develop a feel for what "right" looks like in your fingers.
Germination Environment: While the instructions specify 70-75°F for your germination trial, I've found that maintaining consistent moisture is even more critical than temperature. Instead of just dampening the paper towel, I like to use a spray bottle to mist the towel lightly before placing seeds. This creates a more stable moisture environment. Also, place your sealed bag in a location where temperature fluctuations are minimal—near appliances or drafty windows can cause uneven germination results.
Pro Tips for Coleus Seed Collection
- These simple strategies will help you avoid common pitfalls and maximize your chances of saving viable coleus seeds f...
- Harvesting Timing: The 2-4 week drying period for seed pods is crucial—don't rush it! Humidity plays a huge role here...
- Handling Delicate Seeds: When extracting seeds from pods in Step 2, I can't stress enough how fragile these tiny seed...
Frequently asked questions
Got questions about collecting and storing coleus seeds? You’re not alone! Here are some of the most common queries—and their answers—to help you master the process like a pro.
When is the best time to collect coleus seeds?
Coleus seeds typically mature 8–12 weeks after flowering. Look for dry, brown seed pods that easily crumble when touched—this signals readiness. Harvest on a dry, sunny day to prevent moisture damage. If left too long, seeds may scatter or lose viability.
How do I know if my coleus seeds are still viable?
Fresh seeds should be plump, firm, and dark-colored. For a quick viability test, place a few in a damp paper towel, seal in a bag, and check for sprouts in 7–14 days. If <50% sprout, store seeds in a cool, dry place or try a seed alternative like cuttings.
What’s the best way to store coleus seeds for next year?
Store seeds in a paper envelope or airtight container with a silica gel packet to absorb moisture. Keep them in a cool (35–40°F), dark place like a fridge. Label with the date—most coleus seeds stay viable for 1–2 years, though germination rates drop over time.
Can I collect seeds from hybrid coleus plants?
Probably not—and that’s okay! Many hybrid coleus varieties are sterile (won’t produce viable seeds). If your plant isn’t flowering or seeds are tiny/non-existent, opt for propagating from cuttings instead. Check the plant tag for hybrid labels to avoid disappointment.
What if my seeds won’t germinate? Troubleshooting tips!
Try these fixes if seeds aren’t sprouting:
- Check moisture: Keep soil consistently damp (not soggy) during germination.
- Light vs. dark: Most coleus seeds need light to germinate—don’t bury them deep.
- Temperature: Ideal range is 65–75°F. Use a seedling heat mat if your home runs cooler.
- Freshness: Old seeds may need scarification (lightly sanding the seed coat) to break dormancy.
Wrapping up and next steps
Collecting coleus seeds is a rewarding way to ensure next year’s vibrant blooms—without the hassle of twisting stems! 🌱 By following these simple steps, you’ve learned how to test seed viability, store them properly, and even troubleshoot common pitfalls.
Your green thumb is already paving the way for a thriving garden.
Ready to take the next step? Start small—germinate a few seeds indoors this winter and watch your confidence (and coleus collection!) grow. Happy gardening! 🌿