
Lawn
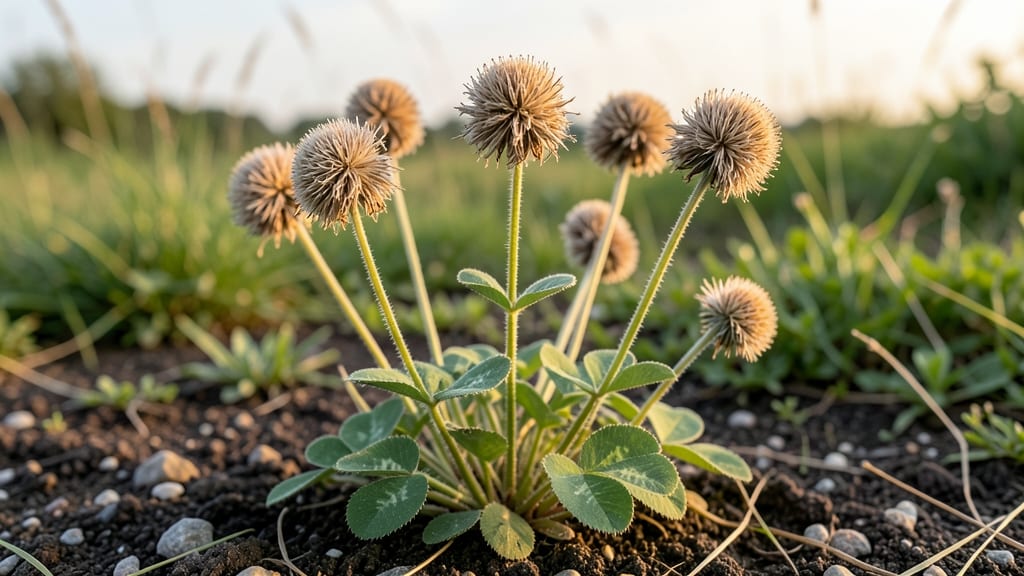
Drying clover seed heads is like saving nature’s tiny treasure chest for next spring’s garden. 🌿 Those fluffy white puffs aren’t just pretty—they’re packed with seeds that’ll bring back fragrant blooms and buzzing bees.
I’ve turned my lawn’s wild clover into a self-sustaining garden feature by collecting and drying these seed heads at the perfect moment.
The best time to harvest is when the seed heads turn golden-brown and start releasing fluff—usually late summer to early fall. Grab a paper bag or basket and gently shake the heads over it, letting the wind carry away empty chaff.
Store them in a dry, airy spot (like a mesh bag) until completely dry, which takes about 2-3 weeks.
Once dry, you can scatter the seeds directly into garden beds, create seed bombs for erosion control, or even craft bird feeders by stuffing them into pinecones. The fragrant blooms return stronger each year, and you’ll have a low-maintenance way to support pollinators without buying new plants.
Pro tip: Avoid harvesting from lawns treated with herbicides—only use clover from organic or untreated areas. This method works for white clover, red clover, and even Dutch clover, making it versatile for any garden corner.
📚 In This Guide
- What you need
- Instructions
- Tips and common mistakes
- Wrapping up and next steps
What you need
- ● Mature clover plants: Choose healthy, fully bloomed clover (e.g., red, white, or Dutch clover) with seed pods forming. Aim for at least 5–10 plants (or more if drying for larger quantities).
- ● Pruning shears or sharp scissors: 1 pair with clean, sharp blades to snip seed heads cleanly without damaging stems.
- ● Paper bags or breathable mesh bags: 5–10 bags (kraft paper or unbleached cotton works best). Avoid plastic to prevent moisture buildup.
- ● Drying rack or screen: A flat, elevated surface (like a wire cooling rack, wooden screen, or even a sturdy cardboard box with holes punched in it).
- ○ Fan or dehumidifier (optional but helpful): To circulate air and speed up drying in humid climates.
- ● Labeling tags: Small tags or masking tape to mark varieties (e.g., "Red Clover – Harvested 2024").
- ● Glove: A pair of gardening gloves to protect hands from prickly stems.
- ● Desiccant packets: 1–2 packets (like silica gel) for indoor drying in very damp conditions.
- ● Storage jars or airtight containers: For long-term storage once seeds are fully dried.
Step-by-step guide to harvesting and drying clover seed heads
Turn this year's clover blooms into next season's fragrant garden treasure with these simple steps.
🌿 Step 1: Identify and Harvest Mature Seed Heads
Look for clover flowers that have fully bloomed and turned a rich, golden-brown color—this signals they're ready for harvest. The seed heads should feel dry and papery to the touch, with no lingering moisture. I like to harvest on a dry morning after the dew has evaporated, as this prevents any dampness from sticking to the delicate seed pods.
Use clean, sharp scissors or pruning shears to cut the stems about 2 inches below the seed head. This extra stem length gives you room to bundle them later without losing any seed pods. Harvest only what you can dry within 24 hours—leaving them too long in humid conditions risks mold. If you're working with multiple plants, I recommend harvesting in small batches to keep everything fresh.
☀️ Step 2: Prepare for Drying Indoors
Choose a well-ventilated area with indirect sunlight—a bright windowsill works perfectly. Direct sunlight can scorch the seed heads and make them brittle, while poor airflow slows drying and invites mold. I often set up a small fan on low speed to gently circulate air without creating drafts that could scatter seeds.
Arrange the clover seed heads in a single layer, either spread out on a clean, dry towel or loosely bundled with twine. If you're using a towel, place it on a baking sheet to catch any stray seeds. Avoid overcrowding—seed heads need space to dry evenly. Check daily for any signs of moisture; if you feel dampness when gently squeezing a seed head, leave it out for another day.
🪴 Step 3: Monitor and Complete the Drying Process
After about 7-10 days, the seed heads should feel completely dry and crisp to the touch. The seed pods will rattle slightly when shaken, and the stems will snap easily. If you're unsure, gently rub a seed pod between your fingers—it should crumble into fine powder rather than leaving any residue.
Once fully dry, carefully remove the seed heads from their stems. You can either rub the dried heads between your palms to release the seeds or use a small sieve to catch them. Store the seeds in a paper envelope or breathable cloth bag in a cool, dry place. Label the bag with the date and variety to keep track of freshness—properly stored, clover seeds stay viable for up to 3 years.
⏰ Step 4: Store for Next Season's Planting
Place your labeled seed bags in a dark, dry spot away from direct sunlight or heat sources. A pantry shelf or sealed drawer works perfectly. Check the seeds occasionally to ensure no moisture has returned—condensation can ruin a whole batch overnight. I like to add a small silica gel packet to the storage container for extra protection against humidity.
When spring arrives, you'll have fragrant, ready-to-plant clover seeds that will bring vibrant color and natural nitrogen back to your garden. The key is patience—rushing the drying process can leave seeds damp, which leads to mold or poor germination. Trust the timeline, and you'll have a reliable supply of seeds for years to come.
Tips & tricks for perfectly dried clover seed heads
Here's what I've learned after drying clover seeds for years—these little tricks make all the difference between viable seeds and wasted effort.
Harvesting Timing: That 24-hour drying window is non-negotiable! I've learned this the hard way—harvesting on humid afternoons led to moldy batches. Aim for early morning harvests when dew has evaporated but before midday heat sets in. If you must harvest later, spread them immediately on a clean towel to evaporate any surface moisture.
Drying Environment: The balance between airflow and sunlight is delicate. I've found that placing a small fan on low speed near the drying area (about 2 feet away) creates gentle airflow without creating drafts that scatter seeds. This mimics the natural drying conditions plants experience, preventing brittleness while ensuring even drying throughout the 7-10 day process.
Moisture Check: The squeeze test is your best friend during drying. If a seed head feels damp when you gently squeeze it, leave it out another day—don't rush it! I've ruined multiple batches by assuming they were dry enough. For extra peace of mind, use a small kitchen scale: fully dry seed heads should weigh about 70% of their fresh weight.
Storage Wisdom: Once you've carefully removed the seeds, don't store them in plastic bags—this traps moisture and reduces viability. That paper envelope or breathable cloth bag is crucial. I've added a silica gel packet to my storage containers, which has helped maintain seed viability for the full 3 years. Labeling with the harvest date is just as important as the variety name!
Pro Tips for Clover Seed Heads
- Here's what I've learned after drying clover seeds for years—these little tricks make all the difference between viab...
- Harvesting Timing: That 24-hour drying window is non-negotiable! I've learned this the hard way—harvesting on humid a...
- Drying Environment: The balance between airflow and sunlight is delicate. I've found that placing a small fan on low ...
Frequently asked questions
Got questions about harvesting and drying clover seed heads?
You’re not alone! Here are answers to the most common queries to help you prepare for next season’s fragrant blooms.
When is the best time to harvest clover seed heads?
Harvest clover seed heads when they’ve turned light brown and the pods are dry but haven’t yet released seeds (usually late summer to early fall). Wait too long, and seeds will scatter—miss the window, and you’ll have to wait another year!
How long does it take for clover seed heads to dry indoors?
Spread seed heads in a single layer on a mesh screen or paper towels in a cool, dry, well-ventilated spot (like a basement or garage). They typically dry in 1–2 weeks. Avoid direct sunlight or heat sources—those can crack the pods!
Can I dry clover seed heads outside instead of indoors?
Yes! Bundle seed heads in small hanging bundles (like herbs) and suspend them in a shady, breezy area (e.g., a porch or tree). Protect them from rain with a tarp or roof. Outdoor drying takes 2–3 weeks but works well if humidity is low.
What do I do if my clover seed heads mold or develop pests?
If you spot mold (fuzzy spots) or pests (like weevils), act fast! Discard affected seed heads immediately. To prevent issues, ensure proper airflow during drying and store seeds in airtight containers with silica gel packets once dry.
How should I store dried clover seed heads for planting next year?
Once fully dry, store seed heads in paper bags or breathable fabric sacks in a cool, dark place (like a pantry). Avoid plastic—it traps moisture and encourages mold. Label bags with the year and variety for easy reference!
Wrapping up and next steps
Clover seed heads aren’t just charming—they’re the secret to fragrant blooms and lush lawns next season! 🌿 By drying them properly, you’re ensuring your clover thrives while adding natural beauty to your outdoor space.
Whether you’re a seasoned gardener or just starting, this simple task sets you up for success.
Ready to take the next step? Grab those dried seed heads, store them safely, and watch your garden come alive with vibrant clover come spring! 🌸