
Lawn
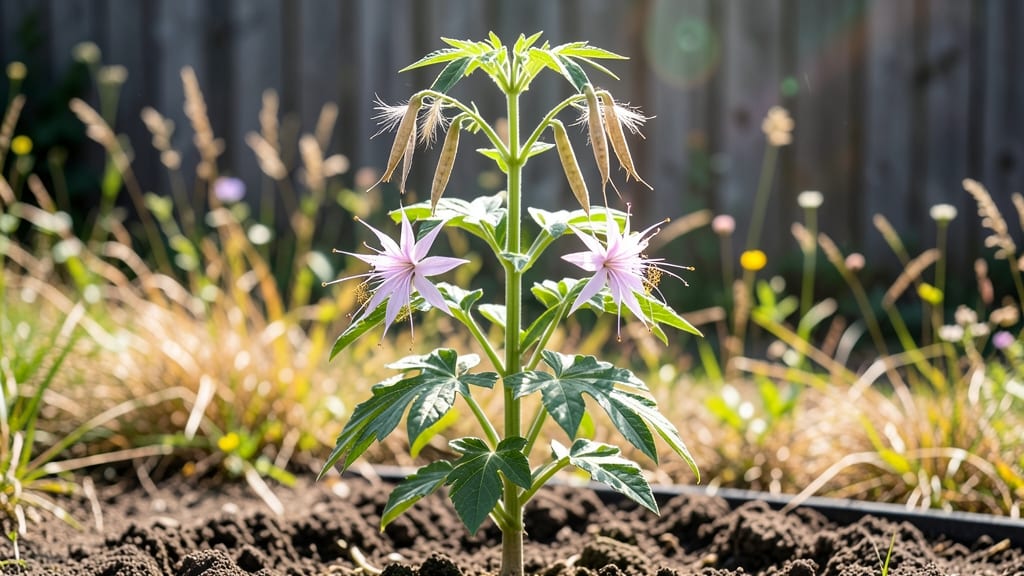
Those exploding cleome seed pods are nature’s fireworks—waiting to burst with tiny black seeds that’ll grow next year’s towering blooms. 🌿 The moment they ripen, they’ll pop open on their own, scattering seeds everywhere, but with a little patience, you can collect them before they do.
I’ve saved seeds from my cleome plants for three seasons now, and the trick is all about timing and a gentle touch.
Harvest pods when they turn from green to a papery brown, usually in late summer or early fall, depending on your zone. The pods feel dry and crisp to the touch—like holding a tiny, intricately designed paper lantern.
If you miss the window, they’ll explode dramatically (and messily) when touched, sending seeds flying. A breath of wind or a passing bee can trigger them, so act fast once they’re ready.
Once collected, let the pods dry completely in a paper bag for a week or two—they’ll release seeds on their own, no shaking required.
Store the dried seeds in an envelope labeled with the year and variety, and you’ll have fresh cleome plants ready to grow in just a few months. The best part? These self-seeding beauties often pop up unexpectedly in spring, rewarding you with shockingly lush vertical blooms year after year.
If you’re new to seed saving, cleome pods are the perfect beginner project—they’re forgiving, dramatic, and endlessly rewarding. Just don’t blame the squirrels if a few seeds escape before you’re ready!
📚 In This Guide
- What you need
- Instructions
- Tips and common mistakes
- Wrapping up and next steps
What you need
- ● Mature cleome plants (ensure pods are fully brown and dry—no green spots!)
- ● Pruning shears or sharp scissors (for clean cuts without damaging stems)
- ● Brown paper bags or breathable fabric sacks (1–2 per plant, labeled with plant names)
- ● Newspaper or cardboard (for drying pods indoors—avoid plastic to prevent moisture buildup)
- ○ Rubber gloves (optional but handy for messy pods or sensitive skin)
- ● Tweezers or fine-tipped scissors (for delicate seed extraction)
- ● Small bowl or tray (to collect seeds and chaff)
- ○ Fine-mesh strainer or sifter (to separate seeds from debris—optional but game-changing!)
- ● Pencil or chopstick (for gently tapping pods to release seeds)
- ● Patience: Let pods dry completely (2–4 weeks indoors) before opening—no exceptions! 💡
- ● Sunny spot: Place drying pods in a warm, dry, and well-ventilated area (e.g., a sunny windowsill or attic).
- ● Seed storage: Once clean, store seeds in paper envelopes (not plastic!) in a cool, dark place for up to 2 years. ✨
- ● Safety first: Wear gloves if you’re sensitive to plant fibers—some cleome pods can be itchy!
How to harvest cleome seeds using natural pod popping
Let’s turn those dramatic cleome seed pods into next year’s garden—without a single mess.
🌱 Step 1: Let Pods Mature Fully on the Plant
Leave cleome pods on the plant until they turn a deep, papery brown and begin splitting open naturally. This usually takes 4-6 weeks after flowering, depending on your climate. You’ll know they’re ready when the pods crack slightly at the seams—this is nature’s way of saying, "Pop me open!"
Don’t rush this step. If you harvest too early, the seeds inside won’t be fully developed, and germination rates will drop. I’ve learned the hard way—green pods mean wasted effort. Wait until at least 70% of pods show these telltale cracks before proceeding.
💧 Step 2: Prepare a Clean Work Surface
Spread a large sheet of newspaper or a clean white towel on a flat surface. The contrast helps you spot tiny seeds against the dark pod debris. I like to work outside on a sunny day—it makes the process easier and keeps stray seeds from blowing away.
Gather a small bowl or container to collect seeds, and have a pair of scissors or pruners ready. Avoid using your hands to open pods directly; the tiny seeds can slip through your fingers. This is where patience pays off—cleome seeds are delicate but abundant.
✂️ Step 3: Pop Pods Open and Collect Seeds
Gently squeeze each mature pod between your fingers or use the scissors to snip open the seam. The pods will release a cloud of tiny, papery seeds—this is the "natural popping" part of the process. Let the seeds fall onto your work surface, then carefully shake the debris into your hand or a sieve.
I like to do this in batches of 10-15 pods at a time to avoid losing seeds. Once the seeds are separated, use a soft brush or your fingers to transfer them to your collection container. Discard the empty pod husks—no need to save those!
☀️ Step 4: Dry and Store Seeds Properly
Spread the collected seeds in a single layer on a clean paper towel or mesh screen. Let them dry in a warm, dry place for 3-5 days, stirring occasionally to prevent mold. Proper drying ensures long-term viability—moisture is the enemy of seed storage.
Once completely dry, transfer seeds to a labeled envelope or airtight container. Store in a cool, dark place like a pantry or seed vault. Cleome seeds can last 2-3 years under these conditions, so you’ll have plenty for future plantings.
🪴 Step 5: Test Germination Before Next Season
Before planting saved seeds, do a quick germination test. Place 10 seeds on a damp paper towel in a sealed bag, then keep them in a warm spot for 7-10 days. If at least 80% sprout, your seeds are viable and ready to plant. If fewer sprout, try again with fresh pods next year.
This test gives you confidence that your zero-waste efforts paid off. Plus, it’s a great way to troubleshoot if your cleomes underperform in future seasons. Happy growing—your garden will thank you!
Tips & tricks for perfect cleome seed harvesting
Here's what nobody tells you about saving cleome seeds without the frustration—these tricks make all the difference.
Patience Pays Off: In Step 1, don't be tempted to harvest pods just because they're brown. The 4-6 week maturation period is non-negotiable for viable seeds. I've seen gardeners rush this step and end up with seeds that either won't sprout or produce weak plants. Look for that telltale crack along the seams—this is your green light to proceed.
Batch Processing: When you reach Step 3, work in manageable batches of 10-15 pods at a time. This prevents seed loss from over-handling and makes cleanup easier. I like to use a small cookie sheet as a temporary seed catcher—it's shallow enough that seeds don't bounce away but deep enough to catch debris. Place it directly under your work area to maximize seed recovery.
Drying Strategy: For Step 4, don't just leave seeds to dry randomly. Spread them on a mesh screen or clean paper towel in a single layer—this ensures even air circulation. Place the screen over a fan on low setting to gently circulate air without creating a breeze that could scatter seeds. Stir them every 8-12 hours to prevent clumping, which can lead to mold. Proper drying is the key to seeds that last 2-3 years.
Pro Tips for Cleome Seed Pods
- Here's what nobody tells you about saving cleome seeds without the frustration—these tricks make all the difference.
- Patience Pays Off: In Step 1, don't be tempted to harvest pods just because they're brown. The 4-6 week maturation pe...
- Batch Processing: When you reach Step 3, work in manageable batches of 10-15 pods at a time. This prevents seed loss ...
Frequently asked questions
Got questions about saving and using cleome seed pods?
You’re not alone! Here are some of the most common queries—and their easy answers—to help you master zero-waste seed saving with these unique pods.
Why do cleome seed pods "pop" so loudly?
Cleome seed pods (from Cleome hassleriana) are famous for their dramatic explosive dehiscence! When dry, the pods release seeds with a loud POP—a natural dispersal mechanism. This happens when humidity drops and internal pressure builds. Pro tip: If you want to collect seeds before popping, harvest pods when they’re just starting to turn brown but aren’t fully dry.
When is the best time to harvest cleome seed pods?
Harvest pods when they’ve matured but before they pop open naturally. Look for pods that are dry, brown, and slightly papery—usually 4–6 weeks after flowering. Cut stems with 2–3 inches of stalk attached, then dry them in a well-ventilated spot (like a mesh bag) for 1–2 weeks. Warning: Avoid harvesting in damp weather to prevent mold.
Can I save cleome seeds for next year?
Cleome seeds stay viable for 2–3 years if stored properly. After pods dry completely, crack them open to release seeds, then store them in a cool, dark, dry place (like a sealed jar or envelope). For extra longevity, add a silica gel packet to absorb moisture. Pro tip: Label your seeds with the harvest year to track freshness!
What if my cleome pods won’t pop?
If pods stay closed or don’t pop, they’re likely not fully dry or were harvested too early. Try these fixes:
- Extend drying time: Place pods in a low-humidity area (like a sunny windowsill) for another 1–2 weeks.
- Gently coax them: Tap dried pods firmly on a hard surface—they may release seeds with a little encouragement.
- Check for pests: Inspect for spider mites or aphids, which can weaken pods. Treat with neem oil if needed.
Are cleome seed pods safe for compost?
Yes! Once you’ve extracted seeds for saving, the empty pods and stems are compost-friendly. Chop them into smaller pieces first to speed up decomposition. Bonus: The pods add nitrogen to your compost pile, balancing greens (like veggie scraps) with browns (like dried leaves). Just avoid composting pods if they show signs of mold or disease.
Wrapping up and next steps
Cleome seed pods offer a fun, eco-friendly way to save seeds while adding whimsical charm to your garden! 🌱 With just a few simple tools and a little patience, you can transform these unique pods into next year’s blooms—all while reducing waste.
Whether you’re a seasoned gardener or just starting out, this method is a delightful way to connect with nature.
Ready to give it a try? Grab your pods, gather your supplies, and let the popping begin! Share your results or tag us in your zero-waste gardening adventures—we’d love to see your creations! 📸✨