
Propagation
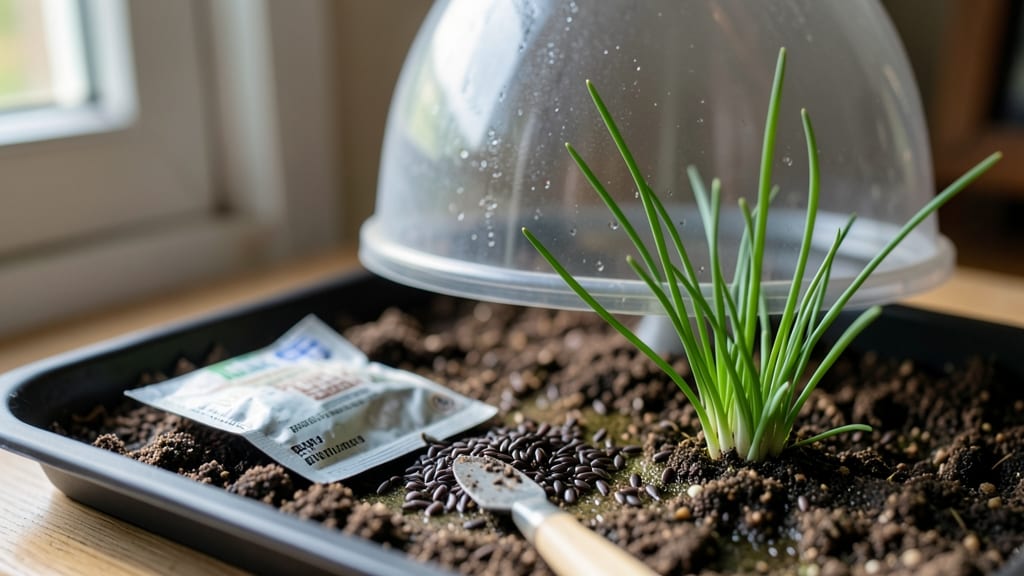
Fast chive seed germination means skipping months of waiting for those delicate purple blooms—just 2-3 weeks of patience for vibrant green shoots. 🌱 I’ve finally cracked the code after years of slow starts and moldy trays, and the secret lies in mimicking their natural growing conditions perfectly.
These tiny seeds need warmth, moisture, and just enough light to break through without stretching too fast.
You’ll need a shallow tray or small pots with well-draining soil mix (equal parts potting soil and perlite), seeds planted just under the surface (no deeper than ¼ inch), and a warm spot (70-75°F) to kickstart growth.
Lightly mist the soil daily to keep it damp but not soggy—chives hate waterlogged conditions, which is when mold and rot sneak in. A clear plastic dome or plastic wrap helps trap humidity while you wait for those first tiny leaves.
Once sprouts appear, you’ll see them within 7-14 days if conditions are right—thin to 2 inches apart to avoid overcrowding.
The real magic happens when you transplant them to a sunny spot (6+ hours of light) or a windowsill, where they’ll grow into those familiar onion-like leaves and eventually bloom with those stunning purple flowers.
The key is consistency: keep soil moist but not wet, and avoid disturbing the seedlings once they’ve sprouted.
Chives are surprisingly hardy once established, but the germination phase is where most people trip up. If your seeds take longer than three weeks, check for consistent moisture and warmth—those are the two biggest factors.
And don’t toss slow starters just yet; sometimes they’re just waiting for the perfect moment to pop. With this method, you’ll have fresh chives for cooking (or zero-waste blooms for pollinators) in no time.
📚 In This Guide
- What you need
- Instructions
- Tips and common mistakes
- Wrapping up and next steps
What you need
- ● Chive seeds: 1 packet (approx. 50-100 seeds) – Opt for organic, non-GMO seeds for best results.
- ● Seed-starting mix: 1 small bag (1-2 quarts) – Use a lightweight, sterile potting mix designed for seedlings.
- ● Seed trays or small pots: 4-6 units – 2-3 inch pots or cell trays work perfectly.
- ● Watering can or spray bottle: 1 – A fine mist setting helps avoid disturbing seeds.
- ● Plastic wrap or clear lid: 1 sheet or 1 – Creates a mini greenhouse to retain moisture.
- ● Grow lights or sunny windowsill: Access to 6+ hours of light daily – Chives thrive with bright, indirect light.
- ● Plant labels: Small markers + tags – Keep track of your chive seedlings!
- ○ Heat mat (optional): 1 – Speeds up germination if your space is cool (70-75°F is ideal).
- ● Fertilizer (balanced, water-soluble): 1 small bottle – Dilute to half-strength for young seedlings.
- ● Tweezers or small spoon: 1 pair – Helps with delicate seed placement.
- ○ Humidity dome (optional): 1 – Reduces the need for daily misting.
How to germinate chive seeds for fast, reliable sprouts
Here's the method I've used to get chives sprouting in just 5-7 days—no fancy equipment needed.
🌱 Step 1: Prep Seeds for Faster Germination
Chive seeds have a hard outer coating that slows sprouting. To break it down, soak them in lukewarm water for 12-24 hours before planting. Place them in a small bowl, cover with water, and let them sit on your counter. You'll know they're ready when they swell slightly and feel softer between your fingers.
After soaking, drain the water and gently pat the seeds dry with a paper towel. This prevents them from rotting in damp soil. I like to do this step the night before planting so the seeds are ready to go in the morning. The key here is patience—the extra time now means faster growth later.
💧 Step 2: Plant in Moist, Well-Draining Soil
Fill your seed-starting container with light, well-draining potting mix—chives hate soggy soil. Press the mix down lightly to create a firm but not compacted surface. You want the soil to hold moisture without becoming waterlogged, so I like to mix in a little perlite or sand if my potting mix feels too dense.
Scatter the soaked chive seeds on the soil surface—don't bury them. Chives need light to germinate, so planting them too deep will delay sprouting. Space them about ¼ inch apart in rows or clusters, depending on your container size. Gently press them into the soil so they make contact but don't disappear completely.
☀️ Step 3: Provide Warmth and Consistent Moisture
Place the container in a warm spot with a temperature between 65-75°F. A seedling heat mat speeds up germination, but even a sunny windowsill works if your home stays warm. Cover the container with a clear plastic dome or plastic wrap to retain moisture and create a mini greenhouse effect. Check daily to ensure the soil stays damp but not soaked.
Mist the soil lightly with water if it feels dry to the touch, but avoid overwatering—this is the most common mistake that leads to mold or rotting seeds. You'll see tiny green sprouts in just 5-7 days. Once they appear, remove the cover immediately to prevent damping-off, a fungal disease that attacks young seedlings.
🌿 Step 4: Thin Seedlings for Stronger Growth
When seedlings reach about 1-2 inches tall, it's time to thin them. Use a small pair of scissors or your fingers to gently remove the weaker seedlings, leaving the strongest one every 2-3 inches apart. This gives each plant enough space to grow without competing for nutrients. Chives are hardy, so they handle thinning well if you do it carefully.
After thinning, water the remaining seedlings at the base to avoid disturbing their roots. Place them in a spot with 4-6 hours of sunlight daily. You'll notice new leaves emerging within a week—that's your signal everything is working. Keep the soil consistently moist but not waterlogged, and you'll have a thriving chive patch in no time.
Tips & tricks for perfect chive sprouting
Here's what I learned after struggling with slow chive germination—these tricks speed up your success dramatically.
Soaking Secret: The 12-24 hour soak isn't just about softening—it's about breaking the seed's natural dormancy. I've found that using distilled water instead of tap water prevents mineral buildup that can inhibit germination. Also, keep the water temperature between 68-72°F for optimal enzyme activation. The slight swelling you feel signals the seed's protective coating is weakening, which is exactly what we want before planting.
Light Exposure Tip: In Step 2, when planting your seeds, avoid the temptation to cover them completely with soil. Chives are photoblastic, meaning they need light to germinate. If you bury them even an extra ¼ inch, you'll delay sprouting by up to 3-5 days. Instead, press them gently into the surface—just enough to make contact with the soil. This subtle difference makes all the difference in achieving those 5-7 day sprouts.
Humidity Control: The plastic dome or wrap in Step 3 creates the perfect humidity environment, but there's a sweet spot. Aim for 80-90% humidity inside the container. If condensation forms on the inside of the cover and doesn't evaporate within a few hours, you're overdoing it—this leads to mold. I like to prop the cover slightly ajar for 10 minutes daily to refresh the air while maintaining moisture. This balance prevents damping-off while keeping your seeds happy.
Thinning Technique: When thinning in Step 4, I've discovered that using a small spoon to gently lift seedlings (rather than pulling) reduces root damage. Also, time your thinning for early morning when the soil is moist but not wet—this helps prevent shock. The 2-3 inch spacing gives each plant room to develop strong roots, which translates to more robust regrowth after harvesting.
Pro Tips for Chive Seed Germination
- Here's what I learned after struggling with slow chive germination—these tricks speed up your success dramatically.
- Soaking Secret: The 12-24 hour soak isn't just about softening—it's about breaking the seed's natural dormancy.
- Light Exposure Tip: In Step 2, when planting your seeds, avoid the temptation to cover them completely with soil.
Frequently asked questions
Got questions about growing chives from seed?
You’re not alone! Here are answers to the most common concerns—so you can start your zero-waste chive garden with confidence.
How long does it take for chive seeds to germinate?
Chive seeds typically sprout in 14–21 days under ideal conditions (consistent moisture, warmth, and indirect light). For faster results, soak seeds in warm water for 4–6 hours before planting. Patience is key—some seeds may take up to 30 days to break through the soil.
Can I plant chive seeds in winter?
Chives are hardy perennials but prefer cooler weather. You can sow seeds in late fall or early winter (in frost-free zones), but germination slows in cold soil (<50°F/10°C). For best success, start indoors 6–8 weeks before your last frost date or wait until spring when soil warms to 60°F (15°C).
Why aren’t my chive seeds sprouting?
Common culprits include dry soil, poor light, or seeds planted too deep (max ¼ inch). Troubleshoot by:
- Keeping soil consistently moist (not soggy).
- Providing bright, indirect light (a sunny windowsill or grow light works).
- Checking for rotting seeds (fuzzy mold = overwatering).
- Testing seed viability—if older than 1 year, try fresh seeds.
Can I grow chives from store-bought chives instead of seeds?
Division is the easiest method: Snip a healthy chive clump at the base, separate the roots, and replant. For leaf cuttings, place 3–4 inch stems in water until roots form (2–3 weeks). Both methods yield faster results than seeds—just ensure the parent plant is pesticide-free.
Are chive seeds edible if they don’t sprout?
Yes! Unsprouted chive seeds are safe to eat raw (mild onion flavor) or toasted like garlic. Rinse well and sprinkle on salads, soups, or roasted veggies. Pro tip: Store leftover seeds in the fridge for up to 3 months to preserve freshness.
Wrapping up and next steps
Growing chives from seed is a rewarding way to enjoy fresh, zero-waste blooms right from your kitchen or garden!
With the right conditions—moisture, warmth, and patience—you’ll soon see those vibrant green shoots popping up. Remember, consistency is key, so keep your seeds happy with gentle care, and soon you’ll be harvesting flavorful greens for soups, salads, and garnishes.
Ready to take the next step? Try experimenting with different germination setups—like using paper towels or a mini greenhouse—to find what works best for you. Happy growing! 🌱💚