
Propagation
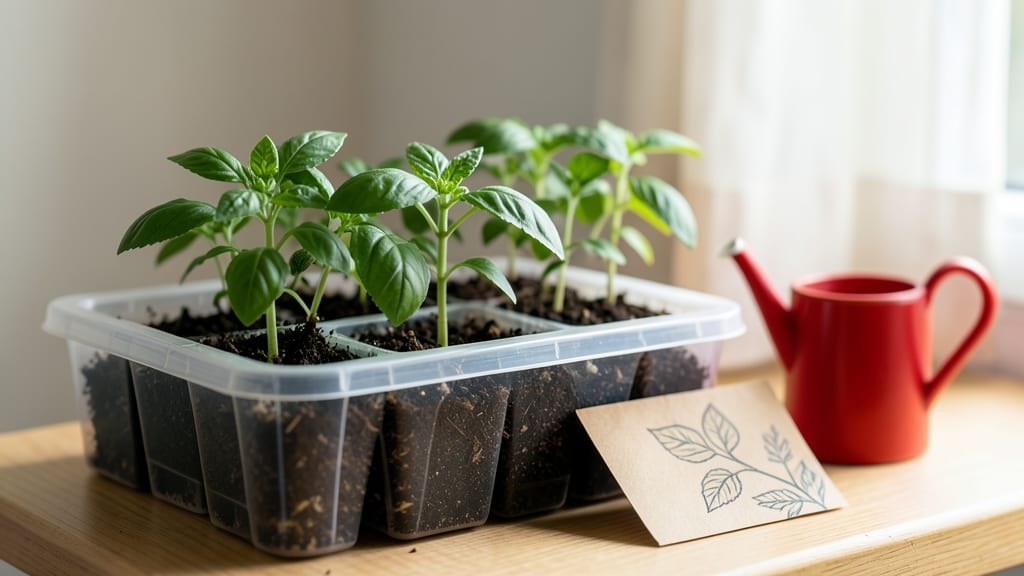
The Burpee Self-Watering Seed Starting System turns fussy seedlings into foolproof sprouts with just three layers of soil and a reservoir. 🌱 I used to kill seedlings every spring—until this system kept my basil, tomatoes, and peppers thriving from day one.
The secret? Consistent moisture without the guesswork of daily watering.
This isn’t just another tray—it’s a self-contained ecosystem where the bottom layer holds water while the top stays dry enough to prevent mold. You’ll spend less time fussing and more time watching roots grow downward instead of circling in stagnant soil.
Perfect for beginners or anyone tired of leggy, weak seedlings.
By week three, you’ll have stocky, dark-green seedlings ready to transplant, not the spindly sticks from store-bought flats. The system even doubles as a hardening-off tray—just move it outside gradually. No more wilting or drowning, just reliable growth every time.
Compared to traditional trays or individual pots, this system saves space, reduces transplant shock, and cuts watering time by 70%. Whether you’re growing herbs on a windowsill or tomatoes for your garden, this is the upgrade that finally makes seed starting easy—and fun.
📚 In This Guide
- What you need
- Instructions
- Tips and common mistakes
- Wrapping up and next steps
What you need
- ● Burpee Self-Watering Seed Starting System (1 unit) – Includes a 3-layer tray, 12 cell pods, and a reservoir.
- ● High-quality seed starting mix (1 bag, ~2-3 cubic feet) – Look for a lightweight, sterile blend (e.g., Burpee Bio Start or Fox Farm Ocean Forest).
- ● Seeds (quantity depends on variety) – Check seed packet spacing recommendations.
- ● Water – Room-temperature, filtered or distilled (avoid tap water with chlorine).
- ○ Spray bottle (optional but helpful) – For gentle watering during germination.
- ● Grow lights or sunny windowsill – 12-16 hours of light daily (LED grow lights are ideal).
- ● Tray or saucer – To catch excess water if not using the system’s built-in reservoir.
- ● Humidity dome – Speeds up germination for delicate seeds.
- ● pH testing kit – Ensures your soil is seed-friendly (ideal pH: 5.8–6.2).
- ● Fertilizer (diluted) – A balanced liquid fertilizer (e.g., 5-5-5) after sprouts emerge.
- ● Label markers – To track seed varieties and planting dates.
- ● Fine-mesh screen – Covers the reservoir to prevent pests.
Step-by-Step instructions for the Burpee self-watering seed starting system
This three-layer system keeps roots happy while you focus on the fun part—waiting for those first sprouts.
🪴 Step 1: Assemble the Three-Layer System
Start by filling the base tray with 2-3 inches of coarse gravel (the bottom layer). This creates drainage and a water reservoir—critical for the self-watering function. I like to use pebbles or aquarium gravel because they pack tightly and won’t decompose over time. The gravel should just cover the tray’s drainage holes completely.
Next, place the removable seed-starting cells into the tray. These cells will hold your soil and seeds while the gravel below regulates moisture. Make sure the cells fit snugly—if they wobble, add a small amount of hydroponic clay pebbles around the edges to stabilize them without blocking drainage.
💧 Step 2: Add Moisture to the Bottom Reservoir
Fill the gravel layer with room-temperature water until it reaches just below the top of the gravel—about ½ inch from the bottom of the cells. This ensures the roots can access moisture through the cell walls without sitting in standing water. Avoid overfilling; you’ll see condensation on the tray’s underside when it’s properly saturated.
Let the system sit for 10-15 minutes so the gravel absorbs the water evenly. The cells should feel damp but not soggy when you press them gently. If water pools in the tray, the gravel layer isn’t coarse enough—drain and replace it with larger stones.
🌱 Step 3: Fill Cells with Seed Starting Mix
Fill each cell with sterile seed-starting mix (never garden soil—it’s too dense and may harbor pathogens). Press the mix down lightly until it’s level with the cell’s rim but not packed. I like to use a small spoon or finger to create a shallow dimple in the center of each cell—this helps seeds stay in place when you drop them in.
Moisten the mix with a spray bottle until it’s damp enough to hold its shape when squeezed but not dripping. Overwatering now will compact the soil and suffocate seeds. The mix should feel like a slightly damp sponge—not dry, not wet.
⏰ Step 4: Plant Seeds and Monitor Moisture
Follow the seed packet’s depth guidelines—most seeds need ¼ to ½ inch of coverage. Gently press the soil around the seed to ensure good contact. Place the tray in a warm, bright location (ideally 70-75°F with 12-16 hours of light daily). A grow light positioned 2-4 inches above the tray works best if natural light is weak.
Check the gravel reservoir every 2-3 days—top off with water if the level drops below ½ inch from the cell bottoms. The self-watering system will slowly wick moisture upward, but evaporation happens faster in warm or dry conditions. You’ll know it’s working when the soil surface stays evenly moist without glistening.
☀️ Step 5: Thin and Transplant Seedlings
Once seedlings develop 2-3 true leaves (about 3-4 weeks), thin to the strongest plant per cell by snipping weaker stems at the base with clean scissors. This prevents overcrowding and ensures robust growth. If multiple seedlings remain, gently tease them apart rather than pulling—you’ll disturb fewer roots.
When seedlings are 4-6 weeks old and show 4-5 true leaves, they’re ready for transplanting. Remove the cells from the tray, gently squeeze the sides to loosen the root ball, and transfer directly into pots or garden beds. The self-watering system’s gradual moisture control means fewer transplant shocks—your seedlings will adjust faster.
Tips & tricks for perfect seed starting with the Burpee system
These game-changing insights will help you maximize your seedling success using this clever three-layer setup.
Gravel Selection Matters: For optimal moisture regulation in Step 1, choose pebble-sized gravel (¼ to ½ inch diameter) rather than sand or fine gravel. The larger surface area of pebbles allows better water absorption while preventing clogging of drainage holes. I've found that aquarium gravel works perfectly because it's sterile and won't break down over time. Avoid river rocks—they can harbor bacteria and decompose, releasing nutrients that may harm seedlings.
Soil Moisture Science: In Step 3, when you're moistening the seed-starting mix, think of it like wringing out a damp sponge—you want it to hold its shape when squeezed but not drip water. The key is to create a capillary action between the soil and gravel layers. After planting, place the tray on a scale (if available) and monitor weight—you should see only a 5-10% weight loss over 48 hours in normal conditions. This tells you the system is maintaining proper moisture without overwatering.
Lighting Optimization: For Step 4's ideal 70-75°F environment with 12-16 hours of light, position your grow lights 3-4 inches above the tray (closer than the 2-4 inch range mentioned) during the first week after germination. This higher light intensity helps prevent leggy seedlings. As they grow, gradually increase the distance to 4-6 inches to prevent burning. I've had great success with full-spectrum LED grow lights that mimic natural sunlight—just be sure to keep them on a timer to maintain consistent light cycles.
Transplanting Technique: When thinning seedlings in Step 5, use a pair of clean, sharp scissors rather than pulling stems by hand. Cutting at the base prevents disturbing neighboring seedlings and reduces stress on the remaining plants. For transplanting, gently squeeze the sides of the cells to loosen the root ball—this helps minimize transplant shock. You'll notice the self-watering system's benefits here as the roots adapt more quickly to their new environment thanks to the consistent moisture they've been accustomed to.
Pro Tips for Burpee Self Watering Seed Starting System
- These game-changing insights will help you maximize your seedling success using this clever three-layer setup.
- Gravel Selection Matters: For optimal moisture regulation in Step 1, choose pebble-sized gravel (¼ to ½ inch diameter) rather than sand or fine gravel.
- Soil Moisture Science: In Step 3, when you're moistening the seed-starting mix, think of it like wringing out a damp sponge—you want it to hold its shape when squeezed but not drip water.
Frequently asked questions
Got questions about the Burpee Self-Watering Seed Starting System?
You’re not alone! Here are answers to the most common ones to help you grow confidently.
How often should I water seeds in this system?
The Burpee system is designed to self-water, but check the reservoir weekly to ensure it’s full. Fill it with water until the bottom tray is saturated—but avoid overfilling to prevent root rot. Most seeds thrive with minimal top-up watering, thanks to the wicking action!
When will my seeds germinate?
Germination time varies by plant (check seed packets!), but this system’s consistent moisture and warmth (70–75°F) speed things up. Fast growers like radishes may sprout in 3–5 days, while slower ones (like tomatoes) take 7–14 days. Keep the tray in a bright, indirect light spot until sprouts appear!
Can I reuse the system for multiple planting cycles?
After harvest, sterilize the tray and cells by soaking them in a 1:10 bleach-water mix for 10 minutes, then rinse thoroughly. Replace soil if it’s depleted or contaminated. This system is built for repeated use, saving you money and reducing waste!
What if my seedlings look leggy or weak?
Leggy seedlings usually mean too little light. Move the tray closer to a sunny window or use a grow light 12–16 hours daily. Rotate trays weekly for even growth. If overcrowded, thin seedlings to the strongest sprout per cell—this boosts airflow and prevents disease.
Are there cheaper alternatives to this system?
Yes! DIY options include repurposed plastic containers (like yogurt cups) with a wicking cloth or a 5-gallon bucket with drainage holes. However, the Burpee system’s three-layer soil design and built-in reservoir make it the most efficient and low-maintenance choice for beginners and pros alike!
Wrapping up and next steps
The Burpee Self-Watering Seed Starting System transforms seedling care into a breeze—no more guesswork about watering or wilting sprouts! 🌱 With its three-layer design, you’ll enjoy consistent moisture, faster germination, and healthier starts that’ll give your garden a head start.
Whether you’re a seasoned gardener or a curious beginner, this system makes growing from seed effortless and rewarding.
Ready to dive in? Grab your supplies, follow the steps, and watch your tiny seeds turn into thriving plants—then transplant them into your garden or pots with confidence! Your green thumb is just a seed away. 🌿