
Propagation
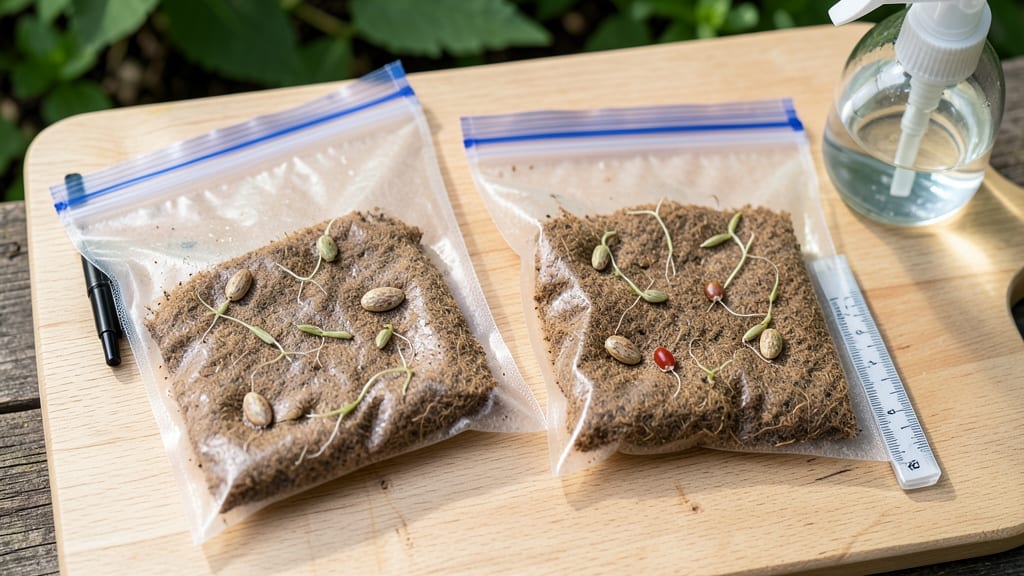
Germinating seeds in a Ziploc bag cuts that waiting time in half while keeping your countertop clean. ✨ I used to struggle with soggy paper towels and uneven germination—until I discovered this foolproof method that works for everything from tiny lettuce seeds to stubborn heirloom tomatoes.
The setup takes less than five minutes and eliminates the guesswork of traditional seed-starting.
You only need three things: a gallon-sized Ziploc bag, a paper towel, and a spray bottle. Lay the paper towel flat, dampen it until it’s moist but not dripping, and place your seeds about an inch apart.
Fold the towel over the seeds, seal the bag, and you’ve created the perfect humid, dark environment for roots to sprout in 3-7 days—not weeks.
Once you see tiny root hairs, it’s time to transfer seedlings to soil. The paper towel method prevents damping off, and the bag’s transparency lets you monitor progress without disturbing the seeds.
You’ll end up with stronger, more uniform seedlings ready for transplanting when they’ve got a couple of true leaves.
This works for any seed, in any season, and even on a windowsill. No fancy equipment, no second-guessing—just reliable, mess-free germination that actually delivers. Let’s get those seeds sprouting!
📚 In This Guide
- What you need
- Instructions
- Tips and common mistakes
- Wrapping up and next steps
What you need
- ● Seeds – Choose any variety (herbs, veggies, or flowers). Start with 5-10 seeds to test the method.
- ● Gallon-sized Ziploc bag – Opt for thick, reusable bags (1-gallon size) for better durability.
- ● Paper towels or coffee filters – 2-3 sheets per bag (unbleached for eco-friendliness).
- ● Spray bottle – A fine-mist setting keeps moisture even without oversaturating.
- ● Scissors or knife – For trimming towels/filters to fit the bag.
- ○ Optional heat source – A seedling heat mat (or a warm spot like a fridge top) speeds germination.
- ● Plastic wrap or aluminum foil – Doubles as a humidity barrier if the bag isn’t airtight.
- ● Labeling tape/marker – Track seed types and planting dates.
- ● Small fan (gentle breeze) – Prevents mold by improving airflow after sprouts appear.
- ● Grow lights – For post-germination seedlings if natural light is limited.
Step-by-Step instructions for germinating seeds in Ziploc bags
This method cuts germination time in half while keeping your counter clean—no trays or soil required.
🌱 Step 1: Prepare Your Seeds and Moisten Paper Towels
Lay out a single sheet of paper towel in a clean, dry Ziploc bag. I like to use unbleached towels—they’re less likely to leach chemicals that might inhibit germination. Add 2 tablespoons of water to the towel, then fold it in half and press gently to distribute moisture evenly. You want it damp, not dripping.
Place your seeds 1-2 inches apart along the folded edge—don’t crowd them. The spacing prevents tangled roots later. For larger seeds like beans, I use a toothpick to create tiny divots in the towel so they sit slightly elevated. This keeps them from sitting in standing water, which can cause rot.
💧 Step 2: Seal and Position for Optimal Warmth
Seal the bag loosely—leave about 1 inch open to allow airflow. Too much oxygen speeds up mold growth, but no airflow suffocates the seeds. Fold the top over twice to create a loose seal, then place the bag in a warm location (I use the top of my fridge, which stays around 70-75°F).
Check daily for condensation—if you see heavy fogging inside, open the bag slightly to let excess moisture escape. You’ll notice seeds like peas or beans swelling within 24-48 hours. For slower germinators like tomatoes, wait 3-5 days before you see the first tiny root hairs emerge.
⏰ Step 3: Monitor and Transplant at the Right Time
Germination happens fastest when the towel stays consistently moist. I mist the inside with a spray bottle every 2-3 days if it feels dry to the touch. Watch for white root hairs first—this is your signal to act. Once roots reach about ½ inch long, gently unfold the towel and place each seedling into its own small pot filled with moistened seed-starting mix.
Press the soil lightly around the seedling to secure it, but don’t bury the roots too deep. You’ll see the first true leaves appear within 7-10 days after transplanting. If a seedling’s roots are tangled, carefully tease them apart with a toothpick before planting—this prevents transplant shock later.
☀️ Step 4: Transition to Light and Maintain Humidity
Move the newly transplanted seedlings to a bright location with indirect light for the first 3-5 days. Too much direct sun now can scorch delicate new leaves. After that, provide 12-14 hours of light daily—a grow light works best if your natural light is weak.
Keep the soil surface damp (not soggy) by watering from the bottom—place the pot in a tray of water for 10-15 minutes until moisture wicks up to the surface. You’ll know you’ve got the right balance when seedlings grow upright with dark green leaves and no yellowing at the edges.
Tips & tricks for perfect Ziploc bag seed germination
Common pitfalls—and how to sidestep every one when speed-germinating seeds.
Moisture Balance: The 2 tablespoons of water in Step 1 should leave the paper towel damp but not dripping—think of a wrung-out sponge. Too much moisture creates anaerobic conditions that suffocate seeds, while too little prevents hydration. For extra insurance, place the sealed bag in a shallow tray to catch any accidental drips during the 24-48 hour waiting period. This keeps your countertop clean and prevents mold from spreading beyond your germination experiment.
Temperature Matters: The ideal 70-75°F range in Step 2 is crucial because cooler temperatures slow germination while warmer ones can cause mold. If your kitchen runs cold, try placing the bag on top of your refrigerator (as I do) or near a sunny window. For faster results with heat-loving seeds like peppers, you can create a DIY seedling heat mat by placing the bag on a warm (not hot) water bottle wrapped in a towel. Just avoid exceeding 85°F—seeds can overheat and die.
Root Hair Rescue: When you spot those first white root hairs in Step 3, resist the urge to rush transplanting. Wait until roots reach about ½ inch long—they'll be more resilient when you move them to soil. For seeds that develop tangled roots (common with beans or peas), gently tease them apart with a toothpick before planting. This prevents transplant shock and gives each seedling room to grow without competing for nutrients.
Light Transition: The 3-5 days of indirect light in Step 4 is your seedlings' acclimation period. Too much direct sun now can scorch their delicate leaves, while too little causes leggy growth. I place mine near an east-facing window where they get gentle morning light. For indoor growers, a simple LED desk lamp on a timer works perfectly—just keep it 6-12 inches above the seedlings to prevent heat stress.
Pro Tips for Ziploc Bag Seed Germination
- Common pitfalls—and how to sidestep every one when speed-germinating seeds.
- Moisture Balance: The 2 tablespoons of water in Step 1 should leave the paper towel damp but not dripping—think of a ...
- Temperature Matters: The ideal 70-75°F range in Step 2 is crucial because cooler temperatures slow germination while ...
Frequently asked questions
Got questions about germinating seeds in Ziploc bags? You’re not alone!
Here are the most common queries—plus quick, no-fuss answers to keep your green thumb thriving.
How long does it take for seeds to germinate in a Ziploc bag?
Germination time varies by seed type, but most sprouts appear within 3–14 days in warm, humid conditions. Fast germinators like beans or peas may pop up in 3–5 days, while slower seeds (e.g., tomatoes) can take 10–14 days. Keep an eye on moisture—damp (not soggy) paper towels speed things up!
Can I use this method for cold-weather seeds (like lettuce or spinach)?
Ziploc bags work best for warm-season seeds (tomatoes, peppers, basil), but cold-weather crops like lettuce or spinach may rot in the humidity. For these, try a damp paper towel in a sealed container at 60–65°F or use a seedling heat mat to mimic spring conditions.
What do I do if mold grows on my seeds?
Mold = too much moisture or warmth. Act fast:
- Open the bag and air it out for 10–15 minutes daily.
- Discard any moldy seeds/towels and sterilize your bag with a 10% bleach solution (rinse well).
- Reduce humidity by folding the towel loosely or using a mesh bag instead.
If seeds are still viable, replant them in fresh, dry soil.
Can I reuse Ziploc bags for seed germination?
Yes! Clean them thoroughly between uses to avoid mold or bacteria:
- Wash with hot, soapy water and rinse.
- Sanitize with 1 part bleach to 9 parts water (rinse well).
- Avoid reusing bags if they’ve had mold—toss and replace.
Pro tip: Label bags with seed type and date to stay organized!
What’s a better alternative if my seeds aren’t germinating?
If Ziploc bags aren’t working, try these low-effort alternatives:
- Seedling trays with domes – Controlled humidity + drainage.
- Paper towel roll method – Fold a damp towel around seeds in a plastic wrap-sealed tube.
- Grow lights or sunny windowsill – Ensure 12–16 hours of light/day.
- Pre-soaking seeds – Boosts germination for stubborn seeds (e.g., chili peppers).
Still stuck? Check your seed viability—test with a water float test (sink = good; float = replace the seed!).
Wrapping up and next steps
Germinating seeds in a Ziploc bag is a game-changer—simple, mess-free, and packed with fast results! 🌱 Whether you're a seasoned gardener or just starting out, this method saves space, moisture, and time while keeping your seeds cozy and happy.
Now that you’ve mastered the technique, it’s time to watch those sprouts pop and grow into thriving plants!
Ready to take the next step? Try experimenting with different seeds or even stacking bags for larger batches. Happy growing—your future garden awaits! 🌿