
Propagation
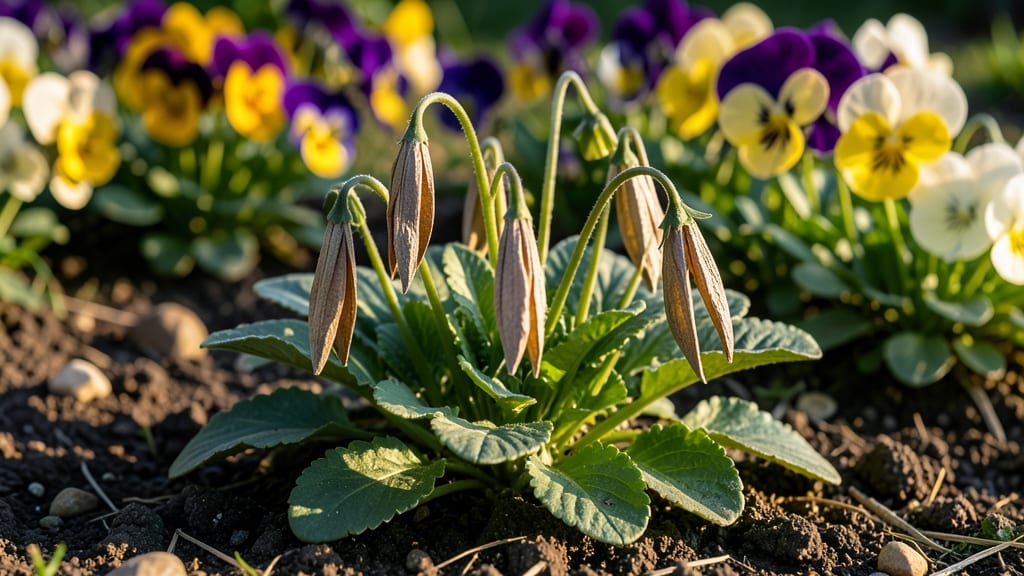
Harvesting viola seed pods means never buying seeds again—just let nature do the work. 🌿 The key is knowing when those pods are ready to pop open, because timing makes all the difference between viable seeds and dust.
I’ve collected hundreds of pods over the years, and I’ll share exactly how to tell when they’re perfect for harvesting, plus how to store them so they stay fresh for planting next spring.
Violas produce their seed pods in late summer or early fall, right after the flowers fade. Look for pods that are dry, papery, and starting to split open—this is your cue to collect them before the seeds scatter. A gentle shake test works too: if seeds rattle inside, they’re ready.
The best part? You can encourage even more pods by deadheading spent blooms early in the season, giving your plants more energy to focus on seed production.
Once you’ve gathered them, dry the pods completely in a cool, dark place for about 1-2 weeks before storing. Keep them in a sealed envelope or jar with a desiccant packet to prevent moisture buildup—this ensures they stay viable for 2-3 years.
The first time I tried this, I ended up with enough seeds to fill my entire garden, and the plants grew just as vibrantly as the originals.
Sowing viola seeds is simple: just scatter them lightly on top of well-draining soil and keep them moist. They germinate best in cool weather, so aim for early spring or late summer planting.
If you’re dealing with low germination rates, try a quick cold stratification trick—just pop the seeds in the fridge for 2-4 weeks before sowing. The secret to success? Patience and consistency, because violas grow slowly but reliably.
📚 In This Guide
- What you need
- Instructions
- Tips and common mistakes
- Wrapping up and next steps
What you need
- ● Mature viola seed pods: Collect fully ripe, dried pods (light brown or tan) from healthy Viola plants. Aim for 5–10 pods for a small batch.
- ● Pruning shears or scissors: Sharp, clean tools to snip pods from stems without damaging them.
- ● Paper bags or breathable containers: Use 2–3 small brown paper bags (or mesh bags) to store pods while they dry further (if not already fully mature).
- ● Flat, shallow tray or seed-starting tray: A 10"x20" tray with drainage holes works perfectly for sowing.
- ● Well-draining potting mix: A seed-starting mix (sterilized and lightweight) or a blend of 50% peat moss and 50% perlite.
- ● Spray bottle with water: For gentle hydration—avoid overwatering!
- ○ Plastic wrap or humidity dome: To create a mini greenhouse effect (optional but helpful for germination).
- ● Labeling tags and marker: Mark trays or pots to track varieties (e.g., Viola odorata vs. Viola tricolor).
- ● Grow lights or sunny windowsill: Viola seeds need bright, indirect light (6–8 hours/day) for best results.
- ○ Heat mat (optional): Keeps soil at 65–70°F to speed up germination (not required but handy in cool climates).
- ● Tweezers: For delicate seed pod opening or seed placement.
- ● Fertilizer (diluted): A balanced, water-soluble fertilizer (5-5-5) for seedlings after 3–4 weeks.
- ● Notebook or app: To log planting dates, pod sources, and germination progress.
Step-by-step guide to harvesting viola seed pods naturally
Here’s how to collect viola seeds without the frustrating twist-and-pull struggle.
🌱 Step 1: Identify Mature Viola Seed Pods
Viola seed pods ripen when they turn from green to a papery brown color—this usually happens 4-6 weeks after flowering. Look for pods that feel dry and brittle to the touch. If you press gently, they should crumble slightly. Avoid harvesting pods that are still green or plump, as the seeds won’t be fully mature.
I like to check pods in the morning after dew has dried, as they’re easier to handle. If you see the pod split open naturally, that’s your cue—those seeds are ready to collect now. Wait too long, though, and the seeds may scatter on their own, leaving you with nothing to save.
🌿 Step 2: Gently Remove Pods Without Damaging Them
Use clean, dry hands or small pruning shears to snip the entire pod from the stem, leaving a tiny bit of stem attached. Twisting can crush the delicate pods, which makes seeds harder to extract later. If you’re working with a large number of pods, wear gloves to keep your hands clean—viola seeds are tiny and can get everywhere.
Place the pods in a paper bag (not plastic) to allow airflow while they fully dry. I always label the bag with the viola variety and harvest date. This prevents mix-ups if you’re growing multiple types. Let the pods dry for 2-3 days in a warm, dry spot—this ensures the seeds release easily when you’re ready.
💧 Step 3: Extract Seeds Using the Natural Release Method
Once the pods are completely dry, hold one over a clean, flat surface like a sheet of paper or a small tray. Gently squeeze the pod between your fingers—you’ll feel it split open. Viola seeds are tiny and lightweight, so they’ll scatter naturally. If the pod resists, let it dry another day; forcing it can damage the seeds inside.
I’ve found that tapping the pod lightly against the tray helps release any stubborn seeds. After all the seeds have fallen, carefully transfer them to a labeled envelope or small jar. Store them in a cool, dry place until you’re ready to plant. Viola seeds stay viable for 2-3 years if kept dry.
✂️ Step 4: Store Seeds Properly for Future Planting
For long-term storage, place the seeds in an envelope or small container with a silica gel packet to absorb moisture. Viola seeds are sensitive to dampness, which can cause mold or rot. Label the container with the harvest date and variety—this helps track seed freshness, as older seeds may take longer to germinate.
If you’re planting right away, scatter the seeds on the soil surface (they need light to germinate) and lightly press them in. Viola seeds are tiny, so I use a fine mist spray bottle to keep the soil moist until germination, which usually happens in 2-4 weeks. Overwatering can wash them away, so keep the soil damp but not soggy.
Tips & tricks for perfect viola seed pod harvesting
Here's what nobody tells you about making viola seed collection effortless and foolproof.
Timing is Everything: The 4-6 week window after flowering is your sweet spot for harvesting. I learned this the hard way after trying to harvest too early—immature pods just won't release seeds properly. Check pods daily during this window, especially in the morning when dew has evaporated. This makes them easier to handle and gives you the best chance of finding perfectly mature pods ready to open naturally.
Gentle Handling Matters: Never twist pods off the stem! Twisting crushes the delicate seed chambers inside, making seed extraction nearly impossible. Instead, use clean pruning shears to snip the entire pod cleanly, leaving just a tiny bit of stem attached. This preserves the pod's integrity so seeds release naturally later. For large batches, wear gloves—they'll keep your hands clean and protect the tiny seeds from getting everywhere.
Drying Strategy: Those 2-3 days of drying in a warm, dry spot are non-negotiable. I've tried rushing it with heat lamps, but that actually makes the pods brittle and prone to cracking before they're ready. Place your paper bags in a spot with good airflow—like on a kitchen counter away from direct sunlight. The gentle drying process is what makes the seeds release cleanly when you're ready to harvest them.
Seed Viability Secret: Viola seeds stay viable for up to 2-3 years if stored properly, but freshness matters for germination speed. I always label my storage containers with both the harvest date and variety. This helps me track which seeds might need a little extra warmth to germinate if they're approaching that 2-3 year mark. The key is keeping them completely dry—any moisture can trigger mold or rot.
Pro Tips for Viola Seed Pods
- Here's what nobody tells you about making viola seed collection effortless and foolproof.
- Timing is Everything: The 4-6 week window after flowering is your sweet spot for harvesting. I learned this the hard ...
- Gentle Handling Matters: Never twist pods off the stem! Twisting crushes the delicate seed chambers inside, making se...
Frequently asked questions
Got questions about viola seed pods? You’re not alone!
Here are some of the most common queries—plus clear, no-fuss answers to help you master the natural seed-release process.
Why do viola seed pods twist open on their own?
Viola seed pods twist open thanks to a clever hygroscopic mechanism! As they dry, the pod’s two halves curl outward, flinging seeds up to 5 feet away—a survival trick to avoid competition with the parent plant. No intervention needed, but if you’re collecting seeds, act fast!
When is the best time to harvest viola seed pods?
Harvest pods when they’re brown and dry but before they’ve fully twisted open (usually late summer to early fall). If left too long, seeds scatter, and you’ll miss the harvest. A gentle shake test: if seeds rattle inside, they’re ready!
What can I do if my viola seed pods won’t open?
Dry pods need low humidity to trigger the twist. Try placing them in a paper bag with a silica gel packet or a fan on low for 1–2 days. Avoid heat—it can scorch the pods. Patience is key; some varieties are slower to release!
Can I save viola seeds from store-bought flowers?
Yes, but check the seed packet first—some hybrids (like Viola × wittrockiana) may not breed true. If it’s a named cultivar, seeds might grow into a mix of colors or traits. For consistent results, source seeds from specialty growers or fellow gardeners!
How should I store viola seeds until planting?
Keep seeds in a cool, dry place (like a sealed envelope in the fridge) for up to 2 years. Label them with the variety and date! Viola seeds don’t need stratification—just plant them in well-draining soil at the surface (they need light to germinate).
What if my viola plants don’t produce seed pods?
Pods skip a season if plants are overcrowded, underfed, or stressed (e.g., drought or pests). Try spacing plants 6–12 inches apart, fertilizing lightly with compost, and ensuring full sun to partial shade. Some violas (like Viola sororia) may need cross-pollination—plant a few together!
Wrapping up and next steps
From gentle coaxing to creative hacks, mastering the art of viola seed pod opening doesn’t have to be a struggle—it’s all about patience and the right techniques! 🌱 Whether you’re a seasoned gardener or just starting, these methods will help you unlock nature’s tiny treasures with ease.
Now that you’re armed with knowledge, why not give it a try? Grab your violas, pick your preferred method, and let the propagation adventure begin!
Ready to grow your own vibrant viola blooms? Start experimenting today! 🌸