
Lawn
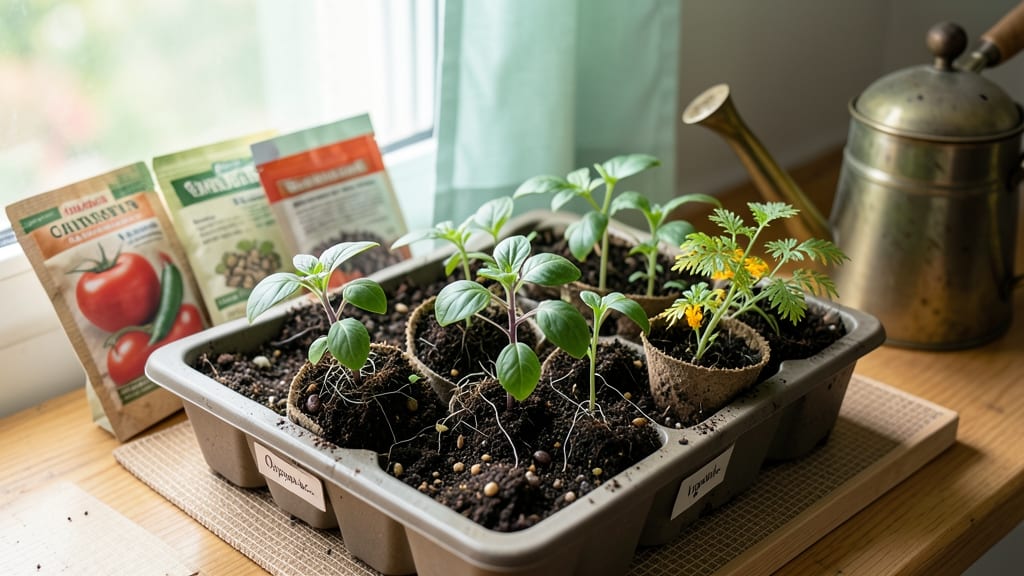
My organic seed starter mix saved my first batch of seedlings from the dreaded "damping off" fiasco—those sad, wilted seedlings that make gardeners want to quit. 🌱 The right mix isn’t just dirt; it’s a lightweight loam that holds moisture without suffocating roots, feeds tiny sprouts, and fights off fungus before it starts.
The magic happens with three simple ingredients: peat moss or coco coir for moisture, compost for nutrients, and perlite or vermiculite to keep things airy.
I’ve tried pre-mixed bags, but custom blends cut costs and let you adjust for your climate—drier mixes for hot houses, extra compost for heavy feeders like tomatoes. You’ll see germination in 3-7 days (instead of 10-14) and seedlings that stand tall instead of flopping.
The mix works for everything from delicate herbs to hearty beans, and you can reuse it for cuttings later in the season. Here’s the game-changer: sterilize your mix by baking it for 30 minutes at 200°F to kill pathogens. Trust me, that one step prevents more heartbreak than anything else.
Let’s get those seeds sprouting!
📚 In This Guide
- What you need
- Instructions
- Tips and common mistakes
- Wrapping up and next steps
What you need
- ● Peat moss or coco coir: 4 parts (holds moisture, provides aeration)
- ● Perlite or vermiculite: 1 part (boosts drainage and air circulation)
- ● Compost or well-aged organic matter: 2 parts (adds nutrients and microbial life)
- ○ Worm castings (optional but recommended): ½ cup (packed with beneficial microbes)
- ○ Mycorrhizal fungi (optional): 1 tsp (enhances root development)
- ● Large mixing container or wheelbarrow (for blending ingredients)
- ● Garden trowel or shovel (for scooping and mixing)
- ○ Fine-mesh sifter (optional, for fluffier texture)
- ● Spray bottle (to lightly moisten the mix before use)
- ● Gloves (to keep hands clean and comfortable)
- ● Biochar: ½ cup (improves water retention and soil structure)
- ● Seaweed extract or kelp meal: 1 tbsp (adds trace minerals)
- ● Chicken manure (composted): ½ cup (extra nitrogen for fast growth)
- ● Seedling trays or biodegradable pots: (for transplanting starts)
How to make an organic seed starter mix for fast germination
This lightweight blend gives seedlings the perfect head start—no store-bought substitutes needed.
🌱 Step 1: Combine Base Materials for Airy Texture
Start with 50% coco coir—this organic fiber holds moisture without compacting. I measure 2 cups into a clean wheelbarrow or large mixing bin. The coir should look fluffy but not dusty; if it's clumped, break it apart with your hands before adding anything else.
Next, add 30% perlite—1.5 cups total. This volcanic mineral creates those crucial air pockets seedlings need. Sift it lightly over the coir to distribute evenly. Avoid inhaling the dust; I work outside or wear a mask when handling perlite for the first time.
🌿 Step 2: Add Nutrients and Microbial Boosters
Stir in 10% worm castings—that's 1 cup of those crumbly black bits. This isn't just fertilizer; it's a microbial powerhouse that jumpstarts root growth. I sift it through a fine mesh screen first to remove any large chunks that could harbor fungus gnats later.
For the remaining 10%, use ½ cup compost—I prefer finished compost from my own bin, but well-aged store-bought works too. This adds trace nutrients and improves water retention. Mix everything together with a garden fork until it looks uniformly dark and crumbly.
⏰ Step 3: Test and Adjust Moisture Levels
Squeeze a handful of the mix—it should hold together when pressed but not drip water. If it feels dry, sprinkle warm tap water gradually while stirring until it reaches that perfect damp-sponge consistency. Too much water creates a muddy mess that suffocates seeds.
For a final check, fill a small container with the mix and press down gently. If water pools on top after 10 minutes, you've overdone it. The surface should look slightly damp but not glistening. This moisture balance is what gives those fast germination results you're after.
💧 Step 4: Sterilize and Store for Ready Use
Spread the mix on a baking sheet and pop it in the oven at 200°F for 30 minutes. This kills any dormant pathogens without cooking the organic matter. Let it cool completely before using—hot mix can scald tender seed coats and delay germination.
Store the finished mix in a sealed container for up to 3 months. I keep mine in a plastic bin with a tight lid in my garage. When ready to use, simply scoop portions into seed trays and you're set for planting. The lightweight texture prevents damping-off while the nutrient boost ensures those first leaves appear in record time.
Tips & tricks for perfect organic seed starter mix
Here's what nobody tells you about crafting this seedling supercharger—details that make all the difference between mediocre starts and thriving seedlings.
Ingredient Selection: For the coco coir in Step 1, choose a brand labeled "seedling mix" rather than general-purpose coir. These blends are pre-washed and free of salt residues that can inhibit germination. I've ruined batches using regular coir that needed rinsing—always check the label for "organic" and "seedling-specific" designations. The perlite should be fine-grade (1-2mm particles) to maximize air pockets without creating gaps where seeds might get lost.
Microbial Boost: When sifting worm castings in Step 2, don't overdo it with the screen—you want to remove large chunks but preserve some texture. The microbial colonies thrive in slightly irregular surfaces. I've found that adding a pinch of powdered mycorrhizal fungi (optional) to the worm castings creates an even stronger symbiotic relationship with seed roots, though this is purely for advanced gardeners. The compost should be fully decomposed—if it still has recognizable plant bits, compost it longer.
Sterilization Secret: That 200°F for 30 minutes in Step 4 isn't just about killing pathogens—it's also about activating the coco coir's moisture-holding capacity. After sterilization, let the mix cool completely before storing, but don't rush it. I place my baking sheet on a wire rack to allow air circulation, which prevents condensation that could create anaerobic pockets. The mix should be just warm to the touch before sealing—any hotter and you risk killing those beneficial microbes we just added.
Storage Wisdom: For the 3-month shelf life mentioned in Step 4, I divide the mix into smaller containers (about 2 cups each) before sealing. This way, you're not opening one large container repeatedly, which introduces moisture and contaminants. Store containers in a cool, dark place—garages with temperature swings can actually shorten shelf life. If you notice mold after opening, discard immediately; it's better to remake a small batch than risk damping-off in your seedlings.
Pro Tips for Organic Seed Starter Mix
- Here's what nobody tells you about crafting this seedling supercharger—details that make all the difference between m...
- Ingredient Selection: For the coco coir in Step 1, choose a brand labeled "seedling mix" rather than general-purpose ...
- Microbial Boost: When sifting worm castings in Step 2, don't overdo it with the screen—you want to remove large chunk...
Frequently asked questions
Got questions about your organic seed starter mix?
Here are some of the most common ones—and their answers—to help you get growing with confidence!
What’s the best time to use organic seed starter mix?
Use your starter mix indoors, 4–8 weeks before the last frost for cool-season crops (like lettuce or spinach) or 6–8 weeks before transplanting for warm-season plants (tomatoes, peppers). This gives seedlings enough time to develop strong roots before moving outside. Pro tip: Check your local frost dates to adjust timing!
How long does it take for seeds to germinate in this mix?
Germination time varies by seed type, but most organic starter mixes deliver faster results (often 5–14 days) thanks to balanced moisture, aeration, and nutrients. Fastest germinators? Radishes (3–5 days) and beans (5–10 days). Slowpokes like parsley may take 2–3 weeks. Keep the mix consistently moist (not soggy) to speed things up!
Can I make my own organic seed starter mix instead of buying it?
A simple DIY blend uses 50% peat moss or coco coir, 30% perlite or vermiculite, and 20% compost or worm castings. Sterilize ingredients first (bake soil at 200°F for 30 mins) to kill pathogens. For extra nutrients, add a pinch of kelp meal or alfalfa powder. Store in a sealed container until use.
What do I do if my seed starter mix smells bad or molds?
Bad smells or mold mean too much moisture or poor drainage. Act fast: Stop watering immediately and move trays to a bright, dry spot with good airflow (a fan helps!). If mold appears, sprinkle a thin layer of food-grade diatomaceous earth or re-pot affected seedlings into fresh mix. Prevent future issues by watering only when the top inch feels dry.
How do I transition seedlings from starter mix to garden soil?
Hardening off seedlings 7–10 days before transplanting is key! Gradually expose them to outdoor conditions (start with 1–2 hours of shade, then increase daily). A week out, bury stems slightly deeper than in the tray to encourage root growth. Water thoroughly after planting, and avoid fertilizing for 2 weeks to prevent shock. Bonus: Transplant on a cloudy day to reduce stress!
Wrapping up and next steps
Creating your own organic seed starter mix is a rewarding way to give your plants the best possible start—lightweight, nutrient-rich, and free from harsh chemicals! 🌱 With just a few simple ingredients, you can craft a loamy blend that promotes fast germination and strong root development, setting your seedlings up for success.
Whether you're a seasoned gardener or just beginning, this DIY approach empowers you to grow healthier, more resilient plants.
Ready to take the next step? Grab your materials, follow the mix, and watch your garden thrive! Happy planting! 🌿