
Lawn
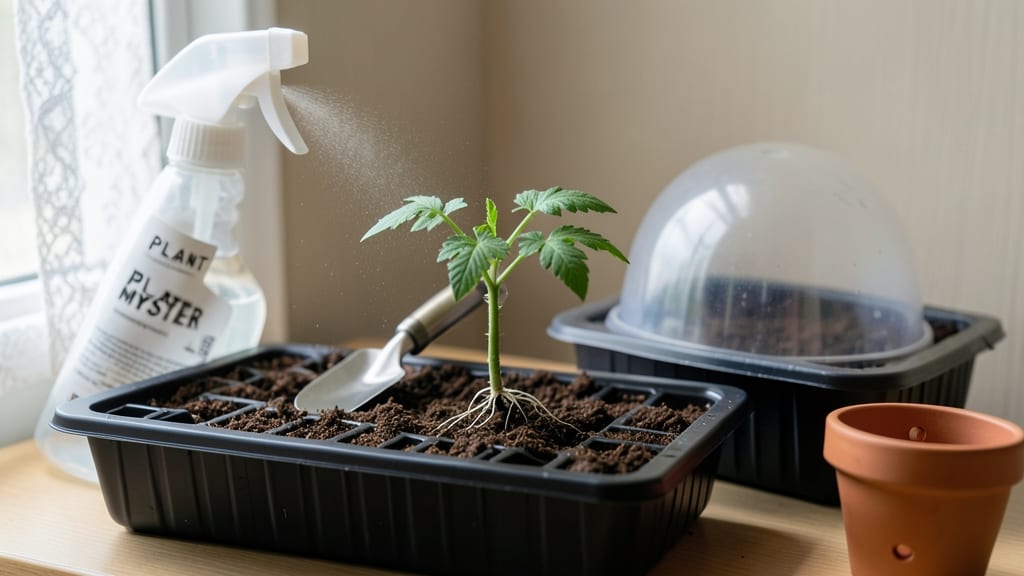
Getting seeds to sprout feels like unlocking a tiny green miracle—moisture, warmth, and patience are the magic trio that turns dry seeds into hungry sprouts. 🌱 I’ve watched my own seeds sit stubbornly dry for weeks before realizing the simplest fix: consistent dampness without soggy soil.
The difference between a blank tray and a forest of seedlings comes down to these three factors, and I’m sharing exactly how to nail them.
You’ll need a warm spot (70–85°F works for most seeds), a fine seed-starting mix that drains well, and a spray bottle or misting system to keep things damp—not wet. Some seeds, like snapdragons, need light to germinate, while others, like tomatoes, prefer darkness until they break soil.
The key is matching your seed’s needs to your setup—no guesswork, just science.
Within 7–14 days, you’ll see those first green hooks poking through, and the moment you spot them, the real work begins. The seedlings will need gentle light, careful watering, and protection from drafts. But that first sprout? That’s the payoff for getting moisture, warmth, and timing just right.
Whether you’re starting tomatoes on a sunny windowsill or herbs under grow lights, these basics apply. The only mistake is giving up too soon—seeds know when to wake up, and your job is to give them the perfect stage to perform.
📚 In This Guide
- What you need
- Instructions
- Tips and common mistakes
- Wrapping up and next steps
What you need
- ● Seeds: Choose fresh, high-quality seeds (check the packet for viability dates). Quantity: Adjust based on your project (e.g., 10–50 seeds for testing, 100+ for a lawn).
- ● Growing Medium: Potting soil: Lightweight, seed-starting mix (sterilized, peat-free if preferred). Quantity: Enough to fill your container 2–3 inches deep.
- ○ Vermiculite or coconut coir: Optional for moisture retention (mix 1:1 with soil for delicate seeds).
- ● Containers: Seed trays or pots: With drainage holes (3–4 inches deep). Size: 1–2 seeds per cell (or 1–2 inches apart in pots).
- ● Plastic wrap or humidity dome: To retain moisture (clear plastic works in a pinch!).
- ● Water: Room-temperature, dechlorinated water (let tap water sit out for 24 hours or use filtered water).
- ○ Heat source (optional but helpful): Seedling heat mat (70–85°F range).
- ● Warm spot (e.g., on top of the fridge or near a sunny window).
- ● Spray bottle: For gentle watering (avoids disturbing seeds).
- ● Tweezers or pencil: To plant tiny seeds precisely.
- ○ Grow lights (optional): LED or fluorescent (12–16 hours/day) if natural light is weak.
- ● Label markers: To track seed types and planting dates.
- ○ Fertilizer (optional): Water-soluble, low-nitrogen starter fertilizer (dilute to half-strength).
Step-by-step instructions for germinating seeds successfully
Here's how I turn stubborn seeds into sprouts—every time—using just a few key tricks.
🌱 Step 1: Soak Seeds Overnight for Faster Germination
Start by placing seeds in a clean container and covering them with lukewarm water for 12 hours. This softens the outer seed coat, which can slow down germination. I use a small glass or bowl and leave it on my counter overnight—just make sure the water stays room temperature, not hot. You'll see seeds plump up and double in size by morning.
For seeds with especially tough coats (like beans or peas), you can gently rub them between two sheets of sandpaper to scratch the surface—this mimics natural weathering and helps them absorb moisture faster. But only do this if the seeds feel completely dry before soaking. If they're already damp, skip this step to avoid overhydrating.
💧 Step 2: Prepare Your Germination Setup
Line a shallow tray or container with a damp paper towel—it should be moist but not dripping. I fold the towel into a thick layer (about 4 layers) to hold moisture while still allowing airflow. Place the soaked seeds about 1 inch apart on the towel, spacing them so they won’t crowd as they grow.
Cover the tray with another paper towel or a clear plastic lid to trap humidity. This creates a mini greenhouse effect that keeps the seeds warm and moist, which is critical for fast germination. Place the setup in a warm spot—ideally between 70-80°F. A sunny windowsill, on top of the fridge, or near a heat vent works well. Avoid direct sunlight at this stage, though.
☀️ Step 3: Monitor Moisture and Warmth Daily
Check the paper towels every 24 hours—they should stay damp but never soggy. If they feel dry to the touch, mist them lightly with water and cover again. Overwatering here is just as bad as underwatering; you want the seeds to breathe but stay hydrated. You’ll know it’s right when the towel looks slightly damp but not wet.
Watch for the first signs of life in 3-7 days, depending on the seed type. Fast germinators like radishes or beans often sprout within 3-4 days, while slower ones like tomatoes or peppers may take up to a week. The moment you see a tiny white root or a green shoot, remove the cover immediately—too much humidity now can cause mold or rot.
⏰ Step 4: Transplant Sprouts to Soil
Once sprouts have ½ inch of growth and show their first true leaves (not just the initial seed leaves), it’s time to move them to soil. Fill small pots with your chosen seed-starting mix and make a tiny hole with your finger—just deep enough to hold the sprout without burying it too deep. Gently place the sprout in the hole, root side down, and cover lightly with soil.
Water the soil gently until it’s moist but not saturated. Place the pots in a warm, bright spot (but avoid direct sun for the first 24 hours to reduce shock). You’ll see new leaves emerge within a week—that’s your signal everything is working. If a sprout looks leggy or weak, it might need more light or warmth, but don’t worry—most seeds bounce back with a little adjustment.
Tips & tricks for perfect seed germination
A few simple adjustments can transform your seed-starting success rate from hit-or-miss to consistently thriving sprouts.
The Soaking Secret: That 12-hour soak is non-negotiable for most seeds, but here's the thing—if your seeds feel damp before soaking, skip the water entirely. The goal is hydration, not drowning. For seeds like lentils or chickpeas, a quick 6-hour soak works just as well, though you'll need to monitor them more closely during germination.
Towel Technique: When folding those 4 layers of paper towel, make the center layer slightly thicker—this creates the perfect moisture reservoir. I like to fold the edges inward to create a little well for each seed, which prevents them from sliding around as they grow. This small detail keeps them stable during the critical first days.
Temperature Matters: That 70-80°F range is ideal, but don't stress if your home runs cooler. Place your setup on top of the fridge or near a heat vent—just avoid direct appliance heat which can create hot spots. For cooler climates, consider a simple seedling heat mat ($10 at garden centers) to maintain consistent warmth without extra effort.
Transplant Timing: The ½-inch growth mark is your cue, but here's what nobody tells you—wait until you see the first true leaves (not the initial seed leaves) before transplanting. This ensures your little plants have enough energy stored to handle the soil transition. I've learned this the hard way after losing delicate sprouts that weren't quite ready.
Pro Tips for Get A Seed To Sprout
- A few simple adjustments can transform your seed-starting success rate from hit-or-miss to consistently thriving spro...
- The Soaking Secret: That 12-hour soak is non-negotiable for most seeds, but here's the thing—if your seeds feel damp ...
- Towel Technique: When folding those 4 layers of paper towel, make the center layer slightly thicker—this creates the ...
Frequently asked questions
Got questions about getting your seeds to sprout? You’re not alone! Here are some of the most common concerns—and their straightforward answers—to help you grow with confidence.
How long does it take for a seed to sprout?
Germination time varies by seed type. Fast growers like radishes or lettuce may sprout in 3–7 days, while slower seeds (e.g., beans or tomatoes) can take 1–3 weeks. Check your seed packet for specifics, and remember: warmth, moisture, and light (or lack of it) all play a role. Patience is key!
What if my seed won’t sprout? What’s the problem?
If seeds refuse to sprout, check these culprits first:
Too dry? Keep soil consistently moist (not soggy). Mist lightly daily if needed.
Not warm enough? Use a heat mat or place trays near a sunny window (65–75°F is ideal for most seeds).
Old seeds? Test viability by soaking a few in water—if they sink, they’re likely still good.
Buried too deep? Tiny seeds need only ¼ inch of coverage; larger seeds (like beans) can go 1–2 inches deep.
If all else fails, try scarification (lightly sanding hard seed coats) or soaking overnight.Do I need to use special soil to help seeds sprout?
Not necessarily! A light, well-draining potting mix (like seed-starting blend) works best, but you can also use a mix of peat moss, perlite, and compost. Avoid garden soil—it’s often too dense and may harbor pests. Pro tip: Sterilize your mix with a 10-minute bake at 200°F to kill fungi or bacteria.
Can I use paper towels or a damp cloth to sprout seeds?
This method is great for fast germination (like herbs or microgreens). Place seeds between damp paper towels in a sealed bag or container, then store in a warm spot. Check daily—once sprouts appear (usually 3–5 days), transfer them to soil gently to avoid damaging roots.
Should I put seeds in light or darkness to sprout?
It depends! Most vegetable seeds (tomatoes, peppers, etc.) need light once they sprout, but darkness helps them break through soil. Herb and flower seeds (like basil or marigolds) often prefer light from day one. For tricky seeds, check the packet—or experiment! Cover trays with a lid until sprouts emerge, then remove.
Wrapping up and next steps
Getting a seed to sprout is all about giving it the right conditions—moisture, warmth, and patience—while avoiding common pitfalls like overwatering or poor soil.
With the right setup, you’ll see those first tiny shoots in no time, and soon you’ll be nurturing a thriving lawn or garden. Now that you’re ready to start, why not try your hand at a small batch of seeds first? Once you’ve mastered the basics, you can scale up and enjoy the rewarding journey of watching life grow from something so small!