
Propagation
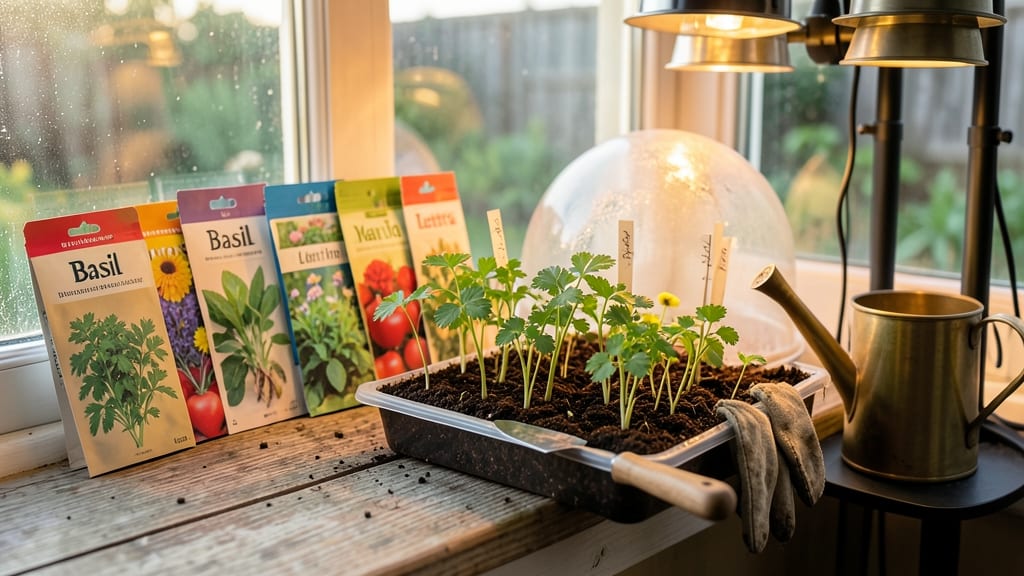
Growing from seed tips start with the right soil and patience—my first batch of seedlings nearly gave up on me until I learned these simple tricks. 🌱 The key isn't fancy equipment but matching seeds to their ideal conditions: moisture, warmth, and just enough light to coax them awake.
I've since grown everything from delicate herbs to hardy tomatoes using the same foolproof method, and you can too.
You only need three things to begin: quality seed-starting mix, containers with drainage, and a warm spot (like a sunny windowsill or grow light). No need for expensive setups—even a repurposed egg carton works.
The real secret is consistency: keep soil damp but not soggy, and avoid moving containers once they sprout. Most seeds germinate within 7-14 days when conditions are right.
What you'll end up with is a tray of sturdy seedlings ready for transplanting, their first true leaves signaling success. The satisfaction of watching tiny sprouts turn into thriving plants is unmatched—especially when you avoid common pitfalls like overwatering or burying seeds too deep.
With these tips, you'll skip the frustration and focus on the rewarding part: watching your garden grow.
Works for any seed type, from fast-sprouting radishes to slow-starting peppers. Whether you're a beginner or a seasoned gardener, these methods simplify the process without sacrificing results. Let's get those seeds sprouting!
📚 In This Guide
- What you need
- Instructions
- Tips and common mistakes
- Wrapping up and next steps
What you need
- ● Seeds: Choose high-quality, fresh seeds (check the packet for germination rates—aim for 80%+). Quantity depends on your project, but start with 10–20 seeds per variety for testing.
- ● Seed-starting mix: A lightweight, sterile blend (e.g., 50% peat moss, 30% perlite, 20% vermiculite). Avoid garden soil—it’s too dense! Use 1–2 cups per seed tray or fill pots to ¾ capacity.
- ● Containers: Seed trays (with drainage holes) or small pots (2–4 inches deep)—1 container per seed or 1 seed per cell in trays.
- ● Clear plastic domes or plastic wrap (to retain humidity).
- ● Watering can or spray bottle (with a fine mist nozzle to avoid displacing seeds).
- ● Grow lights or sunny windowsill: A full-spectrum LED grow light (12–16 hours/day) or a south-facing window (6+ hours of sunlight).
- ○ Heat mat (optional but helpful): For seeds needing warmth (e.g., peppers, tomatoes), use a seedling heat mat (70–85°F).
- ● Seedling labels: Toothpicks + masking tape or plant markers (write seed names and dates!).
- ● Fertilizer: A balanced, water-soluble fertilizer (e.g., 5-5-5 or 10-10-10)—dilute to ½ strength once true leaves appear.
- ● Humidity tray: A shallow tray filled with pebbles + water (place containers on top to boost moisture).
- ● Fungicide: A natural option like hydrogen peroxide (3%) (1 part H₂O₂ to 10 parts water) to prevent damping-off.
- ● Transplanting tools: Small hand trowel or butter knife for delicate seedlings.
Step-by-Step instructions for stress-free seed germination
Here’s how I ensure every seed I plant sprouts reliably—no matter the variety or climate.
🌱 Step 1: Prep Seeds and Containers for Success
Start by selecting a clean container with drainage holes—plastic cell packs or small pots work perfectly. I always sterilize them with a 10% bleach solution (1 part bleach to 9 parts water) for 10 minutes, then rinse thoroughly. This prevents damping-off disease that can kill seedlings before they even emerge.
Fill containers with a sterile seed-starting mix, not garden soil. The mix should be light and fluffy—think of it as the perfect bed for tiny roots to explore. Moisten it until it feels like a wrung-out sponge: damp but not soggy. Press down gently to remove air pockets, then level the surface with your fingers.
💧 Step 2: Sow Seeds at the Right Depth and Moisture Level
Check the seed packet for depth guidelines, but a general rule is to plant seeds no deeper than twice their diameter. Tiny seeds like lettuce go in just barely covered, while larger ones like beans need a ½-inch burial. I use a toothpick to make small holes—it’s precise and avoids crushing seeds.
After planting, water gently with a spray bottle until the soil looks uniformly damp. Avoid overwatering; you’ll know it’s right when the surface looks slightly darker but not glistening. Cover the container with plastic wrap or a humidity dome to trap warmth and moisture—this mimics the cozy conditions seeds need to break through soil.
☀️ Step 3: Provide Ideal Warmth and Light for Germination
Most seeds germinate best at 70-75°F, so place your container on a seedling heat mat if your home runs cooler. Without one, I’ve found that setting the tray on top of the fridge (where it’s naturally warmer) works surprisingly well. Keep the soil consistently moist but never waterlogged—check daily and mist lightly if the surface feels dry.
Once sprouts appear, remove the cover immediately to prevent fungal growth. Place seedlings under grow lights (12-16 hours daily) or in the brightest window you have. Watch for leggy growth—a sign they’re stretching for light—and adjust the light source within 2-4 inches of the tops. Strong seedlings will have thick stems and dark green leaves.
✂️ Step 4: Thin and Care for Seedlings Like Pros
When seedlings have 2-3 true leaves (not the first tiny seed leaves), thin to the strongest plant per cell. Use scissors to snip weak ones at soil level—pulling risks disturbing roots. Leave enough space so remaining plants have 1-2 inches between them; crowded seedlings compete for nutrients and light.
Water from the bottom now to encourage deep root growth. Let the top inch of soil dry between waterings—overwatering at this stage is the fastest way to lose seedlings. Fertilize lightly with a half-strength liquid fertilizer when you see 4-5 true leaves to avoid burning tender roots.
🌿 Step 5: Harden Off Before Transplanting
Two weeks before your last frost date, start hardening off seedlings by moving them outside for 1-2 hours the first day. Choose a shaded, sheltered spot to avoid stress. Gradually increase their outdoor time by 1 hour daily, introducing them to morning sun first—this prevents sunburn on tender leaves.
By the end of the week, they should tolerate a full day outside. You’ll know they’re ready when they look perky and vibrant, not wilted. Transplant on an overcast afternoon to reduce shock, and water deeply at the base to help roots establish quickly in their new home.
Tips & tricks for perfect seed germination
These are the hard-won lessons that turned my seedling failures into reliable, thriving starts—no matter what you're growing.
Sterilization Secret: That 10-minute bleach soak in Step 1 isn't just about clean containers—it's your first line of defense against damping-off, that sneaky fungal disease that turns seedlings to mush overnight. I've lost entire trays because I skipped this step when I was impatient. Pro tip: After rinsing, let containers air-dry completely before adding soil—moisture trapped in damp containers creates the perfect breeding ground for mold.
The Depth Difference: Planting seeds at the correct depth (no deeper than twice their diameter) is non-negotiable for germination success. For tiny seeds like lettuce, think "barely covered"—just enough soil to hold them in place. I learned this the hard way with a batch of chives that refused to sprout because they were buried too deeply. Use a toothpick to make precise holes—it's more accurate than your finger, especially for small seeds.
Lighting Logic: Those 12-16 hours of grow light in Step 3 aren't just about duration—they're about intensity. Place lights within 2-4 inches of seedlings to prevent leggy growth, where plants stretch toward light but never get strong. I've seen seedlings grow 6 inches tall in a week when they were too far from lights! If you don't have grow lights, rotate your containers daily so all sides get equal exposure to your brightest window.
Harden Off Gradually: The 1-2 hour outdoor introduction in Step 5 might seem short, but it's crucial for acclimating seedlings. I used to rush this process and ended up with wilted, sunburned plants. Start with morning sun only—afternoon heat can be too intense. Watch for subtle signs of stress like curled leaves or yellowing, which mean they're not ready for more time outside yet.
Pro Tips for Growing From Seed Tips
- These are the hard-won lessons that turned my seedling failures into reliable, thriving starts—no matter what you're ...
- Sterilization Secret: That 10-minute bleach soak in Step 1 isn't just about clean containers—it's your first line of ...
- The Depth Difference: Planting seeds at the correct depth (no deeper than twice their diameter) is non-negotiable for...
Frequently asked questions
Got questions about growing from seed? You’re not alone—every gardener starts somewhere! Here are answers to the most common queries to help you avoid pitfalls and grow with confidence.
How long does it take for seeds to germinate?
Germination time varies by plant type. Fast growers like radishes or basil sprout in 3–7 days, while slowpokes (e.g., tomatoes or peppers) may take 1–3 weeks. Check the seed packet for specifics—patience is key!
What’s the best way to keep seeds moist without drowning them?
Use a spray bottle for gentle watering, or place trays on a damp paper towel to maintain humidity. Avoid soggy soil—overwatering suffocates seeds. A clear lid or plastic wrap (removed once sprouts appear) traps moisture without excess. Pro tip: Bottom-watering (adding water to the tray) keeps soil evenly damp.
Can I use regular potting soil for seeds?
Not always! Seed-starting mix is lighter and sterile, preventing mold. If you’re using potting soil, amend it with perlite or vermiculite for better drainage. Skip garden soil—it’s too dense and may harbor diseases. For small seeds (like lettuce), a 50/50 mix of soil and coconut coir works well.
What if my seeds won’t germinate—what’s the fix?
First, check if they’re still viable (test with a damp paper towel—if no sprouts in 24 hours, they’re likely dead). Try these fixes:
- Heat: Move trays to a warmer spot (70–85°F is ideal for most seeds).
- Light: Some seeds (like parsley) need darkness to germinate—cover them until they sprout.
- Scarification: For tough seed coats (e.g., beans), lightly sandpaper or soak in warm water overnight.
Can I grow seeds indoors without a grow light?
Yes, but results may vary. Place seedlings near a south-facing window for 6–8 hours of sunlight daily. If growth looks leggy (stretched and weak), supplement with a budding LED bulb or a cheap fluorescent light 2–3 inches above plants for 12–14 hours/day. Rotate trays daily for even growth.
Wrapping up and next steps
Growing from seed is a rewarding journey that connects you to nature—and with the right growing from seed tips, you’ll see those first sprouts like magic! 🌱 Whether you’re a beginner or a seasoned gardener, patience, consistency, and a little creativity are your best tools.
Now that you’re armed with stress-free germination secrets, it’s time to roll up your sleeves and start planting.
Your next logical step? Pick a seed to try this week! Start small with easy-to-grow varieties like basil, marigolds, or snap peas. Track your progress, adjust as needed, and soon you’ll be sharing your green-thumb success with friends—or even expanding to a full garden. Happy growing!